

Introduction
Hershey Kiss Cookies hold a special place in the hearts and homes of many, celebrated for their delightful combination of soft, chewy cookie dough topped with a sweet and velvety Hershey’s Kiss. This iconic treat has roots in American baking, often associated with holiday gatherings, bake sales, and family dinners. Their popularity comes not only from their inviting aesthetic but also from their irresistible blend of textures and flavors.
As you take a bite into one of these cookies, you’re greeted with the soft, buttery dough enriched with a hint of vanilla, perfectly complementing the rich chocolate center. The result is a delectable treat that appeals to cookie lovers of all ages, making them an ideal choice for any occasion—be it a birthday party, a festive holiday gathering, or simply a sweet snack during the week.
These cookies are not just a fun treat; they also offer an enjoyable baking experience. The process of rolling the dough balls in powdered sugar before baking creates a beautiful snowy exterior, enhancing both the cookies’ flavor and appearance. So gather your family and friends, and dive into the joy of making these sweet classics!
Recipe Overview
– Total Time: 30 minutes
– Prep Time: 15 minutes
– Yield: 36 cookies
– Difficulty: Not specified in the recipe
Hershey Kiss Cookies are a delightful dessert, showcasing a perfect balance of flavors and textures. The sweetness from the dough and the chocolate kiss creates an irresistible combination that makes every bite memorable. With simple ingredients and easy instructions, these cookies are perfect for bakers of all skill levels, making them a go-to recipe for various occasions.
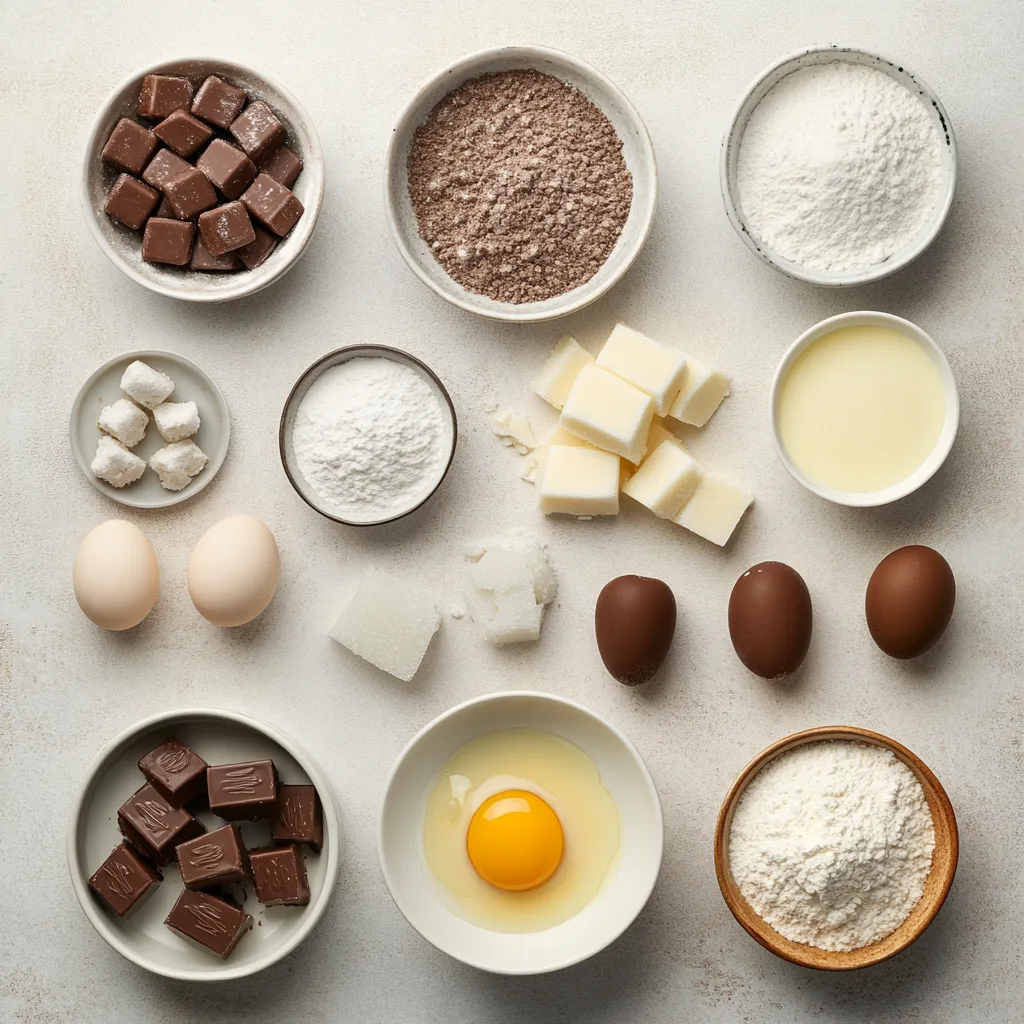
Ingredients
– 1 cup unsalted butter, softened to room temperature
– 1 cup granulated sugar
– 1 cup packed brown sugar
– 2 large eggs
– 2 teaspoons pure vanilla extract
– 3 cups all-purpose flour
– 1 teaspoon baking soda
– 1/2 teaspoon fine sea salt
– 1 cup powdered sugar (for rolling)
– 36 unwrapped Hershey’s Kisses
Instructions
1. Begin by preheating your oven to 350°F (175°C). Line two baking sheets with parchment paper to prevent sticking.
2. In a large mixing bowl, combine the softened butter, granulated sugar, and brown sugar. Beat them together using an electric mixer on medium speed until the mixture is light and fluffy, about 3-4 minutes.
3. Add the eggs to the mixture one at a time, ensuring each egg is fully incorporated before adding the next. Stir in the pure vanilla extract until well combined.
4. In a separate bowl, whisk together the all-purpose flour, baking soda, and fine sea salt until evenly mixed.
5. Gradually incorporate the dry ingredients into the wet mixture, mixing on low speed until just combined. Be careful not to overmix; you want the dough to be soft but not sticky.
6. Using your hands, roll the dough into 1-inch balls. Then, roll each ball in powdered sugar until thoroughly coated, giving them a sweet finish.
7. Arrange the powdered sugar-coated dough balls on the prepared baking sheets, leaving about 2 inches of space between each ball to allow for spreading during baking.
8. Bake in the preheated oven for 10-12 minutes, or until the edges of the cookies are lightly golden brown.
9. As soon as you remove the cookies from the oven, gently press a Hershey Kiss into the center of each cookie. Allow the cookies to cool on the baking sheet for 5 minutes before transferring them to a wire rack to cool completely.
Equipment Needed
When preparing to make Hershey Kiss Cookies, having the right equipment on hand can significantly ease the baking process. Begin with a set of mixing bowls—the larger, the better, for mixing both wet and dry ingredients. An electric mixer is essential for achieving the desired creamy texture of the butter and sugars, providing an easy way to combine ingredients thoroughly without much effort.
Baking sheets play a crucial role in ensuring equal heat distribution and even cooking; choose standard sizes that fit your oven properly. Lining these sheets with parchment paper is also recommended to prevent sticking and ensure an easy cleanup. Measuring cups and spoons are vital for accuracy in baking, ensuring each ingredient is used in the right proportion, which is especially important in recipes like this one where balance is key.
Preparation Steps Before Baking
To create the perfect batch of Hershey Kiss Cookies, proper preparation is fundamental. Start by preheating your oven to 350°F (175°C). This step is critical as it creates the ideal baking environment, ensuring your cookies bake evenly.
While waiting for the oven to heat up, prepare your baking sheets by lining them with parchment paper. This not only helps prevent the cookies from sticking but also facilitates easier transfer from the oven to a cooling rack later on. Taking the time to prepare effectively can enhance your baking experience, leading to beautifully baked cookies that are sure to impress.
By meticulously following these preparatory steps, you establish a smooth workflow that can make the baking process enjoyable and efficient. Stay tuned for further details, techniques, and tips to ensure your Hershey Kiss Cookies are a hit!
Mixing the Dough
Combining butter and sugars: Techniques for achieving a light and fluffy texture
When mixing butter and sugars, it is crucial to use softened, room-temperature butter. Cold butter will not blend well, resulting in a denser dough. Start by beating the butter alone for about 30 seconds to ensure it’s smooth before gradually adding the granulated and brown sugars. The sugars help to aerate the butter; beat the mixture on medium speed for about 3-4 minutes, stopping occasionally to scrape down the sides of the bowl. You should notice a transformation – the mixture should be light in color and fluffy in texture, which creates air pockets that help the cookies maintain a desirable softness when baked.
Introducing eggs: Importance of one-at-a-time addition
Incorporating eggs into your dough is critical for achieving a good structure, and adding them one at a time is essential. This gradual addition allows each egg to fully incorporate before the next is added, ensuring even mixing and proper emulsification. This method aids in creating a consistent texture throughout your cookie dough, as it allows the fats to bind effectively with the liquid from the eggs. Mixing too quickly or adding the eggs all at once can lead to uneven mixing, resulting in an inconsistent cookie texture.
Incorporating vanilla: Ensuring even flavor distribution
Vanilla extract is a key flavor component of these cookies. To ensure its distribution throughout the dough, mix it into the egg and sugar mixture before combining with the dry ingredients. This technique allows the vanilla to be evenly dispersed, enhancing the overall taste of the cookies. Opt for pure vanilla extract for richer flavor; imitation vanilla can yield a more artificial taste.
Mixing dry ingredients separately: Explanation of why this step is crucial
Whisking together your dry ingredients separately is a step that should not be overlooked. This process serves two main purposes: it helps to evenly distribute the leavening agent (baking soda) and prevents clumping of the flour and salt. Combining the dry ingredients before adding them to the wet mixture also ensures that the dough has the right balance of moisture and consistency, which is important for proper baking.
Forming the Cookies
Rolling dough into balls: Tips for uniform size and shape
To maintain uniformity in your cookies, consider using a small cookie scoop or measuring tablespoon to portion out the dough. Rolling the dough between your palms into 1-inch balls ensures consistency in size, which is important for even baking. Keeping the cookies uniform prevents some from over or under-baking while maintaining a visually appealing appearance.
Coating with powdered sugar: Achieving a sweet finish and visual appeal
Rolling the dough balls in powdered sugar adds not only sweetness but also visual appeal. To achieve an even coating, place your dough balls in a shallow bowl filled with powdered sugar, and gently roll them to cover all sides. Ensure they are well-coated before placing them on the baking sheet, as the sugar will caramelize slightly during baking, creating a delightful contrast in texture.
Spacing on baking sheets: Importance of gap for spreading during baking
While arranging the coated dough balls on your baking sheets, ensure you leave enough space (about 2 inches apart) between each cookie. This allows room for the cookies to spread as they bake. Without adequate spacing, the dough may merge together, leading to misshapen cookies that lack the ideal cookie profile.
Baking Process
Timing for optimal results: Watching for golden edges
Baking times can vary slightly depending on your oven’s accuracy, so it’s essential to keep an eye on the cookies. Ideally, after 10-12 minutes, the edges should be lightly golden brown, while the centers remain slightly soft. Take care not to overbake, as this can lead to a dry texture. Remove the cookies from the oven just as the edges are setting for a perfect chewy center.
Adjusting temperature for different ovens: Tips for success
Oven temperatures can differ significantly based on the model and calibration. If your oven runs hot or cold, consider using an oven thermometer to check accuracy. If you find your cookies browning too quickly, lower the oven temperature by 25°F and increase baking time slightly. Conversely, if they’re not browning enough, slightly increase the temperature but monitor closely to prevent burning.
Adding the Hershey Kisses
Timing for pressing the Kisses: Ensuring they stick without melting completely
Pressing the Hershey Kisses into the center of each cookie post-baking is a critical step. Ideally, do this while the cookies are still warm, allowing the chocolate to slightly melt and adhere to the cookie. If you wait too long, they won’t stick well; if you do this right after they come out of the oven, be cautious not to push them down too hard as they could lose their shape.
Tips for gentle handling of warm cookies for perfect placement
To place the Kisses without disturbing the cookie shape, gently hold the cookie by the edges when pressing the chocolate into the center. This careful approach helps maintain the soft texture of the cookie while ensuring the chocolate is set in a way that looks appealing.
Cooling and Serving Suggestions
Importance of cooling time on baking sheets: Ensuring cookies set properly
Letting the cookies cool on the baking sheet for about 5 minutes before transferring them to a wire rack is crucial. This allows them to set and firm up slightly, which prevents them from breaking apart during transfer. The brief cooling also allows the chocolate Kisses to retain their shape while maximizing their adherence to the cookies.
Transferring cookies to a wire rack: Preventing sogginess
Relocating the cookies to a wire rack allows air to circulate around them, which is vital for keeping the cookies crisp. If left on the baking sheet too long, moisture build-up can lead to sogginess, diminishing texture.
Decorative options for serving: Ideas for plating and presentation
For a visually appealing presentation, arrange the cooled cookies on a decorative platter. You can also sprinkle a bit of powdered sugar on top for an elegant touch. Consider adding chocolate sprinkles or drizzling melted chocolate around the edges for an extra flair that enhances their dessert appeal.
Variations and Adaptations
Suggestions for different flavor variations (e.g., mint chocolate, peanut butter)
While this recipe is beloved for its classic flavor, experimenting with variations can spice things up. For example, consider using mint chocolate Kisses for a minty twist. Alternatively, swapping out some of the all-purpose flour for peanut butter can create a unique peanut butter cookie that pairs beautifully with chocolate kisses.
Exploring different chocolate options beyond Hershey’s Kisses
Don’t limit yourself to just Hershey’s Kisses. You can explore other chocolates like caramel-filled, fudge, or seasonal variations such as pumpkin spice. Each chocolate type will impart a different flavor and texture to the final cookie, allowing for a new experience each time.
Adaptations for dietary restrictions (e.g., gluten-free ingredients)
For those with gluten sensitivities, consider using a gluten-free flour blend to replace the all-purpose flour. Many blends are designed to mimic all-purpose flour in taste and texture quite well. Do note that results may vary slightly, requiring some experimentation to find the perfect balance.
Storage and Shelf Life
Best practices for storing cookies to maintain freshness
To maintain the freshness and texture of your Hershey Kiss Cookies, store them in an airtight container at room temperature. If separated by parchment paper, they won’t stick together, preserving their shape. Avoid placing them in a warm environment, as more humidity can lead to sogginess.
Recommended storage containers and temperature considerations
An ideal storage option is a plastic or glass container with a tight seal, which helps to ward off air and moisture. Ensure that the container is kept in a cool, dry place away from sunlight.
Shelf life of Hershey Kiss Cookies and freezing options
When stored properly, these cookies typically last up to a week. If you wish to store them for longer, consider freezing them. Arrange them in a single layer on a baking sheet until frozen solid, then transfer them to a freezer-safe bag or container. They can last in the freezer for up to three months. To thaw, leave them at room temperature for a bit before serving.
Conclusion
Hershey Kiss Cookies offer a delightful combination of sweetness with a soft, chewy center and slightly crisp edges. The preparation time is quite efficient at around 30 minutes, making them suitable for both casual baking and special occasions. Their charming presentation and tempting flavor profile create an inviting treat that is sure to please cookies lovers of all ages.

Hershey Kiss Cookies Recipe – A Sweet Classic
Ingredients
- 1 cup unsalted butter softened
- 1 cup granulated sugar
- 1 cup packed brown sugar
- 2 large eggs
- 2 teaspoons pure vanilla extract
- 3 cups all-purpose flour
- 1 teaspoon baking soda
- ½ teaspoon fine sea salt
- 1 cup powdered sugar for rolling
- 36 unwrapped Hershey’s Kisses
Instructions
-
Preheat your oven to 350°F (175°C) and line two baking sheets with parchment paper.
-
In a large mixing bowl, combine softened butter, granulated sugar, and brown sugar. Beat until light and fluffy, about 3-4 minutes.
-
Add eggs one at a time, mixing well after each addition. Stir in vanilla extract.
-
In a separate bowl, whisk together flour, baking soda, and sea salt.
-
Gradually mix dry ingredients into the wet mixture on low speed until just combined.
-
Roll the dough into 1-inch balls and coat each in powdered sugar.
-
Place the dough balls on the baking sheets, leaving 2 inches between each.
-
Bake for 10-12 minutes until edges are lightly golden brown.
-
Press a Hershey Kiss into the center of each cookie immediately after removing from the oven.
-
Cool on the baking sheet for 5 minutes before transferring to a wire rack.