

Introduction
Desserts have a unique way of bringing joy and comfort, and the Decadent Crockpot Vanilla Pudding Cake does just that. This dessert is a delightful combination of fluffy cake and velvety pudding, offering a satisfyingly rich taste and texture that pleases a wide array of palates. Perfect for gatherings, this dessert can easily serve a crowd and is just right for family dinners, potlucks, or even a simple dinner at home.
The slow-cooking method involved in creating this pudding cake not only simplifies the preparation but also enhances the flavors, making it even more appealing. Each layer melds beautifully, resulting in a dessert that is both decadent and comforting. Whether served warm on a chilly evening or chilled and enjoyed on a warm day, this cake will undoubtedly impress your guests and leave them asking for seconds.
Whipped cream, caramel sauce, or fresh berries make delightful toppings, allowing you to personalize each serving. This adaptability makes the Decadent Crockpot Vanilla Pudding Cake not only a delightful dessert but also a versatile option for various occasions.
Recipe Overview
– Total Time: 4-5 hours
– Yield/Servings: 8
– Difficulty: Not specified in the recipe
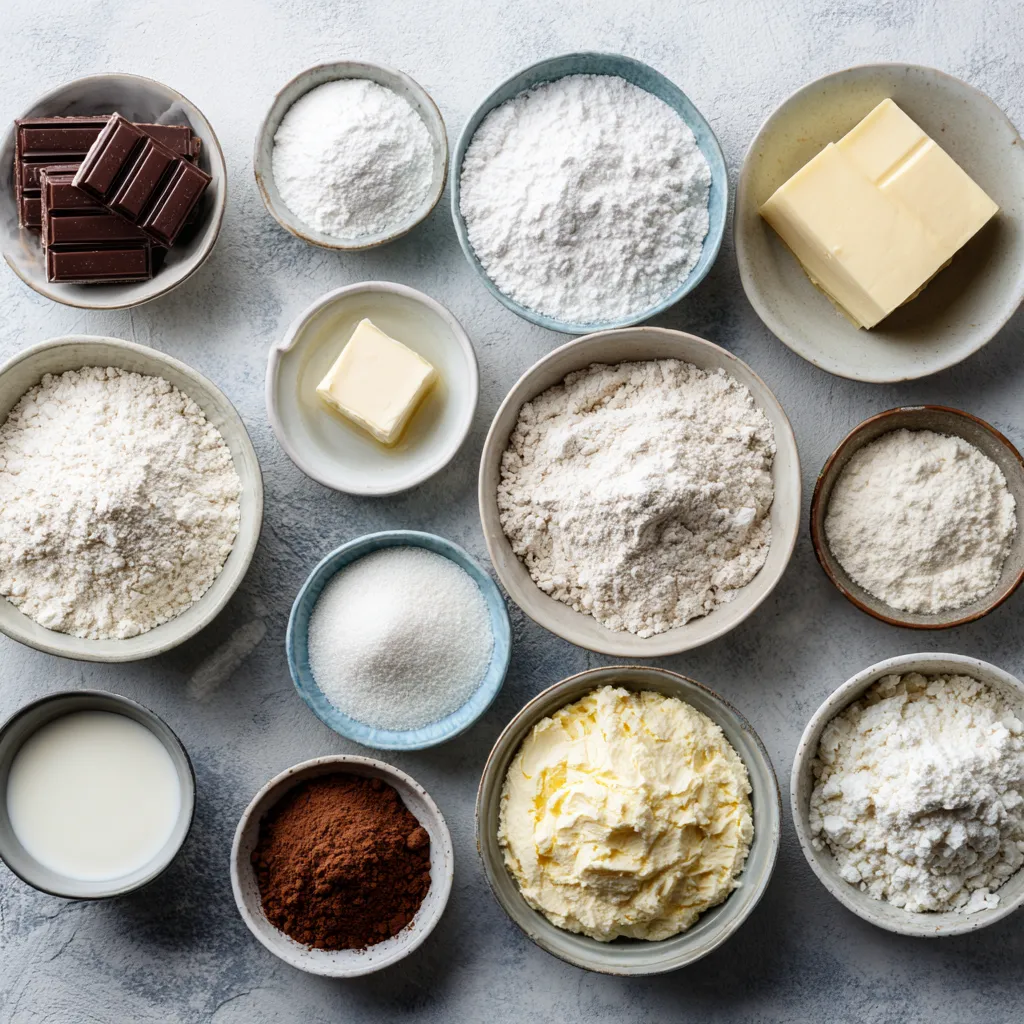
Ingredients
– 1 cup all-purpose flour
– 1 cup granulated sugar
– 2 teaspoons baking powder
– 1/4 teaspoon salt
– 1 cup whole milk
– 1/4 cup unsalted butter, melted and slightly cooled
– 2 teaspoons pure vanilla extract
– 1 cup instant vanilla pudding mix
– 2 cups hot water
– Optional for serving: whipped cream, caramel sauce, or fresh berries
Instructions
1. Prepare the Dry Ingredients:
In a large mixing bowl, combine the all-purpose flour, granulated sugar, baking powder, and salt. Whisk these ingredients together until they are evenly mixed.
2. Mix the Wet Ingredients:
In a separate bowl, blend the whole milk, melted butter, and pure vanilla extract. Gradually add this wet mixture to the dry ingredients, whisking continuously until the batter is smooth and well combined.
3. Incorporate the Pudding Mix:
Gently fold the instant vanilla pudding mix into the cake batter until it is completely integrated. This step is crucial for achieving that rich, creamy texture.
4. Prepare Your Crockpot:
Generously spray the interior of your crockpot with non-stick cooking spray to avoid any sticking issues. Pour the prepared cake batter evenly into the bottom of the crockpot.
5. Pour in the Water:
Carefully pour the hot water over the batter in the crockpot, ensuring not to stir. This step allows the water to create a luscious pudding layer beneath the cake as it cooks.
6. Cook the Cake:
Place the lid on the crockpot and set it to cook on low for 4 to 5 hours. The cake is done when the top is firm, and a toothpick inserted into the center comes out clean or with a few moist crumbs.
7. Serve and Enjoy:
After cooking, turn off the crockpot and allow the cake to cool for a few minutes before serving. For an indulgent touch, serve warm with a dollop of whipped cream, a drizzle of caramel sauce, or a handful of fresh berries.
Preparing the Dry Ingredients
The first step in crafting the Decadent Crockpot Vanilla Pudding Cake involves the precise preparation of dry ingredients. In a large mixing bowl, you will start by measuring and combining all-purpose flour, granulated sugar, baking powder, and salt. It is essential to whisk these elements together thoroughly to ensure an even distribution of the leavening agent and to prevent any clumping. The balance of these ingredients is key to creating a well-structured cake that rises evenly during cooking.
Proper mixing also plays an integral role in the textural outcome of the cake. Whisking not only combines but also aerates the flour, contributing to a lighter cake. For optimal results, it is advised to take the time to meticulously combine these dry components until they showcase a uniform consistency. The sweetness from the sugar, combined with the flour’s structural ability, creates a perfect base that is fundamental to the cake’s success.
Mixing Techniques
When preparing the dry ingredients, employing effective mixing techniques can significantly alter the texture of your cake. Utilizing a whisk is recommended; gentle yet firm strokes can help achieve a well-aerated mixture. Care should be taken to avoid over-mixing, as excessive agitation may lead to a denser cake. The goal is to create a fluffy and airy mixture that will support the indulgent attributes of the pudding layer.
Importance of Sifting
While not explicitly mentioned in the recipe, sifting the flour and sugar prior to measuring can enhance the texture of the final cake. Sifting breaks up any clumps present in the flour, allowing for a smoother batter while promoting a lighter cake. This technique is particularly beneficial when dealing with all-purpose flour, ensuring even hydration when wet ingredients are introduced later in the process.
Mixing the Wet Ingredients
Transitioning to the creation of your wet mixture, you will measure the whole milk and combine it with melted unsalted butter and pure vanilla extract in a separate bowl. The intention is to blend these components until you achieve a harmonious mixture that adds richness and moisture to your cake batter. This combination is vital, as it provides not just flavor but also the necessary liquid for the chemistry of baking.
Combining Tips
To effectively combine the wet ingredients, consider using a whisk to incorporate them thoroughly, which will help eliminate any lumps from the melted butter. Adding the butter at a slightly cooled temperature ensures it does not cook the eggs, should you choose to use them in future variations. When this wet mixture is introduced to the dry ingredients, it is crucial to whisk continuously, creating a smooth batter free of lumps. This method enhances the overall texture of the cake, fostering a delightful mouthfeel upon serving.
Incorporating the Pudding Mix
The inclusion of the instant vanilla pudding mix is a defining step in creating the signature texture of this dessert. As you gently fold in the pudding mix, it becomes essential to ensure that it is fully integrated into the cake batter. This folding technique preserves the airiness of the mixture while allowing the pudding to fully hydrate. The instant pudding not only enriches the flavor profile with its creamy sweetness but also contributes to a moist, luscious texture that is characteristic of pudding cakes.
The incorporation of the pudding mix is crucial for achieving that signature cake-and-pudding hybrid experience. As the cake bakes, the pudding mix interacts with the other ingredients, helping create a delicate balance between the cake’s lightness and the pudding’s rich creaminess. This melding of textures and flavors establishes the crowning glory of the Decadent Crockpot Vanilla Pudding Cake.
Folding Techniques
When incorporating the instant vanilla pudding mix into the cake batter, it’s essential to use a gentle folding technique. This method ensures that the batter maintains its light and airy texture, crucial for a delightful cake experience. Instead of stirring aggressively, which can deflate the bubbles in the batter, use a large spatula to cut down through the center of the mixture, then lift and fold it over the top. Rotate the bowl as you go, repeating this motion until the pudding mix is fully combined. The goal is to integrate the ingredients without losing the airiness created during mixing.
Preparing Your Crockpot
Properly preparing the crockpot is essential to prevent sticking and ensure even cooking. Start by ensuring the interior is clean and dry before applying the non-stick spray.
Non-Stick Spray
Choose a high-quality non-stick cooking spray, preferably one designed for baking to withstand the heat and reduce the chances of sticking. Generously spray the bottom and sides of the crockpot, ensuring complete coverage, as any ungreased areas might cause the pudding cake to adhere to the pot during cooking. You can also use a paper towel to spread the spray for an even coating, eliminating excessive buildup and ensuring a flawless release.
Pouring in the Water
Adding hot water is a pivotal step in this recipe, as it creates the pudding layer that complements the cake beautifully. This process demands caution to avoid disrupting the delicate batter.
Water Temperature
The optimal water temperature for this recipe should be around 200°F (about 93°C)—just below boiling. This temperature will achieve the desired consistency of the pudding. Carefully pour the hot water into the crockpot over the batter, ensuring you pour in a gentle stream down the side of the pot. Avoid pouring directly onto the batter, which could disturb its structure. The water will settle underneath the batter during cooking, forming a luscious layer of vanilla pudding.
Cooking the Cake
Setting up your crockpot correctly will ensure that your cake cooks thoroughly and evenly.
Monitoring Progress
To gauge the cake’s doneness, begin checking around the 4-hour mark. You should look for a firm top, and inserting a toothpick into the center should yield either clean or slightly moist crumbs. If the toothpick comes out with wet batter, allow the cake to continue cooking for an additional 15–30 minutes. Avoid lifting the lid too often, as this can alter the cooking temperature inside, impacting the overall result.
Serving Suggestions
Now that your Crockpot Vanilla Pudding Cake has baked to perfection, think of creative ways to enhance its presentation and flavor.
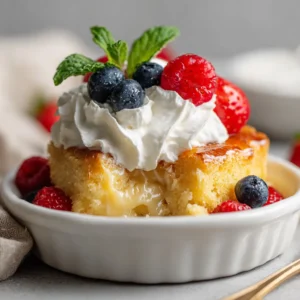
Plating Ideas
One delightful way to serve this dessert is to dish out individual servings in chic bowls. Layer a generous scoop of warm cake and pudding, followed by a dollop of whipped cream. You might even consider adding a few fresh berries or a sprinkle of crushed nuts on top for contrast. For a shared experience, serve the cake directly from the crockpot, allowing guests to serve themselves, creating a rustic and inviting atmosphere.
Flavor Pairings
This pudding cake pairs excellently with various toppings. Besides whipped cream, consider drizzling caramel sauce or chocolate syrup. Fresh fruit like strawberries, raspberries, or blueberries not only add a splash of color but also provide a fruity burst that cuts through the cake’s richness. A light dusting of powdered sugar can add an elegant finish to your plate, enhancing the overall appearance.
Storage Tips
If you find yourself with leftover cake, proper storage will help retain its texture and taste.
Refrigeration Guidelines
To store your Crockpot Vanilla Pudding Cake, allow it to cool completely before transferring it to an airtight container. Store the cake in the refrigerator, where it can stay fresh for up to 3–4 days. If you have toppings, consider keeping them separate until serving to prevent the cake from becoming soggy.
Reheating Techniques
Reheating can be done in several ways to maintain the cake’s creamy pudding layer. For the best results, heat individual portions in the microwave. Start by warming them for 20-30 seconds, checking frequently to avoid overheating. If reheating larger portions, consider placing them back in the crockpot on low heat for about 30 minutes or until warmed throughout.
Variations on the Recipe
The flexibility of this pudding cake allows room for unique variations without straying too far from the original recipe.
Alternative Flavors
Feel free to experiment with flavors by swapping out vanilla extract for almond or coconut extracts, or by using different flavored pudding mixes such as chocolate or butterscotch. These substitutions can introduce new flavor profiles while keeping the comforting essence of the pudding cake intact.
Dietary Adjustments
Making this recipe gluten-free is feasible by using a gluten-free all-purpose flour blend. For a dairy-free version, substitute the whole milk with an unsweetened almond or oat milk and the unsalted butter with a plant-based alternative. With these adjustments, you can enjoy a delicious dessert accommodating various dietary needs while preserving the indulgent nature of the cake.
The Crockpot Vanilla Pudding Cake offers a delightful balance of moist cake and creamy pudding, making it a comforting dessert for any occasion. Its straightforward preparation time of just 10 minutes, followed by a cooking time of 4 to 5 hours, results in a homemade treat that speaks to both simplicity and flavor. This cake topped with whipped cream creates a warm and inviting experience that appeals to diverse palates.
Decadent Crockpot Vanilla Pudding Cake
Ingredients