
Introduction
Understanding the joy of baking can elevate any festive occasion, especially when it involves treats as delightful as Spider Web Cookies. These cookies not only capture the spirit of Halloween but also present a fun opportunity for creative decoration. With a mix of semi-sweet and white chocolate, these cookies offer a delicious contrast in flavor and appearance. The tender, doughy center complemented by the crisp edges makes for a delightful treat that is sure to impress guests of all ages.
These cookies are perfect for brightening up your Halloween gatherings or simply indulging in a sweet, spooky snack on a cozy autumn evening. Their unique design and rich flavors make them not just a dessert but also a captivating centerpiece for your Halloween festivities. Imagine serving these whimsical cookies on a themed platter, with their eerie spider web decor inviting smiles and maybe even a few gasps from your family and friends.
Recipe Overview
Spider Web Cookies are a perfect addition to any Halloween celebration with their unique design and exciting flavors. The combination of rich butter, sugars, and chocolate culminates in a hearty cookie that is both soft and crunchy.
Key Features
– Flavor Profile: A blend of semi-sweet and white chocolate offers an irresistible combination.
– Texture: Soft on the inside with a slight crispiness outside.
– Decoration: The spider web design adds a whimsical touch to your cookie platter.
Serving Suggestions
Ideal for Halloween parties, school events, or as a spooky snack for family movie nights.
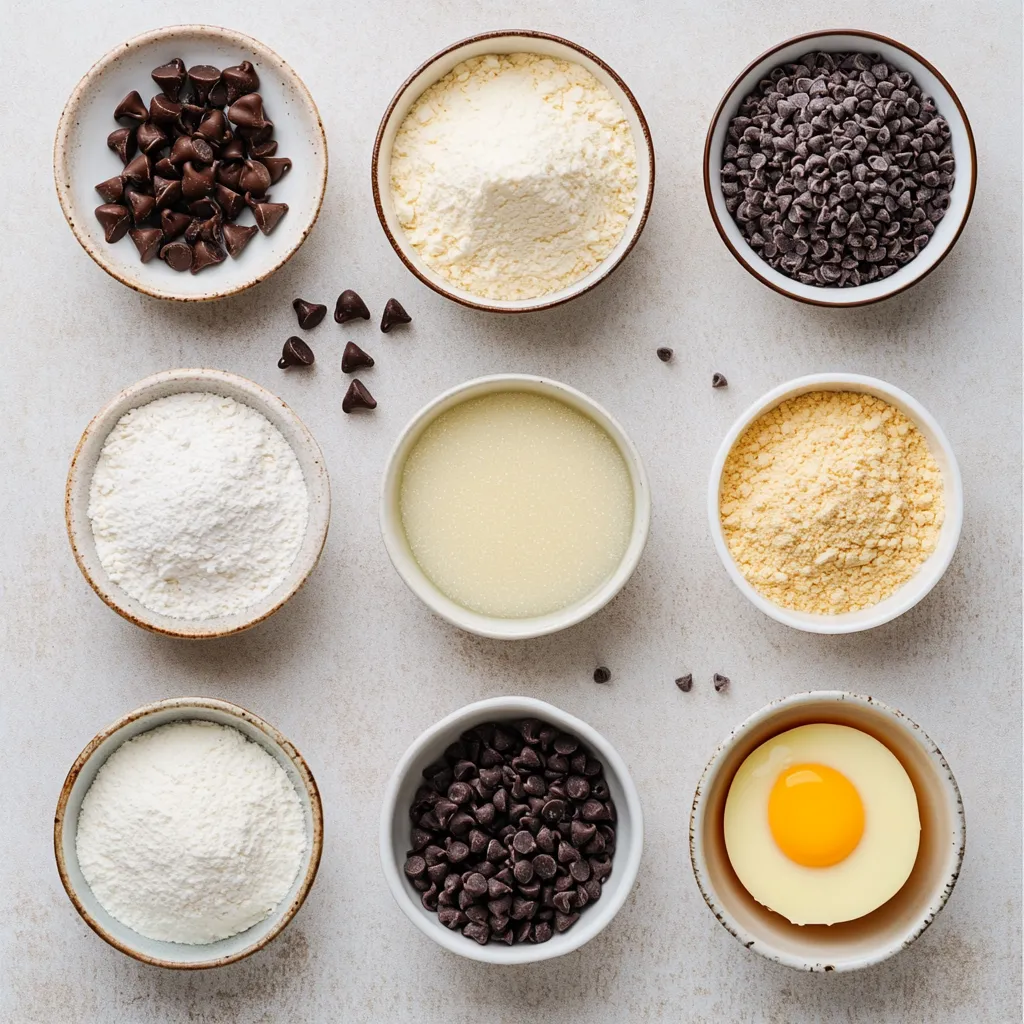
Ingredients
Familiarize yourself with each component that makes this delicious recipe a reality.
Main Ingredients
– 1 cup unsalted butter, softened
– 1 cup granulated sugar
– 1 cup packed brown sugar
– 2 large eggs
– 1 teaspoon vanilla extract
Dry Ingredients
– 3 cups all-purpose flour
– 1 teaspoon baking soda
– 1/2 teaspoon salt
Chocolate Components
– 1 cup semi-sweet chocolate chips
– 1/2 cup white chocolate chips
Optional Additions
– Black food coloring (for darkening cookie dough)
– Edible glitter (for decoration)
Instructions
Here’s how to create your Spider Web Cookies, following each step carefully for the best results.
1. Preheat the Oven: Begin by preheating your oven to 350°F (175°C). Prepare your baking sheets by lining them with parchment paper to prevent sticking.
2. Cream the Butter and Sugars: In a large mixing bowl, combine the softened butter, granulated sugar, and brown sugar. Using an electric mixer, cream the mixture on medium speed until it becomes light and fluffy, which should take about 3-5 minutes.
3. Incorporate Eggs and Vanilla: Add the eggs to the creamed mixture one at a time, ensuring each egg is fully incorporated before adding the next. Follow with the vanilla extract and mix until everything is well blended.
4. Combine Dry Ingredients: In another bowl, whisk together the all-purpose flour, baking soda, and salt. Gradually add this dry mixture to the wet ingredients, stirring gently until just combined to avoid overmixing.
5. Fold in the Chocolate Chips: Gently fold in the semi-sweet chocolate chips. If you want a darker cookie, you can add a few drops of black food coloring to the dough and mix until the color is evenly distributed.
6. Shape the Cookies: Use a tablespoon to scoop out portions of dough and roll them into balls. Arrange the dough balls on the prepared baking sheets, leaving about 2 inches of space between each to allow for spreading.
7. Bake the Cookies: Place the baking sheets in the preheated oven and bake for 10-12 minutes, or until the edges of the cookies turn a light golden brown. Once baked, remove them from the oven and let them cool on the baking sheets for a few minutes before transferring them to wire racks to cool completely.
8. Prepare the Spider Web Decoration: In a microwave-safe bowl, melt the white chocolate chips in 30-second intervals, stirring in between until smooth. If you want a spooky effect, mix in a few drops of black food coloring until you achieve your desired shade.
9. Decorate the Cookies: Using a piping bag or a fork, drizzle the melted white chocolate over the cooled cookies in a circular pattern to create a spider web design. For an extra festive touch, sprinkle edible glitter on top of the chocolate before it sets.
10. Set and Serve: Allow the decorated cookies to sit for about 15 minutes so the chocolate can set before serving. Enjoy your delightful and eerie Spider Web Cookies!
Prepping Your Workspace
Creating an efficient workspace can streamline your cookie-making process. By organizing your ingredients and tools, you will ensure a smooth baking experience.
Gather Your Tools
Before you start baking, gather all necessary tools. You will need an electric mixer to cream your butter and sugars, mixing bowls for combining your ingredients, baking sheets to support your cookies as they bake, and parchment paper to prevent sticking. Additionally, keep piping bags or forks handy for decorating your cookies later.
Setting Up Your Oven
Preheating your oven to 350°F (175°C) is a crucial step, as it ensures that your cookies bake evenly and achieve that perfect golden brown coloration. While the oven warms up, preparing your baking sheets with parchment paper not only prevents sticking but also makes cleanup after baking easier.
Baking the Cookies
Following the correct steps will ensure a successful baking experience, leading to delectable Spider Web Cookies that will be the star of your Halloween festivities.
Preheat the Oven
Begin with preheating your oven. Setting it to 350°F (175°C) early will save you time so that once the dough is ready, your oven will be at the optimal temperature for baking. The right temperature is crucial for achieving the desired texture—soft on the inside and crispy on the outside while maintaining remarkable shape and design consistency during shaping and cooling.
approximately 45 minutes before you can enjoy these fun treats. The decoration adds whimsical flair, making them perfect for Halloween gatherings or themed parties.
Enhancing the Cookie Dough
Adding Chocolate Chips
The addition of semi-sweet chocolate chips to the dough creates pockets of melted chocolate, offering delightful bursts of flavor with each bite. When folding in the chocolate chips, be careful to do so gently to prevent overmixing your dough, which can negate that tender cookie texture you aim for. If desired, you can substitute semi-sweet chips with dark chocolate chips for a richer taste profile, but be mindful that this will slightly alter the cookie’s sweetness.
Incorporating Food Coloring
Black food coloring not only contributes to the aesthetic appeal of the cookies but also enhances the overall theme. When adding food coloring, a little goes a long way. Start with just a few drops and mix thoroughly, checking for color intensity along the way. If you prefer a slightly violet or midnight blue shade, you could mix in colors to achieve the desired effect without changing the flavor.
Shaping the Cookies
Rolling the Dough
To ensure that all cookies are uniformly baked, scoop the dough using a tablespoon or a cookie scoop. Aim for 1.5-inch balls, ensuring they’re rolled smoothly for a consistent surface that helps with even baking. Flouring your hands lightly can be beneficial if the dough is particularly sticky.
Arranging on Baking Sheet
When placing the dough balls on the lined baking sheets, ensure they are spaced adequately, about 2 inches apart. This spacing is crucial because the cookies will spread as they bake, avoiding merged edges and ensuring each cookie retains its distinct shape.
Baking Process
Timing Your Bake
Baking the Spider Web Cookies for 10-12 minutes will yield a deliciously soft cookie characterized by slight crispness at the edges. It’s essential to check for doneness a minute or two earlier if your oven runs hot. A good indicator is the color—edges should be golden, while the center remains lighter and slightly puffy.
Cooling Techniques
After baking, allow the cookies to cool on the baking sheet for about 5-7 minutes. This resting period allows the cookies to firm up slightly before transferring them to wire racks. Placing them on racks promotes even cooling, ensuring that the bottoms do not become soggy.
Decorating the Spider Web Cookies
Melting the White Chocolate
Melting the white chocolate is an exciting step! Use a microwave-safe bowl, and heat in short 30-second bursts, stirring in between to ensure even melting without scorching. Adding a few drops of black food coloring while melting can create an eerie, dark chocolate base for the web design. Alternatively, if you prefer not to use food coloring, the contrast of the white chocolate on a darker cookie still presents a stunning appearance.
Creating the Spider Web Effect
Once your white chocolate is melted and ready, use a piping bag for precision. If you don’t have one, a sandwich bag with a tiny corner cut off can work as well. Start from the center, drizzling outwards in concentric circles. To create the ‘spider web’ effect, use a toothpick or a skewer to drag through the chocolate lines, starting from the center and pulling outwards.
Adding Sparkle
For a delightful finishing touch, sprinkle edible glitter over the drizzled chocolate before it starts to harden. Just a light dusting is enough to elevate the visual appeal, perfect for a festive treat. Choose colors that contrast with the chocolate to maximize effect, such as silver or gold glitter against the black.
Finalizing the Cookies
Setting the Chocolate
Let the decorated cookies rest for about 15 minutes until the white chocolate has fully set. This waiting period will ensure that the decorations don’t smudge when handling or serving.
Serving Presentation
Present the Spider Web Cookies creatively to enhance the Halloween theme. A dark platter or a spooky-themed decorative tray can contribute to the overall atmosphere. Incorporating faux spider decorations around the cookies can make for a delightful centerpiece at any gathering.
Scaling the Recipe
If you’re looking to make a larger batch for parties, this recipe scales easily. Simply double or triple the ingredients, keeping in mind the capacity of your mixing bowl. The baking times will remain unchanged, but style and size consistency becomes increasingly crucial with more cookies.
Storage
To maintain their freshness, store the cookies in an airtight container at room temperature. Properly stored, they can last up to a week. If you live in a humid area, consider placing a slice of bread in the container to help absorb moisture.
Reheating
Should you have leftover cookies that you’d like to enjoy later, gently reheating them can revive the soft texture. Place them in a preheated oven at 300°F (150°C) for about 5-7 minutes or microwave them for a few seconds, taking care not to overheat, which could make them tough.
Troubleshooting
If your cookies spread too much, it may be due to using butter that is too warm or improperly measuring your flour — ensure it is spooned and leveled for accuracy. On the other hand, if the cookies don’t spread at all, your dough might be too cold; letting it sit at room temperature for a while before shaping and baking can help.
FAQs
– Can I freeze Spider Web Cookies? Yes, they freeze well. Place them in an airtight container with parchment paper between layers to prevent sticking.
– Can I use different types of chocolate? Absolutely! You can experiment with milk chocolate, dark chocolate, or even flavored chocolate chips according to your preferences.
– What if I don’t have white chocolate chips? If white chocolate chips are not available, you can substitute with a sweet vanilla or butterscotch chip for similar sweetness.
– Are there gluten-free options? Not specified in the recipe. However, if you need a gluten-free version, substitute the all-purpose flour with a 1:1 gluten-free baking blend, ensuring the flour mix includes xanthan gum for the best results.
Spider Web Cookies present a delightful blend of flavors and textures, combining soft, rich dough with sweet chocolate accents. The preparation takes about 20 minutes, leading to a total time of approximately 45 minutes before you can enjoy these fun treats. The decoration adds whimsical flair, making them perfect for Halloween gatherings or themed parties.
Spider Web Cookies Recipe for Halloween Parties
Ingredients
- 1 cup unsalted butter softened
- 1 cup granulated sugar
- 1 cup packed brown sugar
- 2 large eggs
- 1 teaspoon vanilla extract
- 3 cups all-purpose flour
- 1 teaspoon baking soda
- ½ teaspoon salt
- 1 cup semi-sweet chocolate chips
- ½ cup white chocolate chips
- Black food coloring optional
- Edible glitter optional, for decoration
Instructions
-
Preheat your oven to 350°F (175°C) and line baking sheets with parchment paper.
-
In a large bowl, cream together the softened butter, granulated sugar, and brown sugar until light and fluffy.
-
Add the eggs one at a time, mixing well after each addition, then stir in the vanilla extract.
-
In another bowl, whisk together the flour, baking soda, and salt, then gradually add to the wet ingredients.
-
Fold in the semi-sweet chocolate chips and optional black food coloring if desired.
-
Scoop dough into balls and place them on the prepared baking sheets, leaving space between each.
-
Bake for 10-12 minutes until the edges are light golden brown, then cool on wire racks.
-
Melt the white chocolate chips in intervals, mixing in black food coloring for a spooky effect.
-
Drizzle the melted chocolate over the cooled cookies in a spider web pattern and sprinkle with edible glitter.
-
Let the cookies sit for 15 minutes to set before serving.