

Introduction
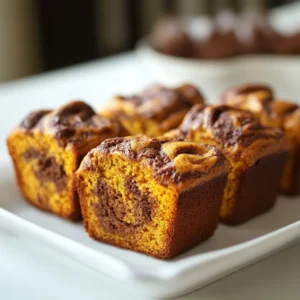
As the leaves turn golden and the air grows crisp, nothing embodies the essence of fall quite like a warm loaf of pumpkin bread. This Easy Mini Pumpkin Bread with Cinnamon Swirl recipe invites you to explore the delightful flavors of the season, combining the natural sweetness of pumpkin with a rich, comforting cinnamon flavor. Perfect for enjoying on its own or paired with a warm drink, this mini pumpkin bread is not only a treat for the taste buds but also a cozy embrace for the soul.
The versatility of mini pumpkin bread makes it an excellent choice for various occasions. Serve it warm as an afternoon snack, highlight it at a coffee gathering with friends, or present it as a delightful homemade gift during the holidays. Complimented by a heavenly cinnamon swirl, this mini loaf adds an extra dimension of flavor, creating a perfect balance that will leave your guests coming back for more.
Recipe Overview
– Total Time: 45 minutes
– Prep Time: 15 minutes
– Cook Time: 25-30 minutes
– Yield: 2 mini loaves
– Difficulty: Not specified in the recipe
This recipe gives you an opportunity to create a beautiful, fragrant bread with a texture that’s incredibly moist and rich. The sweetness harmonizes beautifully with the blend of spices—cinnamon, nutmeg, and ginger—each adding depth to the overall flavor profile. The convenience of the preparation process, coupled with the relatively quick baking time, makes it a great choice for both novice and seasoned bakers.
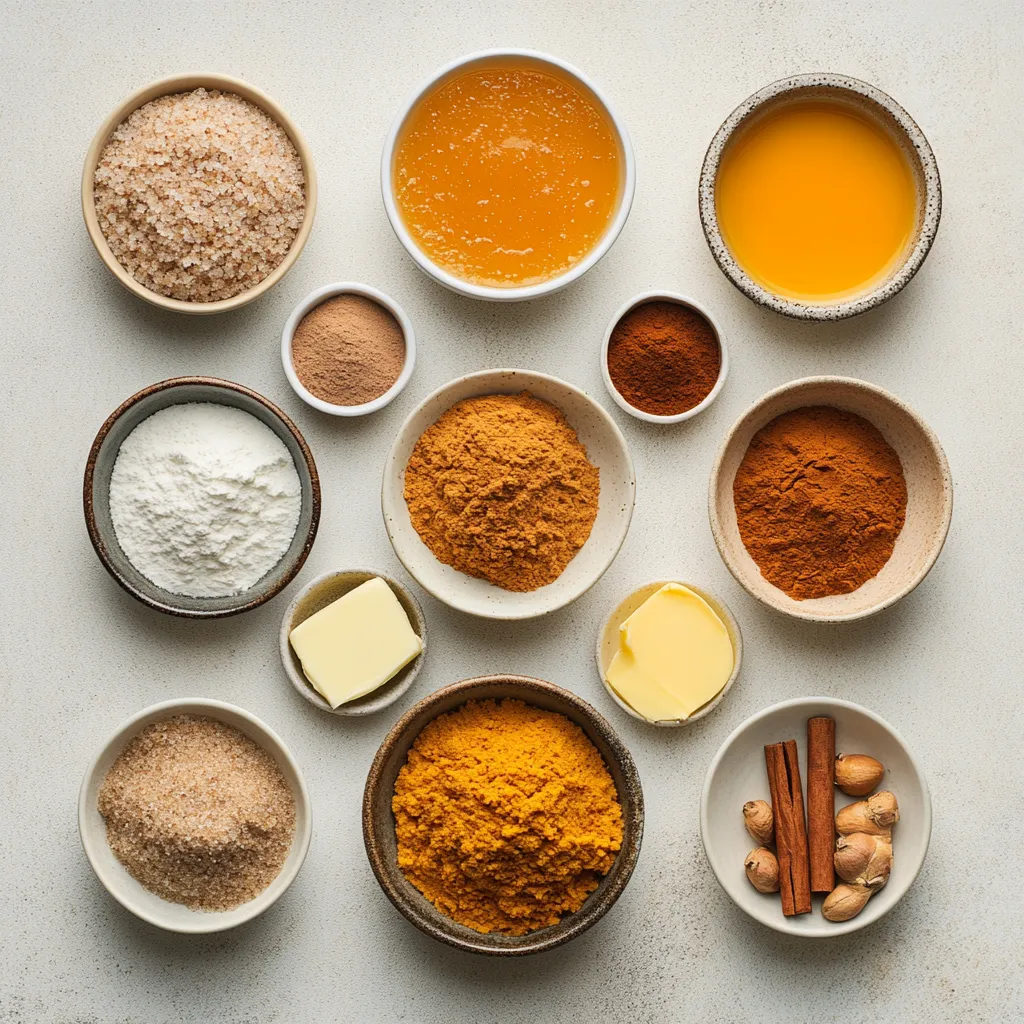
Ingredients
– 1 cup canned pumpkin puree
– 1/2 cup vegetable oil
– 1/2 cup packed brown sugar
– 1/2 cup granulated sugar
– 2 large eggs
– 1 teaspoon vanilla extract
– 1 1/2 cups all-purpose flour
– 1 teaspoon baking soda
– 1/2 teaspoon baking powder
– 1 teaspoon ground cinnamon
– 1/2 teaspoon ground nutmeg
– 1/2 teaspoon ground ginger
– 1/4 teaspoon salt
**For the Cinnamon Swirl:**
– 1/4 cup granulated sugar
– 1 tablespoon ground cinnamon
– 2 tablespoons melted butter
In this straightforward recipe, each ingredient plays a vital role in creating a loaf that is both delicious and satisfying. The use of canned pumpkin puree ensures a rich pumpkin flavor without the fuss of preparing fresh pumpkin. The oils and sugars contribute to the moist texture, while the mix of spices adds that profound autumnal warmth. For those looking to tailor the recipe, consider substitution ideas for different oils or sweeteners based on dietary preferences.
Equipment Needed
To successfully create your Easy Mini Pumpkin Bread with Cinnamon Swirl, you will need a few essential kitchen tools:
– Mixing bowls: A large bowl for wet ingredients and another for dry ingredients will simplify the preparation process.
– Measuring tools: Accurate measuring cups and spoons are vital to ensure the correct proportions of each ingredient.
– Mini loaf pan: A standard-sized mini loaf pan is ideal, but if unavailable, a muffin tin can serve as an alternative for making small pumpkin muffins.
– Whisk or mixing spoon: These tools will assist in effectively combining the ingredients.
When selecting your mini loaf pan, ensure that it is of the appropriate size to create mini loaves that are both pleasing to the eye and the palate. Baking directly in a well-greased pan allows for easy removal after baking, ensuring your creations maintain their perfect shape.
Preparing the Oven and Baking Pan
Before diving into the mixing process, it’s essential to prepare your oven and baking pan. Preheat your oven to 350°F (175°C). This temperature is critical as it ensures the bread bakes evenly, helping to achieve that desirable rise and golden-brown crust.
For preparing your mini loaf pan, you can either grease it with a thin layer of vegetable oil or butter, or you may choose to line it with parchment paper. If you opt for the parchment paper, make sure it hangs over the sides for easy lifting after baking. This simple step can save you from the hassle of having your bread stuck to the bottom of the pan, providing a smoother experience from oven to plate.
Lastly, the placement of your pan within the oven matters. Position it in the center to promote balanced heat distribution, allowing your mini pumpkin bread to bake consistently. This attention to detail will result in a perfectly baked mini loaf that is moist inside and beautifully browned on the outside.
Mixing the Batter
The success of your mini pumpkin bread hinges on how you combine your ingredients, making the mixing process one of the most pivotal steps. Start by taking a large mixing bowl and adding the canned pumpkin puree, vegetable oil, packed brown sugar, and granulated sugar. Use a whisk or a sturdy mixing spoon to blend these ingredients until they achieve a smooth, cohesive mixture.
Introduce the eggs to the wet mixture one at a time, carefully ensuring that each egg is well incorporated before adding the next. This step is vital as it promotes even mixing throughout the batter. Stir in the vanilla extract, which not only enhances the flavor but also contributes to a fragrant aroma.
In a separate bowl, gather your dry ingredients: all-purpose flour, baking soda, baking powder, ground cinnamon, ground nutmeg, ground ginger, and salt. Whisk these ingredients together to eliminate any lumps, ensuring an even texture and distribution of flavors. Once your dry ingredients are ready, gradually fold them into the wet mixture, stirring just until combined. It’s essential to be gentle during this process—overmixing can result in a denser loaf, whereas a few small lumps in the batter are perfectly acceptable.
Making the Cinnamon Swirl
Creating the cinnamon swirl is what will transform your bread from ordinary to extraordinary. This component adds delightful layers of flavor and visual appeal. Start by taking a small bowl, measuring out the granulated sugar, and combining it with the ground cinnamon until well mixed. This essential blend serves as the heart of your swirl.
Next, pour in the melted butter, mixing until the texture resembles coarse crumbs. This will create a beautiful mixture that can be easily layered into your pumpkin batter. When you assemble the pumpkin bread, carefully sprinkle half of this cinnamon mixture on top of the first layer of batter. You will repeat this process again, adding layers of flavor that will intertwine spectacularly as they bake.
The swirling step is where the magic happens. With just a knife or skewer, gently disturb the layers of batter to create a marble pattern. Be cautious not to over-mix this part either; the goal is to achieve an artistic swirl that looks as inviting as it tastes. The result will be a delightful mini loaf, enriched with vibrant flavors of pumpkin and the warm embrace of cinnamon in every bite.
By integrating these detailed steps, you ensure your baking journey is fruitful, leading to mini pumpkin bread that is beguiling and perfectly inviting for any occasion.
Importance of Achieving the Right Crumb Consistency
Achieving the ideal crumb consistency in your mini pumpkin bread is essential for both texture and overall enjoyment. Ideally, you want a tender and moist crumb that is light yet slightly dense, ensuring it holds together without being overly heavy. Overmixing the batter is a common pitfall that can lead to a tougher texture, as it develops gluten within the flour. To maintain the perfect crumb, gently fold your dry ingredients into the wet ingredients until just combined, allowing for a few small lumps in the batter. This approach ensures a softer, more tender loaf that is pleasing to the palate.
Suggestions for Enhancing the Cinnamon Flavor Profile
To elevate the cinnamon flavor in your pumpkin bread, consider enhancing it with additional ingredients. One popular option is to incorporate freshly grated nutmeg alongside the ground spices; this will amplify the warm spice notes already present in the recipe. Using a blend of Chinese five-spice powder can also introduce a complex flavor profile that complements pumpkin beautifully. Furthermore, for a more refined cinnamon touch in the swirl, you might add a teaspoon of pure cinnamon extract to the sugar and butter mixture, creating a more intense flavor that permeates the bread.
Tips for Balancing Sweetness in the Swirl Against the Pumpkin Batter
Finding the right balance of sweetness between the pumpkin batter and the cinnamon swirl is crucial. As pumpkin puree is naturally sweet, it’s important not to overpower the bread with excess sugar. Stick closely to the suggested amounts of brown and granulated sugar in the batter, and consider reducing the sugar in the swirl by a tablespoon if you prefer a less sweet result. On the other hand, if you enjoy a more indulgent treat, you could retain the original measurements and serve slices topped with a light drizzle of maple syrup or honey for an added sweetness layer that complements the bread nicely.
Layering the Batter
When it comes to layering the pumpkin batter and the cinnamon swirl effectively, the technique can greatly influence the visual appeal and final taste. Start by pouring half the pumpkin batter into your prepared mini loaf pan, leveling it out gently with a spatula. After sprinkling half of the cinnamon swirl mixture evenly across the batter, follow with the remaining pumpkin batter. Pouring it carefully over the initial layer will reduce disruption of the swirl beneath.
To create an elegant marbled effect, use a knife or skewer to gently swirl the batter and cinnamon mixture. A simple figure-eight motion is often effective; however, it’s important to avoid overdoing it. Too much swirling can result in a fully blended mixture, which sacrifices the attractive visual contrast and distinct flavors of the cinnamon and pumpkin layers.
Baking the Mini Pumpkin Bread
The baking time for the mini pumpkin bread typically falls between 25 and 30 minutes. However, it’s crucial to monitor the bread closely during this period. When you first place the pan in the oven, you will notice the aroma immediately wafting through your kitchen, a great sign that your bread is well on its way to perfection.
To ensure your mini loaves are fully baked, use the toothpick test. Insert a toothpick into the center of the loaf; if it comes out clean or with a few moist crumbs, you know the bread is done. If the toothpick is coated in batter, allow it to bake for a few additional minutes and repeat the test. Additionally, avoid the common pitfall of opening the oven too frequently. Each time the oven door opens, it can drop the internal temperature, impacting the rise and structure of your bread.
Cooling and Serving Suggestions
Once your mini pumpkin bread has reached the desired doneness, allow it to cool in the pan for about 10 minutes. This resting period is essential as it allows the steam to escape and helps the bread firm up, making it easier to remove from the pan without falling apart. Afterward, transfer the loaves onto a wire rack to cool completely; this helps maintain the freshness of the texture while preventing sogginess.
Creative serving suggestions include slicing the mini loaves and presenting them on a rustic wooden board with a light dusting of powdered sugar on top. Pair each slice with a dollop of freshly whipped cream, or elevate it further by adding a scoop of vanilla ice cream. The addition of cream or ice cream not only enhances the flavors but also adds a delightful contrast in temperature and texture.
Flavor Enhancements and Variations
For an exciting twist on your mini pumpkin bread, consider adding ingredients such as chopped nuts like walnuts or pecans, which contribute a satisfying crunch and nutty flavor. Chocolate chunks or chips can also be a delightful addition, offering a rich counterpart to the spiced pumpkin. For spice-based variations, consider experimenting with cardamom, allspice, or even a hint of clove based on personal preferences.
If you’re looking for gluten-free alternatives, replace the all-purpose flour with a 1:1 gluten-free flour blend, ensuring you also adjust the baking powder accordingly if it’s not already included in the blend. This way, you can enjoy a moist and tender texture without compromising on taste.
Nutritional Information
The mini pumpkin bread has key nutritional elements, including fiber from the pumpkin puree and healthy fats from the vegetable oil. Each loaf, divided into servings, can be a reasonable indulgence, making it suitable for various diets when consumed in moderation. With its mixture of sugars sourced from both granulated and brown sugar, and a balance of moisture from the pumpkin, the bread provides sustenance without being overly rich.
Conclusion
The Ultimate Mini Pumpkin Bread with Cinnamon Swirl is a delightful treat that boasts a rich pumpkin flavor complemented by a warm cinnamon touch. Achieving the optimal texture, along with thoughtful layering and baking techniques, creates a moist and tender loaf. With a total prep and baking time of just about 45 minutes, this recipe stands out as a comforting and easily manageable bakery-style home creation.
Easy Mini Pumpkin Bread with Cinnamon Swirl Recipe
Ingredients
- 1 cup canned pumpkin puree
- ½ cup vegetable oil
- ½ cup packed brown sugar
- ½ cup granulated sugar
- 2 large eggs
- 1 teaspoon vanilla extract
- 1 ½ cups all-purpose flour
- 1 teaspoon baking soda
- ½ teaspoon baking powder
- 1 teaspoon ground cinnamon
- ½ teaspoon ground nutmeg
- ½ teaspoon ground ginger
- ¼ teaspoon salt
- ¼ cup granulated sugar for swirl
- 1 tablespoon ground cinnamon for swirl
- 2 tablespoons melted butter
Instructions
-
Preheat your oven to 350°F (175°C) and prepare a mini loaf pan.
-
Blend together pumpkin puree, vegetable oil, brown sugar, and granulated sugar until smooth.
-
Add eggs one at a time, mixing well after each addition, then stir in vanilla extract.
-
In a separate bowl, whisk together flour, baking soda, baking powder, cinnamon, nutmeg, ginger, and salt.
-
Fold the dry ingredients into the wet mixture until just combined.
-
Combine granulated sugar and ground cinnamon for the swirl, then mix in melted butter.
-
Pour half of the pumpkin batter into the loaf pan and sprinkle half of the cinnamon mixture on top.
-
Layer the remaining pumpkin batter and sprinkle with the rest of the cinnamon mixture, swirling gently.
-
Bake for 25-30 minutes or until a toothpick comes out clean.
-
Cool in the pan for 10 minutes before transferring to a wire rack.