

Introduction
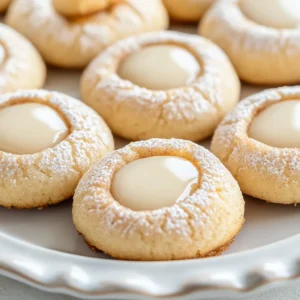
The holiday season often calls for sweet treats that embody the spirit of celebration, and Eggnog Snickerdoodle Thumbprint Cookies are a perfect fit. Combining the traditional flavors of eggnog and snickerdoodles, these cookies not only serve as delightful desserts but also elevate any festive gathering. Their rich flavor profile and soft texture make them a memorable addition to seasonal festivities.
These cookies capture the essence of winter with the warm spices of cinnamon and nutmeg, lending a nostalgic quality while the creamy notes of eggnog bring a new layer of richness. Whether it’s a cozy family gathering, a holiday party, or simply a treat to enjoy by the fireplace, these cookies provide a comforting taste of the season. With their inviting appearance and delicious flavor, it’s no surprise that Eggnog Snickerdoodle Thumbprint Cookies quickly become a crowd favorite during the holidays.
As you prepare to make these delicious cookies, you’ll find that they come together easily and require relatively simple ingredients. With just a few preparation steps and a little patience while they bake, you’ll have a batch of delicious cookies that perfectly harmonize the traditional holiday flavors everyone craves. They are also a great sharing dessert, making them perfect for potlucks, cookie exchanges, or as sweet gifts for loved ones.
Recipe Overview
– Prep Time: 15 minutes
– Cook Time: 12 minutes
– Total Time: 27 minutes
– Course: Dessert
– Cuisine: American
– Servings: 24 cookies
– Calories: Approximately 150 per cookie
Eggnog Snickerdoodle Thumbprint Cookies are a delicious twist on classic cookies, featuring a buttery, cinnamon-infused dough filled with the warm flavors of eggnog. With a preparation time of just 15 minutes and a total cooking time of 12 minutes, these cookies yield approximately 24 servings, making them ideal for sharing. Each cookie contains about 150 calories, bringing comfort and enjoyment without the guilt.
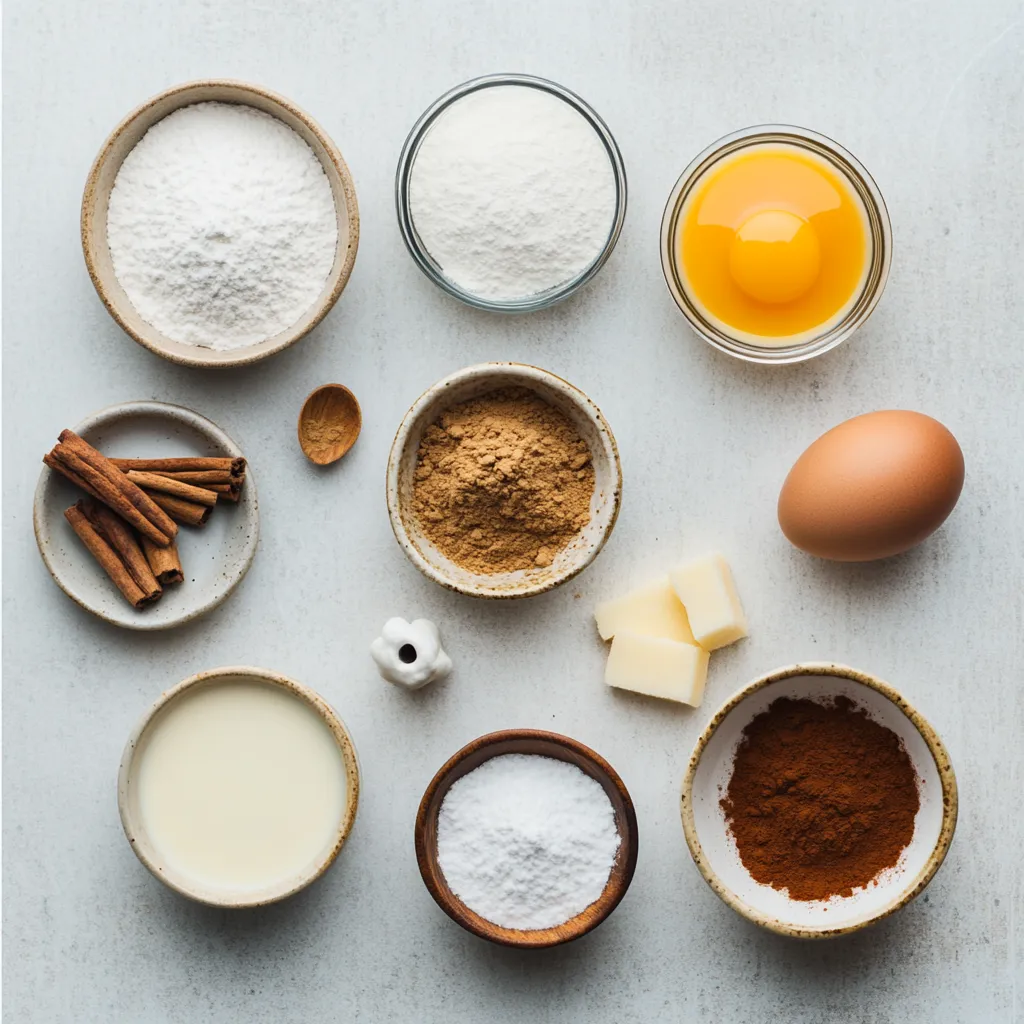
Ingredients
– 2 ¾ cups all-purpose flour
– 1 teaspoon baking soda
– 1 teaspoon cream of tartar
– 1 teaspoon ground cinnamon
– ½ teaspoon ground nutmeg
– ½ teaspoon salt
– 1 cup unsalted butter, softened to room temperature
– 1 cup granulated sugar
– 1 large egg
– 1 teaspoon pure vanilla extract
– ½ cup eggnog
– ½ cup powdered sugar (for rolling)
Instructions
1. Begin by preheating your oven to 350°F (175°C). Prepare a baking sheet by lining it with parchment paper to prevent sticking.
2. In a medium mixing bowl, combine the all-purpose flour, baking soda, cream of tartar, ground cinnamon, ground nutmeg, and salt. Whisk these dry ingredients together until evenly mixed, then set the bowl aside.
3. In a large mixing bowl, use a hand mixer or stand mixer to cream the softened butter and granulated sugar together. Beat them until the mixture is light, fluffy, and pale in color.
4. Add the large egg, pure vanilla extract, and eggnog to the butter-sugar mixture. Beat these ingredients together until they are fully incorporated and smooth.
5. Gradually introduce the dry ingredient mixture to the wet ingredients, mixing gently until just combined. Be careful not to overmix, as this can make the cookies tough.
6. Use a tablespoon to scoop out portions of the dough and roll them into smooth balls using your hands. Once shaped, roll each dough ball in powdered sugar to coat.
7. Arrange the sugar-coated dough balls on the prepared baking sheet, ensuring there is enough space between each ball for spreading during baking.
8. With your thumb, gently press down in the center of each cookie to create a thumbprint indentation.
9. Place the baking sheet in the preheated oven and bake for 10-12 minutes, or until the edges of the cookies turn a light golden brown.
10. After baking, allow the cookies to cool on the baking sheet for a few minutes before transferring them to a wire rack. Let them cool completely.
11. Optional: For an extra festive touch, drizzle a simple eggnog glaze over the cooled cookies.
Equipment Needed
Mixing Bowls
Using the right mixing bowls is crucial when preparing Eggnog Snickerdoodle Thumbprint Cookies. It is best to have separate bowls for mixing the wet and dry ingredients to avoid clumping and to ensure an even distribution of flavors. Look for medium to large-sized bowls to accommodate the volume of ingredients without risk of spillage.
Hand Mixer/Stand Mixer
A hand mixer or stand mixer is recommended for this recipe as it efficiently combines the ingredients, ensuring a smooth dough. The benefits of using an electric mixer are countless; they save time and effort, especially when creaming the butter and sugar. For the right texture, it’s essential that the butter is at room temperature, making it easier to achieve a light and fluffy mixture.
Baking Sheet and Parchment Paper
Using a baking sheet lined with parchment paper is a key step in baking these cookies. The parchment paper prevents sticking and ensures even cooking, allowing the cookies to retain their shape and texture. If you do not have parchment paper, you can alternatively use a silicone baking mat or lightly grease your baking sheet.
Preparing the Dough
Mixing Dry Ingredients
Properly incorporating dry ingredients is essential for achieving the optimal consistency in the cookie dough. Start by whisking the flour, baking soda, cream of tartar, cinnamon, nutmeg, and salt thoroughly to eliminate any lumps. This step ensures a uniform taste and texture throughout the cookies, allowing the spices to blend seamlessly with the other ingredients.
Creaming the Butter and Sugar
To achieve the perfect light and fluffy mixture, cream the softened unsalted butter with granulated sugar until airy. It usually takes a few minutes of mixing on medium speed to reach the desired texture. The significance of using room temperature butter cannot be overstated, as it plays a vital role in incorporating air into the mixture, creating the lightness that is characteristic of cookies.
Adding Wet Ingredients
When adding the large egg, vanilla extract, and eggnog to the creamed butter and sugar, it’s important to do so in a specific order. Start by adding the egg, ensuring it is fully mixed in before incorporating the liquids. This technique helps maintain a smooth mixture, turning the batter creamy and cohesive, ready for the dry ingredients.
Incorporating Dry Ingredients
It’s crucial to introduce the dry mixture gradually into the wet ingredients to maintain the desired cookie texture. Gently fold the mixture with a spatula or wooden spoon until just combined. Overmixing at this stage can lead to tough cookies, so be mindful to avoid this common mistake. The goal here is to achieve a soft dough that holds shape yet stays tender.
Reasons for rolling in powdered sugar
Rolling the cookies in powdered sugar before baking not only adds a visually appealing finish but also contributes a delightful texture that contrasts the soft interior. The powdered sugar creates a nice crust as it bakes, which enhances the overall experience. This layer offers a subtle sweetness that complements the rich flavors of eggnog and spices, making each bite more indulgent. Additionally, as the cookies bake, the powdered sugar can create a crackled effect that is reminiscent of snow, fitting perfectly with the holiday theme.
Alternate coating options for variety in flavor and texture
While powdered sugar is the traditional choice for coating Snickerdoodle Thumbprint Cookies, there are several alternative options that can elevate both flavor and texture. Consider rolling the dough balls in crushed nuts, such as pecans or walnuts, to add a crunchy texture and nutty flavor. For an extra touch of spice, a mixture of granulated sugar and pumpkin pie spice can be used, giving a nod to classic autumn flavors. Cocoa powder can also be an intriguing option for a chocolatey twist, providing depth to the cookie that harmonizes beautifully with the eggnog base.
Baking Process
Preparing the Baking Sheet
When preparing the baking sheet, ensure it is well-lined with parchment paper to prevent the cookies from sticking. This step is crucial, as it allows for easy removal of the cookies post-baking. When placing the dough balls onto the sheet, maintain adequate spacing—about 2-3 inches apart is ideal—to allow for proper spreading during baking. Overcrowding the baking sheet can result in joined cookies, ruining their delicate texture and shape.
Preventive measures for cookies spreading too much
To prevent cookies from spreading excessively, ensure your butter is softened but not melted. If the butter is too warm, it can cause the cookies to spread too much as they bake. Refrigerating the cookie dough for 30 minutes before scooping can also help maintain their shape. Additionally, consider using a combination of baking soda and cream of tartar, as specified in the recipe, to achieve a balanced rise without the excess spread.
Pressing the Indentations
Techniques for creating uniform thumbprint indentations
To create consistent and uniform thumbprint indentations, consider using the end of a measuring spoon or the rounded side of a small kitchen tool instead of your thumb, which could vary in pressure and size. Gently press in the center of each dough ball with the utensil until you reach the desired depth—this helps to form a perfect indent that can hold the optional glaze or additional toppings later.
Suggestions for alternative toppings if desired
If you wish to get creative, consider adding chocolate chips, a dollop of fruit preserves, or a spoonful of caramel sauce in the center after pressing the indentations. These add-ins can enhance flavor while providing an exciting surprise with every bite. Additionally, a sprinkle of sea salt atop the cookies pre-baking can elevate the flavor profile beautifully, balancing sweetness with a touch of savory.
Baking Time and Temperature
Explanation of oven temperature variations and their effects
Baking time and temperature play a critical role in achieving the perfect cookie. 350°F (175°C) is the ideal temperature for these Eggnog Snickerdoodle Thumbprint Cookies, allowing them to bake evenly. However, individual ovens can vary, and factors such as altitude and humidity can affect baking times. It’s essential to keep an eye on the cookies as they approach the end of their baking window to ensure they are not overbaked, leading to a dry texture.
Monitoring the cookies to prevent overbaking
For optimal results, watch for a light golden brown edge while the center remains slightly soft. The residual heat will continue to cook the cookies even after removed from the oven, ensuring a chewy texture. A timer will assist in monitoring the time, but visual cues are just as crucial. Allowing the cookies to cool on the baking sheet for a few minutes gives them time to set while retaining their delightful softness.
Cooling and Storing
Cooling on the Baking Sheet
Advantages of letting cookies cool initially on the sheet
Letting the cookies cool on the baking sheet for 5-10 minutes before transferring them to a wire rack provides several advantages. It allows the cookies to firm up slightly, making them easier to move without crumbling. Moreover, this cooling period helps maintain the deliciously soft center while ensuring they don’t become too hard from direct exposure to air too soon.
Recommended times for cooling before transferring
A cooling time of about 5 minutes is typically optimal. During this time, the cookies begin to set while still keeping a warm, soft texture. If the cookies are moved too quickly while still hot, they may lose their shape and crumble. Once they have firmed up just enough, transfer them to a wire rack to cool completely, ensuring your cookies retain their perfect consistency.
Transferring to a Wire Rack
Importance of cooling completely for texture
Cooling the cookies completely on a wire rack is essential for achieving the perfect texture. This allows air to circulate around them, preventing them from becoming soggy on the bottom. Complete cooling helps create a firm exterior while maintaining a chewy center, which is ideal for these delightful cookies.
Tips for handling hot cookies safely
When handling hot cookies, a spatula is your best friend. Use a spatula to gently lift the cookies from the baking sheet to the wire rack. Ensure you allow them to cool sufficiently before stacking or storing, as this can lead to a sticky mess if they are too warm.
Storage Tips
Ideal storage conditions to maintain freshness
To maintain the freshness of the Eggnog Snickerdoodle Thumbprint Cookies, store them in an airtight container at room temperature. This will help keep them soft and chewy for several days. If you live in a particularly humid climate, consider using a container with a desiccant to absorb excess moisture.
Suggestions for freezing cookies and recommended durations
These cookies also freeze exceptionally well, making them perfect for preparing ahead of time. To freeze, place cookies in a single layer on a baking sheet lined with parchment paper until solid. Once frozen, transfer them to a freezer-safe container with parchment paper between layers. They can be stored in the freezer for up to three months. When ready to enjoy, simply thaw them at room temperature or briefly in the oven to refresh.
Optional Eggnog Glaze
Ingredients for the Glaze
Simple ingredients needed for an easy glaze
If you wish to add an eggnog glaze for an extra festive touch, you’ll need powdered sugar, vanilla extract, and a splash of eggnog. The combination yields a smooth, pourable consistency that enhances the flavor of the cookies and adds a glossy finish.
Alternative flavor enhancements if desired
For additional flavor boosters, consider incorporating a pinch of nutmeg or ground cinnamon into the glaze, aligning it with the existing cookie flavor. A touch of rum extract can also complement the eggnog theme, making the glaze even more delectable.
Drizzling Technique
How to evenly drizzle the glaze over cookies
To achieve an even drizzle, use a piping bag fitted with a small round tip or simply a plastic bag with a corner snipped off. Drizzle the glaze over the completely cooled cookies in a back-and-forth motion to create a decorative design. Allow the glaze to set for a few minutes before serving.
Recommendations for presentation enhances with glaze
To enhance the presentation further, consider sprinkling a bit of additional nutmeg or crushed candies on top of the glaze while it’s still wet, adding both flavor and visual appeal to your cookies.
Presentation Tips
Display Ideas
Creative ways to present cookies for festive gatherings
When it comes to presenting your cookies at festive gatherings, consider arranging them on the table in colorful, handcrafted platters or festive cookie tins, making them a showstopper. Using decorative stands can elevate the display while allowing for ample space, encouraging guests to admire their beauty before enjoying.
Using decorative platters or cookie tins for gifting
For gifting, opt for themed cookie tins that resonate with the holiday spirit. Wrapping the tins with colorful ribbons and personalized gift tags can add a special touch and make your Eggnog Snickerdoodle Thumbprint Cookies gifts that are warmly received.
Garnishing Suggestions
Sprinkling of additional cinnamon or nutmeg
A light sprinkle of additional cinnamon or nutmeg on top of cookies after glazing can enhance their visual appeal while reinforcing their lovely flavor profile. This small step goes a long way in making cookies more festive.
Incorporating candy canes or chocolate shavings for variety
For a more extravagant presentation, consider finely crushing candy canes or shavings of chocolate. These can be sprinkled over the glaze for added texture and color, bringing an extra festive flair to your holiday cookie tray.
Flavor Profile
Taste and Texture
The Eggnog Snickerdoodle Thumbprint Cookies showcase a rich flavor journey, beginning with the sweet creaminess of eggnog enhanced by warm spices. The cinnamon and nutmeg provide a cozy warmth that complements the vanilla undertones beautifully. Each cookie offers a unique balance of chewy interior and slightly crisp edges, making every bite a delightful celebration of sweetness and spice.
Discussion on the balance of spices and sweetness
The careful balance of spices and sweetness is key to the success of these cookies. The sweetness from the granulated sugar and the richness of eggnog harmonize perfectly with the spices, preventing the cookies from becoming overly sweet. This balance makes them an enjoyable treat throughout the holiday season, appealing to a wide range of taste preferences.
Perfect Pairings
Suggested beverages or desserts that complement these cookies
Eggnog Snickerdoodle Thumbprint Cookies pair exceptionally well with a variety of seasonal beverages such as hot cocoa, spiced apple cider, or even a bold cup of coffee. Each beverage complements the warm spices while enhancing the flavors of the cookies. They are also perfect alongside holiday desserts, such as pumpkin pie or spiced cakes, adding to a festive spread.
Seasonal foods that enhance the festive spirit
Serving these cookies alongside traditional holiday foods, such as roast turkey, honey-glazed ham, or savory stuffing, creates a contrast that can elevate the overall meal experience. Their soft, sweet flavor provides a delightful culmination to a flavorful feast, leaving a warm and joyful feeling among family and friends.
Conclusion
Eggnog Snickerdoodle Thumbprint Cookies are a delightful blend of festive flavors, offering a soft and chewy texture that’s simply irresistible. In just 27 minutes, you can create a delicious treat that celebrates the warmth of the holiday season, making it a perfect addition to any dessert table. Whether enjoyed fresh out of the oven or adorned with a glaze, these cookies are sure to impress.
Eggnog Snickerdoodle Thumbprint Cookies Recipe
Ingredients
- 2 ¾ cups all-purpose flour
- 1 teaspoon baking soda
- 1 teaspoon cream of tartar
- 1 teaspoon ground cinnamon
- ½ teaspoon ground nutmeg
- ½ teaspoon salt
- 1 cup unsalted butter softened
- 1 cup granulated sugar
- 1 large egg
- 1 teaspoon pure vanilla extract
- ½ cup eggnog
- ½ cup powdered sugar for rolling
Instructions
- Preheat your oven to 350°F (175°C) and line a baking sheet with parchment paper.
- In a medium bowl, whisk together flour, baking soda, cream of tartar, cinnamon, nutmeg, and salt.
- In a large bowl, cream the softened butter and granulated sugar until light and fluffy.
- Add the egg, vanilla extract, and eggnog to the butter-sugar mixture and mix until smooth.
- Gradually mix in the dry ingredients until just combined, being careful not to overmix.
- Scoop out portions of dough, roll into balls, and coat in powdered sugar.
- Place the dough balls on the baking sheet, leaving space between them.
- Press your thumb gently into the center of each cookie to create an indentation.
- Bake for 10-12 minutes until edges are light golden brown.
- Cool on the baking sheet for a few minutes before transferring to a wire rack.