
Introduction
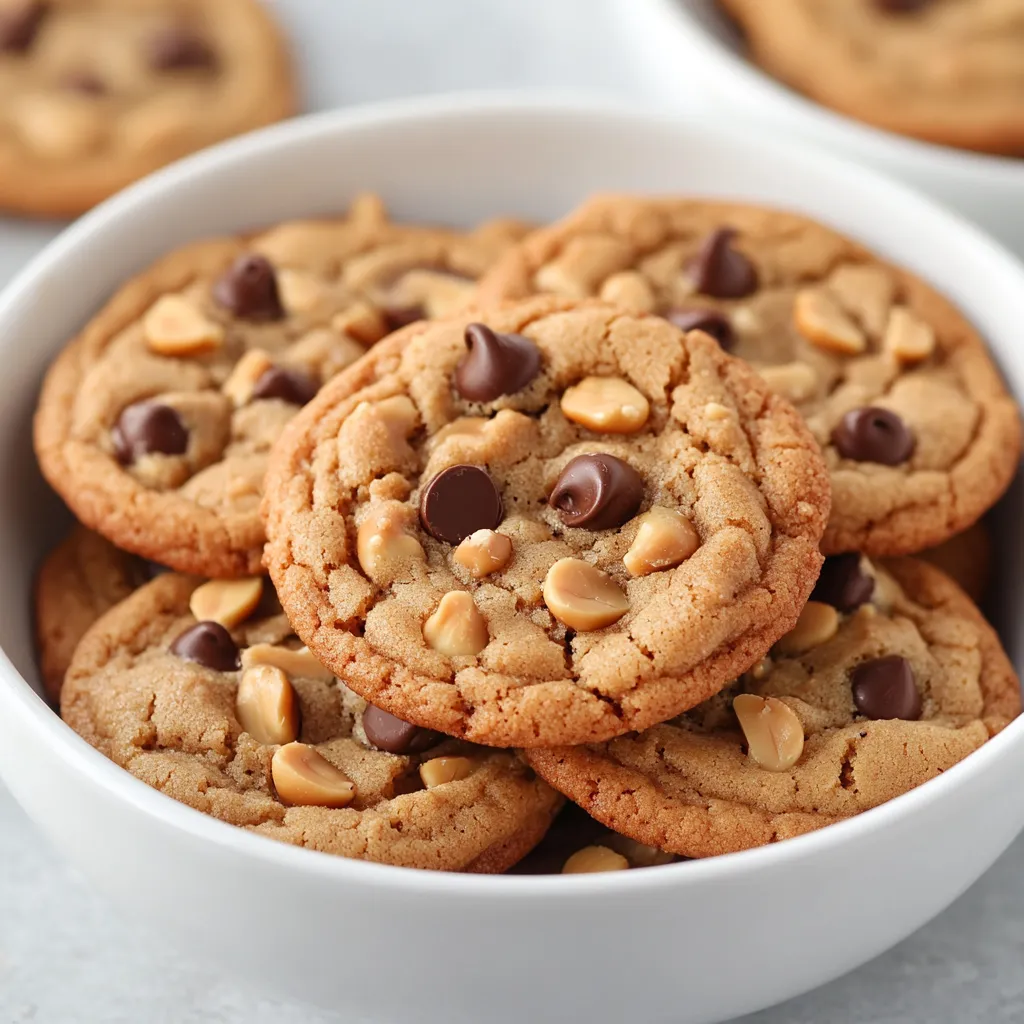
Delve into the delightful world of homemade cookies with our Peanut Butter Chocolate Chip Delight Cookies. These cookies are a perfect blend of creamy peanut butter and rich chocolate, sure to satisfy your sweet tooth. The combination of peanut butter and semi-sweet chocolate chips creates a harmonious balance that is both indulgent and comforting. Whether enjoyed with a glass of milk or as a sweet treat to share with friends and family, these cookies are an inviting option for any occasion, be it a cozy afternoon snack or a festive gathering.
These cookies delight with a soft, chewy texture complemented by just the right amount of sweetness from the sugars. The optional chopped roasted peanuts offer an extra layer of crunch, bringing texture and flavor that enhances the overall cookie experience. Baking these cookies fills your kitchen with a warm nutty aroma that is reminiscent of childhood baking days. The inviting scent and the delicious outcome make this treat hard to resist.
Recipe Overview
– Total Time: 22 minutes (10 minutes preparation + 12 minutes baking)
– Yield/Servings: Approximately 24 cookies
– Difficulty: Not specified in the recipe
Ingredients
Explore the necessary ingredients for enhancing your baking adventures:
Primary Components
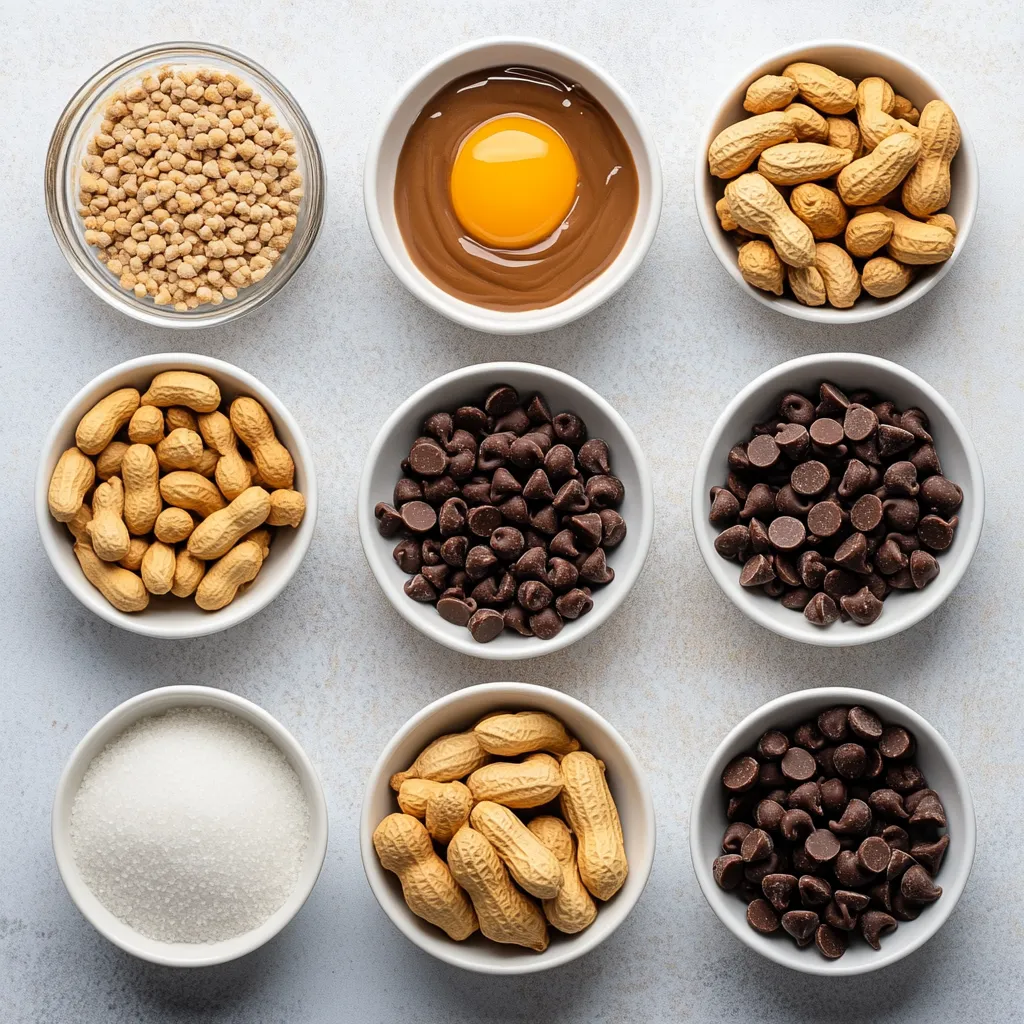
– 1 cup creamy peanut butter
– 1 cup packed light brown sugar
– 1/2 cup granulated sugar
– 1 large egg
– 1 teaspoon pure vanilla extract
Baking Essentials
– 1/2 teaspoon baking soda
– 1/4 teaspoon fine sea salt
Sweet Additions
– 1 cup semi-sweet chocolate chips
– 1/2 cup chopped roasted peanuts (optional)
Instructions
1. Begin by preheating your oven to 350°F (175°C). Prepare a baking sheet by lining it with parchment paper to prevent sticking.
2. In a spacious mixing bowl, combine the creamy peanut butter, packed brown sugar, and granulated sugar. Stir vigorously until the mixture is smooth and well-blended.
3. Incorporate the large egg and pure vanilla extract into the peanut butter mixture, beating until everything is fully combined and creamy.
4. Sprinkle the baking soda and fine sea salt over the mixture, then gently fold in until just combined—be careful not to overmix.
5. Carefully add the semi-sweet chocolate chips and chopped roasted peanuts (if desired), folding them into the dough until they are evenly distributed.
6. Using a tablespoon or a cookie scoop, drop rounded portions of dough onto the prepared baking sheet, ensuring they are spaced about 2 inches apart to allow for spreading.
7. Lightly press down on each cookie with the back of a fork, creating a charming crisscross pattern on top.
8. Place the baking sheet in the preheated oven and bake for 10-12 minutes, or until the edges are a light golden brown. The centers may appear slightly soft, which is perfect as they will firm up while cooling.
9. Once baked, remove the cookies from the oven and let them rest on the baking sheet for 5 minutes. Afterward, transfer them to a wire rack to cool completely.
Baking Preparation
Learn how to prepare your kitchen for the perfect cookie batch:
Preheating the Oven
Understanding the importance of preheating your oven to 350°F (175°C) is a crucial first step in baking cookies. Preheating ensures that your cookies bake evenly and at the right temperature from the moment they enter the oven. This initial heat aids in achieving that desired light golden brown edge and soft center. Not allowing sufficient preheating can lead to uneven baking, which is something no baker wishes to encounter.
Lining the Baking Sheet
Discover the benefits of using parchment paper for a non-stick surface. Lining your baking sheet with parchment paper not only facilitates easy removal of the cookies but also prevents them from sticking to the pan. This method guarantees that your cookies maintain their shape and texture without any hassle. Moreover, parchment paper helps in even baking by providing a consistent surface for the cookies to rise and spread, creating that perfect chewiness inside and slight crispness outside.
Mixing the Dough
Master the art of mixing dough for ideal cookie consistency:
Combining the Peanut Butter and Sugars
Exploring techniques to achieve a smooth and well-blended mixture starts with choosing the right bowl and mixing tool. Use a spacious mixing bowl to give adequate room as you stir the creamy peanut butter with the packed light brown sugar and granulated sugar. Mixing vigorously until the blend is smooth is essential, as it helps dissolve the sugar granules, ensuring they incorporate fully into the dough. A wooden spoon or sturdy spatula works perfectly for this technique, allowing for thorough mixing without splattering.
Incorporating Wet Ingredients
Learning how to seamlessly mix in the egg and vanilla for a creamy consistency is vital for achieving the right dough texture. After mixing in the sugars, add the large egg and pure vanilla extract to the peanut butter mixture. Beating until fully combined is essential, as this step introduces moisture and flavor that contribute to the overall texture. The creamy consistency is what helps bind all the components together and provides that rich flavor profile characteristic of gourmet cookies.
Folding in Dry Ingredients
Tips for incorporating baking soda and salt without overmixing are crucial to maintaining the desired cookie texture. By sprinkling the baking soda and fine sea salt evenly across the batter, you can ensure balanced distribution. Gently folding these ingredients into the mix is key; vigorous mixing can lead to tough cookies. The ideal folding technique involves a careful motion that combines ingredients while preserving air pockets, which contribute to tenderness in the final bake.
Adding Chocolate and Nuts
Explore how to enhance your cookies with chocolate and optional ingredients:
Choosing Chocolate Chips
To enhance your cookies, utilizing semi-sweet chocolate chips brings a delightful sweetness that perfectly complements the richness of the peanut butter. When measuring out the chips, aim for a generous addition that will provide a chocolatey burst in every cookie bite. If you are feeling adventurous, feel free to mix different types of chocolate, such as dark or milk chocolate, to create a custom flavor profile. Adding the optional chopped roasted peanuts not only gives more character but also introduces a satisfying crunch and a nutty taste, setting these cookies apart from ordinary recipes.
Reason for Opting for Semi-Sweet Chocolate Chips
Semi-sweet chocolate chips are the quintessential choice for these Peanut Butter Chocolate Chip Delight Cookies due to their balanced sweetness and rich chocolate flavor. Unlike milk chocolate, semi-sweet chips offer a slight bitterness that complements the sweetness of the cookie dough, creating a well-rounded taste experience. The cocoa content in semi-sweet chocolate is higher and more robust, which enhances the overall flavor profile of the cookies. Additionally, they melt perfectly during baking, forming luscious pools of chocolate that make each bite irresistible.
Incorporating Roasted Peanuts
Including roasted peanuts adds unique texture and flavor to these cookies. The crunch of the peanuts contrasts beautifully with the soft chewiness of the cookie, providing an enjoyable mouthfeel. Their rich, nutty flavor also amplifies the peanut butter base, enriching the overall flavor profile. If you’re considering whether to include roasted peanuts, think about the audiences’ preferences. If you wish to create a smoother texture or cater to those with nut allergies, you might choose to omit them or replace them with seeds like sunflower seeds.
Shaping the Cookies
Perfecting the shape and structure of your cookies is essential for both aesthetics and even baking.
Portioning the Dough
To ensure uniform cookie size, use a tablespoon or a cookie scoop to measure out portions of dough. By leveling the scoop against the side of the bowl or using the flat edge of the tablespoon, you can achieve consistent sizes that bake evenly. This helps prevent some cookies from being overbaked while others may remain undercooked. Additionally, a cookie scoop allows for less mess and quicker portioning, leading to a smoother workflow in the kitchen.
Creating the Crisscross Pattern
To achieve the classic fork-drawn crisscross pattern, once you have placed the cookie dough balls on the baking sheet, take a fork and press down lightly on the top of each ball. Use a gentle, firm pressure and draw lines down the center in one direction, then turn the fork 90 degrees and press down again to create the crosshatch effect. This not only provides a decorative touch but also helps the cookies bake evenly by allowing a bit more surface area to be exposed to the heat.
Baking Process
Understanding the baking process is key to achieving the perfect cookie.
Ideal Baking Time and Temperature
These cookies are perfectly baked when the edges turn a light golden brown, while the centers still appear slightly soft. This typically occurs around the 10-12 minute mark at 350°F (175°C). Keep an eye on them as oven temperatures can vary. If you notice the edges beginning to darken significantly earlier than 10 minutes, it might be wise to remove them sooner to prevent overbaking.
Cooling Duration
After pulling the cookies from the oven, it’s important to let them rest on the baking sheet for about 5 minutes. This resting time is crucial as it allows the cookies to firm up slightly, which prevents them from breaking apart when moved. If transferred immediately to a wire rack, they could lose their shape while still warm. Once on the cooling rack, let them cool completely before storing or serving to ensure they maintain their texture.
Presentation Suggestions
Presenting your finished cookies creatively can enhance a simple treat into a delightful dessert experience.
Serving on Platters or Stands
Consider displaying your cookies on a rustic wooden platter or a vibrant cake stand to catch the eye. Layering cookies in a tower or providing small tongs for a buffet-style setup invites guests to indulge freely. Pairing the cookies with a glass of milk or a scoop of vanilla ice cream alongside can make the serving even more appealing.
Enhancing with Chocolate or Sea Salt
For an elevated finish, consider drizzling some melted chocolate over the cooled cookies, adding a touch of elegance and extra flavor. A light sprinkle of flaky sea salt on top can also enhance the sweet and salty flavor contrast that makes these cookies so enjoyable. This added detail can make them feel more gourmet and special for gatherings or celebrations.
Variations and Customizations
Explore alternative ingredients and methods to give your cookies a personal twist.
Substituting Nut Butters
If you’re looking to experiment, other nut butters can be used in place of peanut butter for different flavor profiles. Almond butter or cashew butter can provide a creamy consistency similar to peanut butter while imparting their unique flavors. However, keep in mind that the final taste and texture may differ based on the nut butter choosen, particularly if they have added ingredients or salt.
Dietary Modifications
For those with dietary restrictions, there are various adaptations to consider. Gluten-free flours can be used to replace regular flour if necessary—though this recipe does not contain traditional flour, ensuring that gluten-intolerant individuals can enjoy it as is. For vegan adaptations, consider replacing the egg with a flax egg (1 tablespoon ground flaxseed mixed with 2.5 tablespoons water) as a binder to maintain texture and binding in the cookie dough.
Storing and Freezing Cookies
Learn the best practices for storing your cookies for long-lasting freshness.
Best Storage Practices
To keep your cookies fresh, store them in an airtight container at room temperature. This method helps retain moisture, ensuring they remain soft and chewy for several days. To maintain texture, consider placing a piece of bread in the container, as this will help absorb excess moisture and prevent the cookies from becoming too hard.
Freezing for Later
For long-term storage, these cookies can be frozen. Wrap individual baked cookies in plastic wrap or foil, then place them in a freezer-safe Ziploc bag. They can maintain their flavor and texture for up to three months. If you prefer freezing unbaked dough, scoop the dough balls, freeze them on a baking sheet until firm, and then transfer to a plastic bag. When ready to bake, simply preheat the oven and bake straight from frozen, adding a minute or two to the baking time.
Conclusion
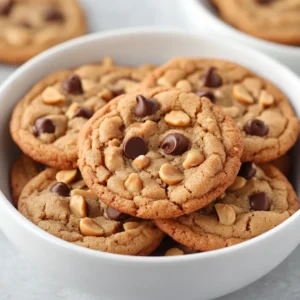
These Peanut Butter Chocolate Chip Delight Cookies feature a tender, chewy texture, coupled with the rich flavors of peanut butter and chocolate. With a preparation time of just 10 minutes and a baking time of around 12 minutes, they are a quick yet delightful treat perfect for any occasion. Each cookie embodies the essence of homemade sweetness, making them a wonderful addition to any dessert table.
Peanut Butter Chocolate Chip Delight Cookies
Ingredients
- 1 cup creamy peanut butter
- 1 cup packed light brown sugar
- ½ cup granulated sugar
- 1 large egg
- 1 teaspoon pure vanilla extract
- ½ teaspoon baking soda
- ¼ teaspoon fine sea salt
- 1 cup semi-sweet chocolate chips
- ½ cup chopped roasted peanuts optional
Instructions
-
Preheat your oven to 350°F (175°C) and line a baking sheet with parchment paper.
-
In a mixing bowl, combine creamy peanut butter, packed brown sugar, and granulated sugar until smooth.
-
Add the egg and vanilla extract, beating until fully combined.
-
Sprinkle in baking soda and sea salt, folding gently until just combined.
-
Fold in chocolate chips and chopped peanuts until evenly distributed.
-
Drop rounded portions of dough onto the baking sheet, spaced about 2 inches apart.
-
Press down each cookie with a fork to create a crisscross pattern.
-
Bake for 10-12 minutes until edges are golden brown and centers are slightly soft.
-
Let cookies rest on the baking sheet for 5 minutes before transferring to a wire rack to cool.