

Introduction
Chocolate chip cookies have undeniably secured their place as a cherished dessert in American cuisine. Their rich, sweet aroma and enticing taste make them a classic go-to treat for many occasions, whether it’s a cozy family gathering or simply a sweet indulgence after a long day. The delightful combination of melting chocolate against a perfectly baked, soft center brings a sense of nostalgia, reminding us of warm afternoons spent in a family kitchen or sharing cookies with friends.
The origins of chocolate chip cookies date back to the early 1930s when Ruth Wakefield, the owner of the Toll House Inn in Massachusetts, accidentally created the first batch by mixing semi-sweet chocolate into her cookie dough. The result? A scrumptious dessert that caught the hearts of many and eventually became a staple in homes across the nation. Over decades, variations of this classic treat emerged, but nothing quite beats the satisfaction of preparing these cookies from scratch.
The joy of baking at home extends beyond just the taste; it’s an experience that can be shared with loved ones. Imagine the excited faces of children as they eagerly await cookies fresh out of the oven, or the satisfaction of sharing a plate of warm cookies with friends. The Ultimate Chocolate Chip Cookies recipe is designed to bring joy and satisfaction, with the added bonus of being incredibly easy to make!
Recipe Overview
– Prep Time: 15 minutes
– Cook Time: 12 minutes
– Total Time: 27 minutes
– Course: Dessert
– Cuisine: American
– Servings: 24 cookies
– Calories: Approximately 150 per cookie
These Ultimate Chocolate Chip Cookies are characterized by their soft centers and irresistible crispy edges. Each bite offers a deliciously gooey pocket of melted chocolate encased in a perfectly baked cookie. For those looking to add an extra crunch to their cookies, there’s the optional inclusion of chopped walnuts, enhancing both texture and flavor. With a total yield of 24 cookies and roughly 150 calories per cookie, they’re perfect for sharing or indulging all on your own.
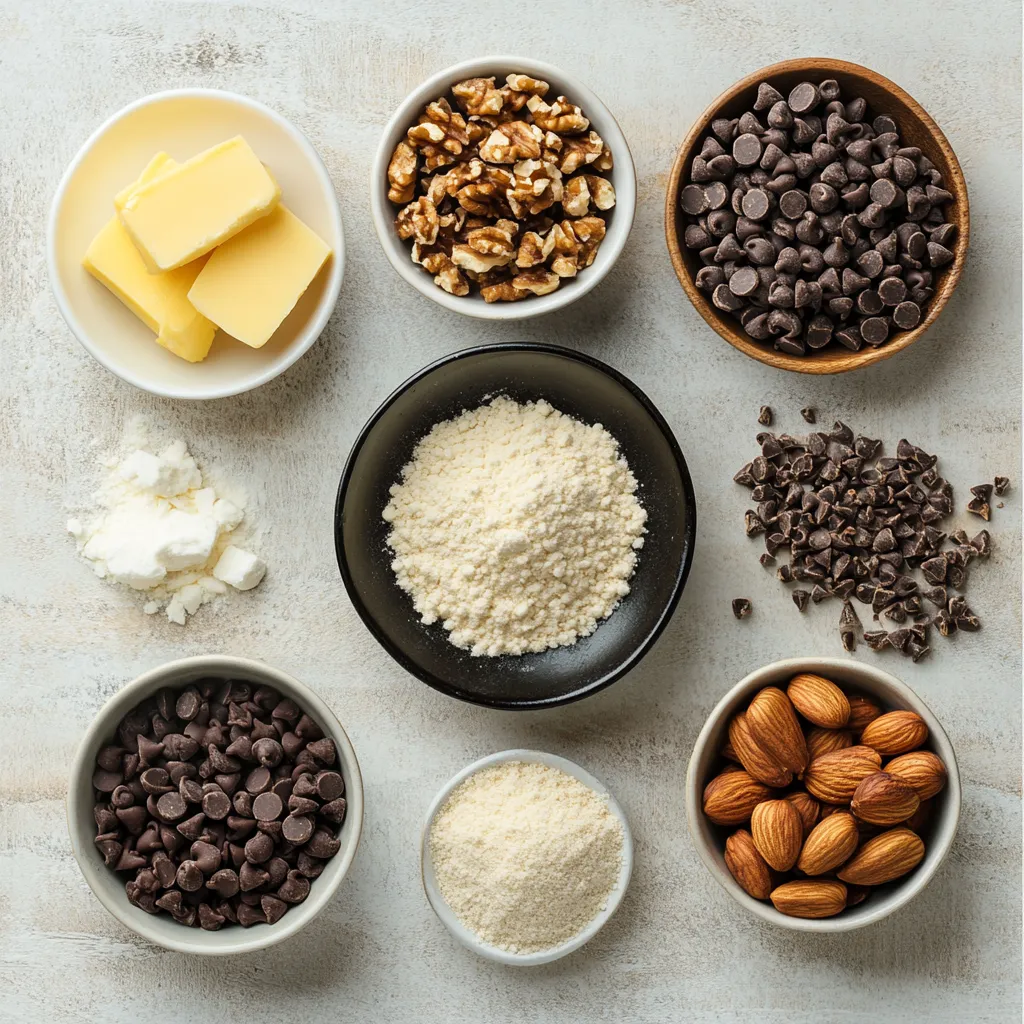
Ingredients
– 1 cup unsalted butter, softened to room temperature
– 1 cup packed brown sugar
– 1/2 cup granulated sugar
– 2 large eggs, at room temperature
– 2 teaspoons pure vanilla extract
– 3 cups all-purpose flour
– 1 teaspoon baking soda
– 1/2 teaspoon fine sea salt
– 2 cups semi-sweet chocolate chips
– 1 cup chopped walnuts (optional for added crunch)
Each ingredient in this Ultimate Chocolate Chip Cookies recipe serves a specific purpose in creating the perfect cookie.
Starting with unsalted butter, its softness at room temperature allows for proper creaming with sugars, creating a light and fluffy texture essential for the cookie’s body. The packed brown sugar contributes not only sweetness but also moisture and a rich flavor that complements the chocolate. Meanwhile, granulated sugar adds to the sugary taste and texture while enhancing the browning process during baking.
The eggs are crucial for binding the ingredients together, providing moisture that helps the cookies retain their delicious softness. With pure vanilla extract, the overall flavor deepens, enhancing the sweetness beautifully.
All-purpose flour serves as the main structure for the cookies, while baking soda acts as a leavening agent to help them rise and achieve that dreamy texture. Fine sea salt doesn’t just add taste but also balances and enhances the sweetness of the chocolate.
The star of the show, semi-sweet chocolate chips, delivers the classic chocolate flavor we all crave. For those wishing to diversify the texture, chopped walnuts can be added for an enticing crunch, providing not just flavor but a delightful surprise in every bite.
Instructions
1. Begin by preheating your oven to 350°F (175°C). Prepare a baking sheet by lining it with parchment paper to prevent sticking.
2. In a large mixing bowl, combine the softened butter, packed brown sugar, and granulated sugar. Using an electric mixer, cream these ingredients together until the mixture is light, fluffy, and pale in color—this should take about 2-3 minutes.
3. Add the eggs to the creamed mixture one at a time, ensuring each egg is fully incorporated before adding the next. Then, mix in the pure vanilla extract until well combined.
4. In a separate bowl, whisk together the all-purpose flour, baking soda, and fine sea salt. This helps to evenly distribute the leavening agent and salt throughout the flour.
5. Gradually add the dry mixture to the wet ingredients, mixing gently until just combined. Be careful not to overmix; the dough should be slightly sticky.
6. Carefully fold in the chocolate chips and chopped walnuts (if using) with a spatula, ensuring they are evenly distributed throughout the dough.
7. Using a tablespoon or cookie scoop, drop rounded balls of dough onto the prepared baking sheet, making sure to leave about 2 inches of space between each cookie to allow for spreading.
8. Bake the cookies in the preheated oven for 10-12 minutes, or until the edges are golden brown, while the centers remain soft. Keep an eye on them to avoid overbaking!
9. Once baked, remove the cookies from the oven and let them cool on the baking sheet for 5 minutes. This allows them to firm up slightly before transferring them to a wire rack to cool completely.
10. Indulge in your delightful homemade chocolate chip cookies, ideally paired with a refreshing glass of milk or your favorite non-dairy alternative!
Now, it is time to break down the preparation and mixing of the dough, ensuring that every step contributes to enhancing the overall baking experience.
Tools and Equipment
To achieve the best results when making these Ultimate Chocolate Chip Cookies, certain kitchen tools and equipment are essential. An electric mixer is ideal for creaming the butter and sugars, making this step effortless and ensuring that the mixture becomes beautifully light and fluffy. You’ll need a couple of mixing bowls of various sizes to help keep your wet and dry ingredients organized, effectively preventing any mess while facilitating a smooth workflow.
Using a baking sheet lined with parchment paper is crucial for the baking process, as it prevents the cookies from sticking to the surface and enables even baking. A spatula comes in handy for folding in the chocolate chips and walnuts carefully, ensuring an even distribution without overmixing the dough. Accurate measurements with measuring cups and spoons will ensure that your cookies turn out perfectly every time, so having a reliable set at your disposal is important.
Preparation Steps
Preparation is key to the success of your cookies, and one of the most essential first steps is preheating the oven. Doing so ensures that when the cookies go in, they bake evenly and develop that irresistibly crisp exterior while remaining soft on the inside.
One of the most critical aspects of the preparation is properly creaming the butter and sugars. The softened butter should be mixed with the sugars until light and fluffy, which typically takes about 2-3 minutes. This step is integral to incorporate air into the mixture, aiding in the leavening process.
It’s also beneficial to have your eggs at room temperature because they mix more easily with the other ingredients, resulting in a smoother dough. When whisking together the dry ingredients, such as flour and baking soda, it’s essential to achieve uniformity to ensure even leavening and flavor throughout the cookies.
Mixing the Dough
Once you have set the stage with all your ingredients, it’s time to mix them into a delightful dough. The process of combining your wet and dry mixtures should be done gradually. As you blend them, take care not to overmix; doing so will develop gluten, resulting in tough cookies rather than the soft and chewy texture we desire.
When it comes to adding in the chocolate chips and walnuts — if you choose to include them — folding them in gently with a spatula helps maintain that lovely texture of the dough. The end mix should be slightly sticky, inviting and reminiscent of your favorite cookie shop’s dough.
Stay tuned for Part 2, where we’ll discuss baking tips, serving suggestions, and possible variations to try.
Importance of Not Overmixing the Dough
When creating the ultimate chocolate chip cookie, one of the key factors to consider is the mixing process. Overmixing the dough can lead to cookies that are tough instead of soft and chewy. This happens because excessive mixing encourages gluten formation, resulting in a denser texture. The goal is to create a slightly sticky dough that holds all ingredients together without becoming overly elastic.
To avoid overmixing, incorporate the dry ingredients just until they are combined with the wet mixture. It’s completely fine for some small flour streaks to remain; these will be fully mixed in during the folding process of adding chocolate chips and nuts. This gentle approach maintains the lightness of the cookies and results in a beautifully baked treat.
Tips for Achieving the Right Dough Consistency
For the ideal cookie dough, aim for a consistency that is slightly sticky yet manageable; if it’s too dry, the cookies may crumble, and if it’s too wet, they will spread too much in the oven. Here are some tips to achieve the perfect thickness:
– When measuring flour, ensure it’s spooned into the measuring cup and leveled off rather than scooped directly. Scooping can compact the flour, resulting in too much being added.
– If the dough feels too sticky to handle, let it rest for a few minutes, or chill it briefly in the refrigerator. This allows the butter to firm up slightly, making it easier to scoop or shape.
– Remember to adjust the amount of flour based on humidity and other environmental factors for best results.
Incorporating Mix-ins
Best Practices for Folding in Chocolate Chips and Walnuts
Integrating chocolate chips and optional walnuts into your dough is essential for achieving an even distribution of flavors and textures. When folding in the mix-ins, use a spatula and gently incorporate them into the dough rather than stirring aggressively. This ensures that your cookies maintain their airy consistency while evenly distributing the mix-ins.
Distribution Tips for Even Chocolate/Walnut Coverage
The objective is to have every cookie filled with an equal amount of chocolate and nut goodness. A good practice is to add a heaping amount of chips and nuts, and then fold gently until you see a harmonious blend throughout the dough. Doing this in smaller batches can also help in achieving better distribution and prevent any clumping of the chocolate and nuts.
Optional Variations: Using Different Types of Chocolate or Nuts
While semi-sweet chocolate chips are a classic choice, feel free to experiment with variations to suit your taste. Dark chocolate chips can bring a richer flavor, while white chocolate offers a sweet contrast. You can even use a combination of different chocolates to create a layered taste profile. Additionally, varying the nuts you use can add unique flavors—try macadamia nuts for a tropical twist or even almonds for a crunchier bite.
Baking the Cookies
Baking Process and Tips for Optimal Results
Once your dough is ready to go, it’s time to bake! Preheat your oven carefully to ensure it reaches the required temperature of 350°F (175°C) for optimal cookie baking. Consistency in oven temperature is crucial to achieving even baking.
Ideal Baking Temperature and Time, with Indicators for Doneness
Baking the cookies for 10 to 12 minutes is ideal. Look for cookies that have golden-brown edges while the centers remain soft and slightly underbaked. They will continue to cook on the baking sheet after removal from the oven, resulting in a perfectly gooey center. If the centers look shiny, give them a minute longer, but keep a close eye to ensure they don’t overbake.
Importance of Spacing on the Baking Sheet to Prevent Merging
Spacing is crucial when arranging your cookie dough on the baking sheet. Each dough ball should be placed about 2 inches apart to allow for spreading. If cookies are too close, they can merge, resulting in a large, misshaped cookie that lacks the distinct texture and flavor bites of individual cookies. Proper spacing will help them maintain their shape and texture.
Cooling and Storage
Cooling the Cookies for Perfect Texture
After baking, allow the cookies to cool on the baking sheet for about 5 minutes. This step is vital as it gives them a chance to firm up a bit before being transferred. If they are moved too soon, they may fall apart. Cooling slightly helps achieve a nice, chewy center with perfectly crisp edges.
Explanation of the Cooling Process on a Baking Sheet vs. Wire Rack
After the initial cooling on the baking sheet, transferring the cookies to a wire rack is important. This allows air to circulate around all sides of the cookie, preventing them from becoming soggy. A wire rack helps maintain the best texture, especially for storing or serving afterward.
Storage Tips for Maintaining Freshness
Proper storage is critical for retaining the flavor and texture of your cookies. Store them in an airtight container at room temperature for up to a week. You may also choose to refrigerate them to extend their freshness, though this may alter the texture slightly.
Recommendations for Short-term and Long-term Storage Options
For longer storage, consider freezing the cookies. They can be placed in a freezer-safe bag and stored for up to 3 months. To enjoy, simply thaw them at room temperature or pop them in the microwave for a few seconds to regain that fresh-baked feel.
Presentation Ideas
Creative Ways to Serve Chocolate Chip Cookies
The presentation of your cookies can elevate any gathering. Consider serving them on a decorative plate, stacked in a rustic manner, or arranged neatly with slight variations in flavor and type. The visual appeal adds an inviting touch.
Ideas for Stacking and Plating for Gatherings
When hosting, think about using tiered stands to display your cookies. This not only creates an eye-catching centerpiece but also encourages guests to indulge. You may incorporate small labels with the names of flavors or variations you offer.
Use of Decorative Touches, Such as Flaky Sea Salt
Adding a sprinkle of flaky sea salt on top just before serving can enhance the flavor and give a gourmet touch to your cookies. The contrast between sweet and salty makes for a delightful experience.
Suggestions for Pairing with Drinks (Milk or Non-Dairy Alternatives)
Chocolate chip cookies are often paired with cold milk. For those seeking alternatives, consider almond milk or oat milk to complement the cookies. The creamy texture of these drinks balances beautifully with the soft, gooey cookies.
Troubleshooting Common Issues
Solutions for Potential Baking Problems
Baking cookies can sometimes lead to unexpected results. Here are some common issues and how to troubleshoot them successfully.
Cookies Spreading Too Much: Causes and Fixes
If your cookies spread excessively, it might be due to warm butter or not enough flour. Ensure your butter is softened correctly and consider adding an extra tablespoon of flour in your next batch if spreading occurs.
Overbaked Cookies: Indicators and Tips for Perfect Timing
Watch closely for color changes, particularly for the edges. The cookies should be removed when the edges are golden, and centers slightly underdone for the best chewiness.
Cookies Being Too Dry: Possible Adjustments to Moisture Levels in Future Batches
If you find your cookies are dry, this might be a result of overbaking or insufficient fat content. Adjusting the butter amount or ensuring that eggs are fully integrated can help maintain moist cookies in future attempts.
Variations and Customizations
Suggestions for Variations to the Classic Recipe
The Ultimate Chocolate Chip Cookies can be customized in numerous ways to suit your flavor preferences and dietary requirements. Feel free to explore your creativity based on what you have on hand or your specific tastes.
Substitutions for Different Sugars (Like Coconut Sugar)
You can experiment by substituting brown sugar with coconut sugar for a hint of caramel flavor and healthier alternative. This will add natural sweetness while slightly changing the texture, offering a unique twist.
Incorporating Different Types of Chocolate (Dark, White, etc.)
Utilizing different chocolate options can lead to further explorations; try mixing dark, semi-sweet, and white chocolates together for a delightful multi-chocolate cookie experience.
Ideas for Flavor Add-ins Like Peanut Butter or Spices
Consider adding a swirl of peanut butter to your dough or a sprinkle of cinnamon for a warm spice element. Both options will give your cookies an exciting new flavor profile without compromising the original essence.
Nutritional Information
Overview of the Nutritional Content of the Cookies
These chocolate chip cookies are rich in flavor and comfort, providing a caloric indulgence of approximately 150 calories per cookie. While they are a treat, they can be enjoyed as part of a balanced diet.
Breaking Down Calories per Cookie
The caloric count primarily comes from the butter, sugars, and chocolate chips. The balance of these ingredients offers a satisfying experience without excessive guilt when enjoyed mindfully.
Discussing Potential Nutritional Benefits from Ingredients (e.g., Walnuts)
If you choose to include walnuts, you add a dose of healthy fats, omega-3s, and protein to your cookies, which could enhance the overall nutritional profile.
Conclusion
The Ultimate Chocolate Chip Cookies offer a delightful balance of soft interiors and crisp edges, making them an indulgent treat. With a total preparation and baking time of 27 minutes, you can enjoy this American classic fresh out of the oven. The flavor is enhanced with rich chocolate chips, and for those who love a bit of crunch, optional walnuts provide an added texture. The cookies are perfect for sharing or enjoying with a comforting glass of milk.

The Ultimate Chocolate Chip Cookies Recipe
Ingredients
- 1 cup unsalted butter softened
- 1 cup packed brown sugar
- ½ cup granulated sugar
- 2 large eggs
- 2 teaspoons pure vanilla extract
- 3 cups all-purpose flour
- 1 teaspoon baking soda
- ½ teaspoon fine sea salt
- 2 cups semi-sweet chocolate chips
- 1 cup chopped walnuts optional
Instructions
- Preheat your oven to 350°F (175°C) and line a baking sheet with parchment paper.
- In a large bowl, cream together the softened butter, brown sugar, and granulated sugar until light and fluffy.
- Add the eggs one at a time, mixing well after each addition, then stir in the vanilla extract.
- In a separate bowl, whisk together the flour, baking soda, and sea salt.
- Gradually mix the dry ingredients into the wet ingredients until just combined.
- Fold in the chocolate chips and walnuts if using.
- Drop rounded balls of dough onto the prepared baking sheet, leaving space between each cookie.
- Bake for 10-12 minutes until edges are golden brown and centers are soft.
- Let the cookies cool on the baking sheet for 5 minutes before transferring to a wire rack.
- Enjoy your cookies with a glass of milk or a non-dairy alternative!