

Introduction
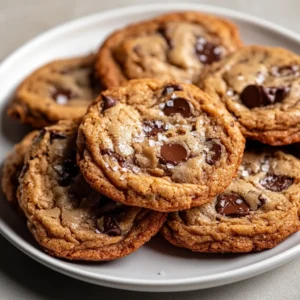
Introducing the ultimate treat for chocolate chip cookie lovers: ooey-gooey brown butter chocolate chip cookies. This delightful dessert combines the rich, nutty flavor of brown butter with the comforting sweetness of chocolate chips, creating a perfect balance of flavor and texture. The gooey interiors contrasted against slightly crispy edges make these cookies irresistibly pleasant to bite into, offering a unique experience with each mouthful.
These cookies are perfect for any occasion, whether it’s a cozy evening at home, a gathering with friends, or a special treat to brighten up someone’s day. The complex flavor profile of the brown butter enhances the classic chocolate chip cookie, taking it to new heights. In this article, we will walk you through the step-by-step process for making these incredible cookies, ensuring every bite is a moment of bliss.
Recipe Overview
– Total Time: 1 hour 15 minutes
– Yield/Servings: 24 cookies
– Difficulty: Not specified in the recipe
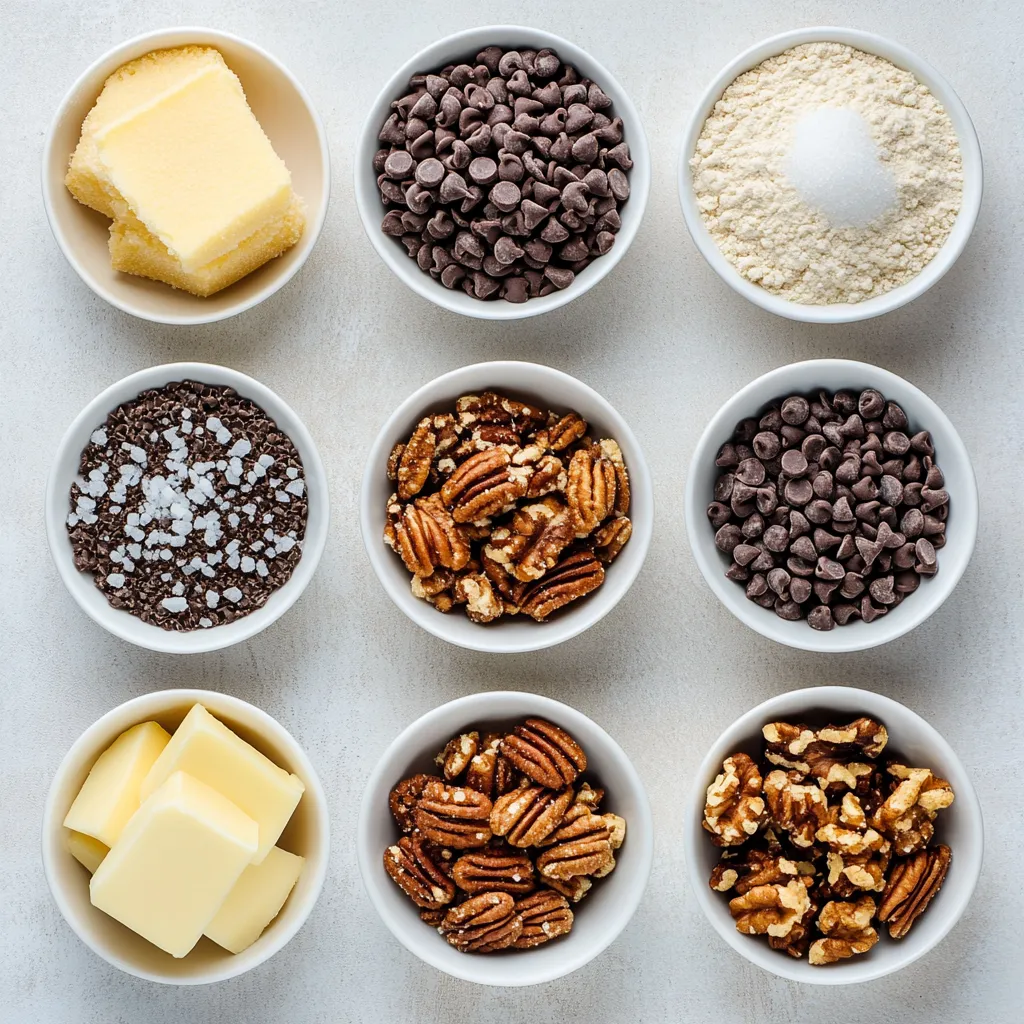
Ingredients
– 1 cup unsalted butter (equivalent to 2 sticks)
– 1 cup packed light brown sugar
– 1/2 cup granulated sugar
– 2 large eggs, at room temperature
– 1 tablespoon pure vanilla extract
– 2 1/4 cups all-purpose flour
– 1 teaspoon baking soda
– 1/2 teaspoon sea salt
– 1 cup semi-sweet chocolate chips
– 1/2 cup chopped walnuts or pecans (optional)
– Flaky sea salt, for garnish
Instructions
1. Brown the Butter: In a medium saucepan over medium heat, melt the unsalted butter. Stir frequently as it cooks, allowing it to bubble and foam. Continue until it reaches a rich golden brown color and emits a nutty aroma, which should take about 5-7 minutes. Once browned, remove the pan from heat and let the butter cool slightly.
2. Combine Sugars and Butter: In a large mixing bowl, combine the packed brown sugar and granulated sugar. Pour in the warm browned butter, mixing thoroughly until the sugars are fully integrated with the butter.
3. Incorporate Eggs and Vanilla: Add the eggs to the mixture, one at a time, beating well after each addition. Then, mix in the vanilla extract until the batter is smooth and creamy.
4. Mix Dry Ingredients: In a separate bowl, whisk together the all-purpose flour, baking soda, and sea salt. Gradually add this dry mixture to the wet ingredients, stirring gently until just combined. Be careful not to overmix.
5. Add Chocolate and Nuts: Carefully fold in the semi-sweet chocolate chips and the chopped walnuts or pecans (if using), ensuring they are evenly distributed throughout the dough.
6. Chill the Dough: Cover the mixing bowl with plastic wrap or a clean kitchen towel and refrigerate the dough for at least 30 minutes. For enhanced flavor and texture, you can chill it overnight.
7. Preheat the Oven: Preheat your oven to 350°F (175°C). Line two baking sheets with parchment paper to prevent sticking.
8. Scoop and Prepare for Baking: Using a cookie scoop or a tablespoon, drop dough balls onto the prepared baking sheets, spacing them about 2 inches apart to allow for spreading. Lightly sprinkle each cookie with flaky sea salt for an extra touch of flavor.
9. Bake the Cookies: Place the baking sheets in the preheated oven and bake for 10-12 minutes. The edges should turn golden brown while the centers remain soft and slightly underbaked. Once done, remove from the oven and allow the cookies to cool on the baking sheets for 5 minutes before transferring them to wire racks to cool completely.
10. Serve and Enjoy: For the ultimate gooey experience, serve the cookies warm. Alternatively, store any leftovers in an airtight container for later enjoyment.
Understanding Brown Butter
What is Brown Butter?
Brown butter, also known as beurre noisette, is a cooking technique where butter is melted and cooked until the milk solids turn a golden brown. This process enhances the flavor, resulting in a nutty taste and delightful aroma. The transformation not only adds depth to savory dishes but also elevates sweet treats, such as our chocolate chip cookies. The nutty flavor of brown butter complements the sweetness of the sugar while balancing the richness of the chocolate.
The Flavor Profile
The rich taste of brown butter plays a pivotal role in the appeal of these cookies. As the milk solids caramelize, they contribute complex flavors, including hints of toffee and a subtle nuttiness, which can make even the simplest cookie feel gourmet. It creates a delightful contrast with the sweetness of the chocolate and the sugar, giving each bite a rich, multi-dimensional flavor that is downright addictive.
Tips for Perfect Brown Butter
When browning butter, patience is key. Start by melting it over medium heat, and stir constantly to monitor its progress. The milk solids should begin to separate and sink to the bottom of the pan, turning a golden brown. Watch carefully, as it can go from perfectly browned to burnt in a matter of seconds. The ideal color is a deep amber, resembling the perfect tan. Add this gorgeous brown butter to your cookie batter quickly to take advantage of its delicious flavor while it’s still warm.
Preparing the Dough
Mixing Wet Ingredients
When mixing the sugars with the browned butter, it’s crucial to do so while the butter is still warm, as this will help dissolve the sugars effectively. Utilize a whisk or a hand mixer for best results, ensuring the mixture is well blended and creamy. The blend should have a glossy appearance, signaling a smooth integration of the sugars and butter, which plays a vital role in achieving the perfect cookie texture.
Incorporating Eggs and Vanilla
The addition of eggs is a crucial step that contributes to the cookies’ texture. Incorporate them one at a time, ensuring thorough mixing after each addition. This prevents the batter from becoming too dense and allows for better aeration. Room temperature eggs will mix more evenly, preventing any cold spots that might interfere with the batter consistency. Adding vanilla at this stage enhances the flavor profile, creating a rich, aromatic base that underscores the chocolate chips.
Combining Dry Ingredients
When it comes to the dry ingredients, use a gentle hand. Whisking together the flour, baking soda, and sea salt beforehand ensures they are evenly distributed before mixing. Adding this dry mixture to the wet ingredients should be done gradually. Be cautious; overmixing at this point can develop the gluten in the flour, leading to tough cookies. Instead, stir just until you see the flour disappear, leaving a slightly lumpy batter ready to embrace the chocolate chips.
Chocolate and Nuts
Choosing Chocolate Chips
The choice of chocolate chips can significantly impact the overall flavor of your cookies. Semi-sweet chocolate chips offer a delightful balance between sweetness and bitterness, providing a rich depth of flavor that perfectly complements the caramel notes of the brown butter and the sweetness of the sugars. Feel free to experiment with different types of chocolate: dark chocolate chips could add a more intense flavor, while milk chocolate would increase the sweetness.
In addition to chocolate, you might consider adding nuts for texture and flavor. Chopped walnuts or pecans add a crunchy contrast to the soft, gooey centers of the cookies. They also enhance the nutty profile, complementing the brown butter beautifully. Whether you prefer them or not, the decision can tailor these cookies to fit your palate preferences perfectly.
Incorporating Nuts
When it comes to enhancing the experience of your ooey-gooey brown butter chocolate chip cookies, incorporating nuts like walnuts or pecans can add a satisfying crunch and depth of flavor. To include nuts in your cookie dough, you should start by coarsely chopping the walnuts or pecans to ensure even distribution throughout the dough. This step is crucial, as larger pieces can alter the texture and structure of your cookies.
After you have mixed the wet and dry ingredients, gently fold the chopped nuts into the dough using a spatula. Make sure to distribute them evenly, but take care not to overmix at this stage. Overmixing can lead to tough cookies as the gluten in the flour becomes more developed. With nuts added, your cookies will not only boast a pleasing crunch but also a nutty flavor that complements the richness of the chocolate and the brown butter’s toasty notes.
Chilling the Dough
Importance of Chilling
Chilling cookie dough is a vital step that impacts both flavor and texture significantly. When the dough is allowed to rest in the refrigerator, the flour hydrates fully, allowing water to absorb into the flour. This hydration enhances the structure of the cookie. Additionally, chilling solidifies the fat (in this case, the browned butter), which helps control spread during baking. Solid fat takes longer to melt in the oven, resulting in thicker, chewier cookies rather than flat, crispy ones.
Furthermore, chilling gives the sugars time to dissolve and meld with the other ingredients, which enhances the cookies’ depth of flavor. As the dough rests, the flavors intensify, leading to a more satisfying eating experience.
Recommended Chilling Time
For the best outcomes, it is recommended to chill the dough for at least 30 minutes. However, for an even better flavor and texture, you can chill it overnight. Overnight chilling allows for maximal hydration and flavor maturation, leading to a more complex and delicious cookie. If time allows, this is the preferred method for serious cookie enthusiasts.
Prepping the Oven
Oven Temperature
To achieve perfectly baked cookies, preheating your oven to 350°F (175°C) is crucial. An adequately preheated oven ensures that cookies bake quickly and evenly, which is essential for maintaining a tender center and a light golden exterior. If you place cookies in a cold oven, they may spread excessively and not rise properly, leading to disappointing results.
Baking Sheet Preparation
Properly preparing your baking sheets is another essential step. Line two baking sheets with parchment paper to prevent sticking and facilitate easy cookie removal. Parchment paper not only provides a non-stick surface but also promotes even browning on the bottoms of the cookies, enhancing their overall appearance and taste. If parchment paper is unavailable, silicone baking mats can serve as an excellent alternative.
Scooping and Baking Cookies
Measuring Dough Portions
Achieving uniform cookies shapes is key to even baking and presentation. Use a cookie scoop or a tablespoon to measure out consistent dough portions. When dropping the dough onto the baking sheets, space the dough balls approximately 2 inches apart. This gap is crucial, as the cookies will expand while baking. Proper spacing helps prevent the cookies from merging into a single cookie mass and ensures they develop their characteristic chewy textures.
Timing and Appearance
When baking your cookies, pay close attention to both timing and visual cues. The recommended baking time ranges from 10 to 12 minutes. Keep an eye on the edges; they should become golden brown, while the centers should remain soft and slightly underbaked. Removing the cookies when they are still soft allows them to set perfectly as they cool. If the edges darken too much before the centers are done, you may need to adjust your baking time slightly in future batches.
Cooling Cookies
Importance of Cooling Time
Allowing your cookies to cool for a few minutes on the baking sheet is important. This cooling time lets the cookies firm up slightly while maintaining their soft, gooey centers. If you transfer them to wire racks too quickly, they may break apart or lose that cherished gooey quality.
Ideal Cooling Conditions
Once the cookies are on the wire racks, allow them to cool completely if you’re looking for the best texture. Cooling cookies in an area with good airflow helps maintain their crispy edges while allowing the centers to remain soft and delicious. Avoid covering warm cookies, as this can trap steam and lead to sogginess.
Serving Suggestions
Presentation Tips
Serving your cookies can be as enjoyable as baking them! Consider placing your freshly baked cookies on a beautiful rustic wooden board or a decorative cake stand. To elevate the experience even further, accompany your cookies with beverages like a cold glass of milk or a warm cup of coffee. You can even sprinkle additional flaky sea salt on top shortly after baking for an enhanced visual appeal and flavor burst.
Enjoying the Cookies
For the best experience, enjoy your cookies while they are still warm. This will provide the maximum gooeyness, and the semi-sweet chocolate chips will melt beautifully, creating a luscious treat. They can also be delightful at room temperature on other occasions, making them a versatile treat suitable for various events or quiet moments.
Storing Leftovers
Proper Storage Techniques
Storing leftover cookies properly is essential to preserve their texture and flavor. To keep them fresh, place the cookies in an airtight container. A cool, dry place is ideal for storage, as heat and moisture can lead to cookies becoming stale. If you need to store them for an extended period, consider layering them between sheets of parchment paper to avoid sticking while maintaining their structure.
Reheating Tips
When you’re ready to enjoy your leftover cookies, reheating them is a simple way to restore their original gooeyness. Preheat your oven to a low temperature, around 300°F (150°C), and place the cookies on a baking sheet. Warm them in the oven for about 5-7 minutes, keeping an eye on them to ensure they don’t overbake. Alternatively, you can microwave a cookie for about 10 to 15 seconds; just make sure to eat it immediately afterward for that gooey experience.
Conclusion
These ooey-gooey brown butter chocolate chip cookies promise to deliver a delightful combination of rich flavors and chewy textures. The intricate process of browning butter and allowing the dough to chill results in cookies that are beautifully golden on the outside and melt-in-your-mouth soft on the inside. Ideal for sharing or savoring solo, these cookies provide a quintessential treat for any occasion.
The Ultimate Ooey-Gooey Brown Butter Chocolate Chip Cookies
Ingredients
- 1 cup unsalted butter
- 1 cup packed light brown sugar
- ½ cup granulated sugar
- 2 large eggs
- 1 tablespoon pure vanilla extract
- 2 ¼ cups all-purpose flour
- 1 teaspoon baking soda
- ½ teaspoon sea salt
- 1 cup semi-sweet chocolate chips
- ½ cup chopped walnuts or pecans
- flaky sea salt for garnish
Instructions
-
Brown the butter in a saucepan over medium heat until golden brown and nutty.
-
Combine brown sugar and granulated sugar in a bowl, then mix in the warm browned butter.
-
Add eggs one at a time, beating well after each, then mix in vanilla extract.
-
Whisk together flour, baking soda, and sea salt in a separate bowl.
-
Gradually add dry ingredients to wet ingredients, stirring gently.
-
Fold in chocolate chips and nuts until evenly distributed.
-
Chill the dough for at least 30 minutes, or overnight for better flavor.
-
Preheat oven to 350°F (175°C) and line baking sheets with parchment paper.
-
Scoop dough onto baking sheets, spacing them 2 inches apart, and sprinkle with flaky sea salt.
-
Bake for 10-12 minutes until edges are golden and centers are soft.