

Introduction
Soft pretzels have long been celebrated as a delightful treat that combines simplicity with indulgence. Their warm, doughy texture and distinctive twisted shape make them a favorite snack for many, whether enjoyed at a bustling street fair, a cozy movie night at home, or as a show-stopping appetizer at parties. The versatility of soft pretzels allows them to be paired with a variety of dips or toppings, but few combinations can rival the heavenly experience of freshly baked pretzels served with a creamy cheese dip.
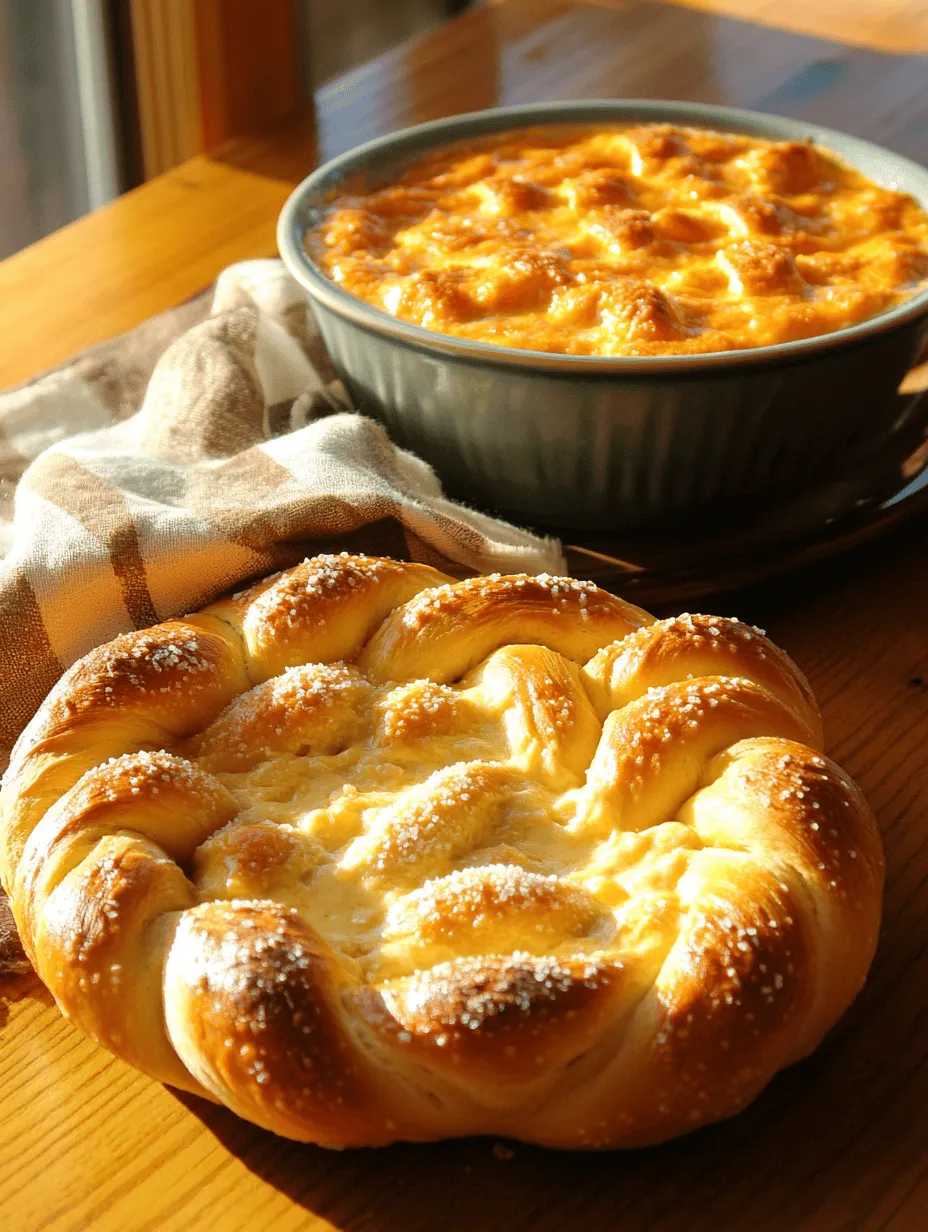
Enter the recipe for Twisted Delight: Soft Pretzels with Cheesy Bliss. This indulgent treat elevates the classic soft pretzel by pairing it with a luscious cheese dip that enhances the overall flavor profile. Imagine biting into a warm, golden-brown pretzel, its exterior perfectly crisp yet soft inside, complemented by the rich and gooey texture of melted cheese. This recipe not only satisfies your cravings but also invites you to experience the joy of making pretzels from scratch, filling your kitchen with irresistible aromas that will have your family and friends begging for more.
Creating homemade pretzels is a rewarding experience that allows you to take control of the ingredients, resulting in a snack that is both delicious and wholesome. While many enjoy grabbing a bag of store-bought pretzels, nothing compares to the satisfaction of crafting your own from the comfort of your kitchen. The process may seem daunting at first, but with this step-by-step guide, you’ll find that making soft pretzels is not only achievable but also enjoyable.
The Allure of Soft Pretzels
The history of pretzels is rich and fascinating, dating back to ancient times. They are believed to have originated in Europe, with some of the earliest records pointing to the region of modern-day Italy. The traditional shape of a pretzel, resembling crossed arms, is thought to symbolize the act of prayer, with the three holes representing the Holy Trinity. Over the centuries, pretzels evolved from their religious significance to become a popular snack enjoyed by people of all backgrounds.
In Germany, pretzels hold a cultural significance that is celebrated during festivals such as Oktoberfest, where they are often paired with hearty meals and local beers. The soft pretzel has also made its way into American culture, especially as a popular street food found at sporting events and fairs. Each bite of a soft pretzel offers a sensory experience that is hard to resist: the warm aroma wafting through the air, the golden-brown crust crackling as you tear into it, and the chewy texture that evokes a sense of comfort and nostalgia.
The combination of flavors and textures in soft pretzels makes them a beloved snack across various cuisines. Whether enjoyed plain or topped with a sprinkle of coarse sea salt, dipped in mustard, or paired with a creamy cheese sauce, soft pretzels are a versatile canvas for culinary creativity. The experience of enjoying a freshly baked pretzel is one that brings people together, making it a perfect addition to any gathering.
Ingredients Breakdown
Before diving into the step-by-step process of making Twisted Delight: Soft Pretzels with Cheesy Bliss, it’s essential to understand the role each ingredient plays in creating the perfect pretzel. Here’s a detailed breakdown of the ingredients you will need for both the pretzel dough and the accompanying cheese dip.
Pretzel Dough Ingredients
1. All-Purpose Flour: The backbone of the pretzel dough, all-purpose flour provides the necessary structure and chewiness. Its protein content helps create gluten, which gives the pretzel its characteristic texture.
2. Active Dry Yeast: This ingredient is crucial for leavening the dough and contributing to its flavor. The yeast ferments the sugars in the dough, producing carbon dioxide, which causes the dough to rise and become light and fluffy.
3. Warm Water: Water is essential for activating the yeast and hydrating the flour. The ideal temperature for warm water is between 100°F to 110°F, as this range encourages yeast activity without killing it.
4. Granulated Sugar: A small amount of sugar is added to the dough to enhance flavor and promote browning during baking. Sugar serves as food for the yeast, aiding in fermentation and helping the pretzels develop a beautiful golden color.
5. Salt: Salt is a vital ingredient that enhances the flavor of the pretzel while also controlling yeast activity. It helps to strengthen the gluten structure, resulting in a chewier texture.
6. Baking Soda: This ingredient plays a unique role in the pretzel-making process. Before baking, the pretzels are briefly boiled in a baking soda solution, which gives them their signature dark brown crust and distinctive flavor.
7. Coarse Sea Salt: The finishing touch on top of the pretzels, coarse sea salt adds a burst of flavor and a pleasing crunchy texture. It balances the richness of the cheese dip and enhances the overall taste experience.
Cheese Dip Ingredients
1. Unsalted Butter: The base for the cheese sauce, unsalted butter adds richness and creaminess. It is the starting point for creating a roux, which thickens the cheese dip.
2. Flour: Combining flour with melted butter creates a roux, which serves as the thickening agent for the cheese sauce. This mixture helps to create a smooth and creamy texture.
3. Milk: Adding milk to the roux is essential for creating a velvety cheese sauce. The milk adds creaminess and helps to achieve the desired consistency for dipping.
4. Sharp Cheddar Cheese: The star of the cheese dip, sharp cheddar cheese provides a bold flavor and excellent melting qualities. Its tangy taste complements the pretzel’s flavor profile perfectly.
5. Garlic Powder: This ingredient adds depth and complexity to the cheese dip, enhancing the overall flavor experience. Garlic powder is an easy way to infuse the sauce with a savory note.
6. Smoked Paprika: A hint of smoked paprika elevates the cheese dip by adding a subtle smokiness and vibrant color. This ingredient enhances the flavor profile while contributing to a visually appealing dish.
7. Seasoning: A pinch of salt and pepper can be added to balance the flavors and bring out the best in the cheese dip. Adjusting the seasoning allows you to customize the dip to your taste.
With these ingredients in hand, you are now ready to embark on the journey of creating your Twisted Delight: Soft Pretzels with Cheesy Bliss. The next step is to prepare the dough, which involves activating the yeast, mixing the ingredients, and kneading the dough to achieve the perfect consistency.
Step-by-Step Guide to Making Soft Pretzels
Preparing the Dough
1. Activating the Yeast: Start by measuring out the warm water into a mixing bowl. Sprinkle the active dry yeast and granulated sugar over the water. Gently stir the mixture and let it sit for about 5-10 minutes until it becomes frothy. This step is crucial, as it confirms that the yeast is alive and ready to leaven your dough.
2. Mixing the Ingredients: In a separate large mixing bowl, combine the all-purpose flour and salt. Once the yeast mixture is frothy, pour it into the bowl with the flour. Stir the mixture with a wooden spoon or spatula until a shaggy dough begins to form. At this point, you may need to adjust the flour or water slightly to ensure the dough is not too sticky or too dry.
3. Kneading the Dough: Transfer the dough onto a lightly floured surface and begin kneading it by hand. Knead the dough for about 8-10 minutes, or until it becomes smooth and elastic. Proper kneading develops the gluten structure, which is essential for achieving the perfect pretzel texture. If the dough is too sticky, sprinkle a little more flour as needed until it reaches the desired consistency.
4. First Rise: Once kneaded, shape the dough into a ball and place it in a lightly greased bowl. Cover the bowl with a clean kitchen towel or plastic wrap, and let it rise in a warm, draft-free area for approximately 1 hour or until it has doubled in size.
As you wait for the dough to rise, you can prepare the cheese dip, ensuring that everything is ready for when the pretzels come out of the oven. The journey to homemade Twisted Delight: Soft Pretzels with Cheesy Bliss is well underway, and soon you will be enjoying the fruits of your labor.
Importance of Kneading for Gluten Development
Kneading is an essential step in making soft pretzels, as it plays a crucial role in developing the gluten structure within the dough. Gluten, a protein found in wheat flour, gives pretzels their characteristic chewiness and structure. When you knead the dough, you are aligning the gluten strands, which helps the dough become elastic and allows it to rise properly.
To knead effectively, you should use the heel of your hand to push the dough away from you, then fold it over itself, and repeat this process. Aim for about 8 to 10 minutes of kneading, until the dough is smooth and elastic. You can check the dough’s readiness by performing the “windowpane test”: stretch a small piece of dough between your fingers. If it stretches thin enough to let light through without tearing, it’s well-kneaded.
Signs That Dough is Ready for Rising
Once you’ve kneaded the dough, it’s important to ensure it’s ready for the rising phase. Look for these signs:
1. Smooth Texture: The surface should be smooth, and the dough should feel soft and pliable.
2. Elasticity: The dough should spring back when you poke it with a finger.
3. Increased Size: After kneading, the dough should have grown slightly, indicating some initial fermentation.
If your dough meets these criteria, you can proceed to let it rise. Place it in a lightly greased bowl, cover it with a damp cloth or plastic wrap, and let it rise in a warm place until it doubles in size, usually about 1 to 1.5 hours.
Shaping the Pretzels
Shaping your pretzels is where the fun begins! Once your dough has risen, it’s time to break it down into individual pretzels. Start by punching down the dough to release the air, then divide it into equal portions, typically around 8 pieces for medium-sized pretzels.
Visual Cues for Shaping Pretzels Properly
When shaping pretzels, aim for a long rope-like strand of dough. Each piece should be rolled out to about 24 inches in length. Here’s how to shape them:
1. Roll the dough into a long rope, approximately 1 inch thick.
2. Form the rope into a U shape.
3. Cross the ends over each other twice and then twist them around each other once more.
4. Bring the twisted ends down to meet the bottom of the U and press to seal.
This classic pretzel shape not only looks appealing but also allows for even boiling and baking.
Creative Variations in Pretzel Shapes
Don’t feel limited to the traditional pretzel shape; get creative! You can make pretzel knots by simply tying the rope into a knot instead of twisting it. Alternatively, try shaping them into sticks for dipping or even hearts for a special occasion. The possibilities are endless, and experimenting with shapes can add a fun touch to your pretzel-making adventure.
The Boiling Process: Key to Perfect Pretzels
Boiling your pretzels before baking is a crucial step that sets them apart from other bread. This process gives pretzels their distinctive chewy crust and helps develop that beautiful golden-brown color.
Why Pretzels are Boiled Before Baking
Boiling the pretzels helps gelatinize the outer layer of dough, which prevents the crust from becoming too hard during baking. The alkaline nature of the boiling water, especially if you add baking soda, creates that signature pretzel flavor and enhances the browning through the Maillard reaction.
Step-by-Step Instructions on Boiling Pretzels
1. Prepare the Boiling Solution: In a large pot, bring 10 cups of water to a rolling boil. Add 2/3 cup of baking soda (be cautious as it may bubble up).
2. Boil the Pretzels: Carefully drop a few pretzels into the boiling water at a time (don’t overcrowd the pot). Boil for about 30 seconds per side.
3. Remove and Drain: Using a slotted spoon, carefully remove the pretzels and let them drain on a wire rack.
Safety Tips for Boiling and Handling Pretzels
– Use caution when working with boiling water and baking soda; wear an apron to protect your clothing.
– Always use a slotted spoon to handle the pretzels to avoid burns.
– Make sure not to boil the pretzels for too long, as this can lead to overly tough crusts.
Baking Your Pretzels to Golden Perfection
Once your pretzels have been boiled and drained, it’s time to bake them to achieve that perfect golden-brown crust.
Importance of Oven Temperature and Baking Time
Preheat your oven to 425°F (220°C) to ensure that your pretzels bake evenly and develop a nice color. Place the boiled pretzels on a lined baking sheet, and brush them with a beaten egg wash to enhance the color and shine.
Bake the pretzels for about 12 to 15 minutes, or until they are deep golden brown. Keep an eye on them as baking times can vary depending on your oven.
Recognizing When Pretzels are Perfectly Baked
You’ll know your pretzels are perfectly baked when they are a deep golden brown and have a slightly crisp exterior. The aroma of freshly baked pretzels should fill your kitchen, making it hard to resist them!
Cooling Tips for Maintaining Texture
After baking, allow the pretzels to cool on a wire rack for a few minutes. This helps maintain their texture, ensuring that they remain soft and chewy rather than soggy. Serve them warm, and enjoy their delightful aroma and flavor.
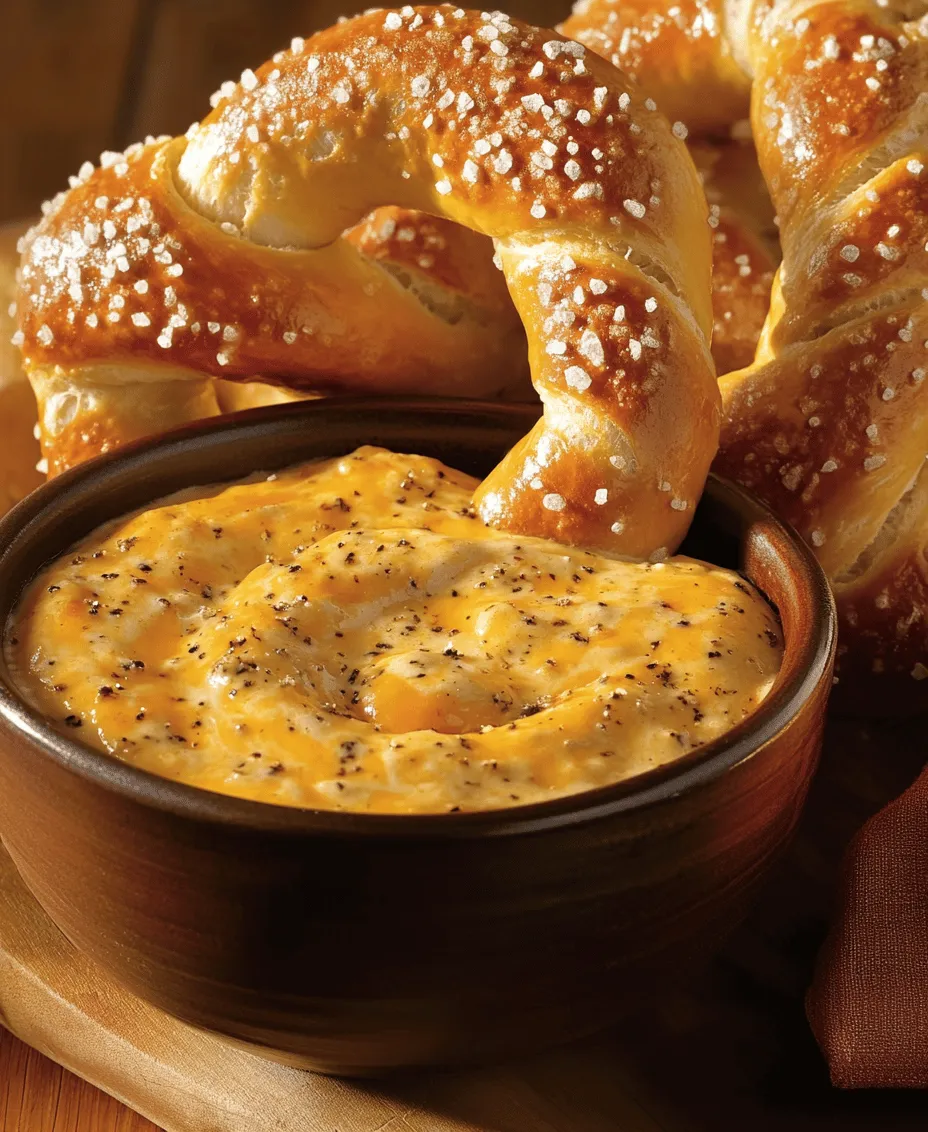
Creating the Perfect Cheese Dip
No soft pretzel experience is complete without a delicious cheese dip. Making your cheese sauce is straightforward and allows you to customize it to your taste.
Step-by-Step Guide to Making the Cheese Dip
1. Ingredients: Gather 2 tablespoons of butter, 2 tablespoons of all-purpose flour, 1 cup of milk, and 1 ½ cups of shredded cheese (cheddar is a popular choice).
2. Make the Roux: In a medium saucepan over medium heat, melt the butter. Once melted, add the flour and whisk until smooth, cooking for about 1 minute.
3. Add Milk: Gradually whisk in the milk, stirring continuously until the mixture thickens.
4. Incorporate Cheese: Remove from heat, then add the shredded cheese. Stir until the cheese melts completely and the sauce is smooth.
Emphasis on Temperature Control for a Smooth Sauce
The key to a smooth cheese dip is maintaining a steady heat while whisking. If the heat is too high, the cheese can become grainy. If you desire a thinner consistency, feel free to add more milk until you reach your preferred texture.
Suggestions for Customizing the Cheese Dip
Experiment with different cheeses like pepper jack for a spicy kick or a blend of cheeses for depth. You can also add spices such as garlic powder, paprika, or even jalapeños for extra flavor. Explore your creativity and make the cheese dip uniquely yours!
Serving Suggestions and Pairing Ideas
When it’s time to serve your Twisted Delight: Soft Pretzels with Cheesy Bliss, presentation matters. Here are some tips to elevate your serving game:
Presentation Tips for Serving Pretzels and Cheese Dip
– Place pretzels on a large wooden board or platter for a rustic look.
– Serve the cheese dip in a small bowl nestled among the pretzels, garnished with fresh herbs or a sprinkle of paprika for color.
Suggested Sides or Accompaniments
Enhance your pretzel experience by offering sides like tangy mustard, crunchy pickles, or even a refreshing salad. These accompaniments complement the rich flavors of the pretzels and cheese dip, creating a well-rounded snack.
Discussion on Pairing Drinks
Pair your soft pretzels with drinks that enhance their flavors. A crisp lager or a hoppy IPA can balance the richness of the cheese dip. For non-alcoholic options, consider sparkling water with a splash of lemon or a refreshing iced tea.
Why Homemade is Better
Making soft pretzels at home brings several advantages over store-bought options. Here’s why you should consider making them yourself:
Advantages of Making Pretzels at Home
Homemade pretzels allow you to control the ingredients, ensuring they are fresh and free from preservatives. You can experiment with flavors, shapes, and sizes, tailoring each batch to your preferences. Plus, the satisfaction of creating something from scratch is unmatched!
Healthier Ingredient Choices
When you make pretzels at home, you can opt for healthier alternatives. Use whole wheat flour for added nutrition or experiment with different toppings like sea salt, garlic, or herbs. This way, you can enjoy guilt-free indulgence.
The Joy of Sharing Homemade Food
Homemade pretzels are perfect for gatherings. Sharing your freshly baked treats with friends and family fosters connections and creates lasting memories. There’s something special about enjoying food that has been made with care.
Conclusion
Making Twisted Delight: Soft Pretzels with Cheesy Bliss is not just about the end result; it’s about the joy of the process. From kneading the dough to shaping the pretzels and crafting the perfect cheese dip, every step is a delightful experience.
Encourage your friends and family to join in the fun, and share the finished product together. Embrace the art of pretzel-making, and savor the comfort and satisfaction it brings to your gatherings. Whether enjoyed during a movie night, a game day, or simply as a snack, these pretzels are sure to become a favorite in your home. So, roll up your sleeves, get baking, and enjoy the bliss of homemade soft pretzels!
Soft Pretzels with Cheese Dip
Ingredients