
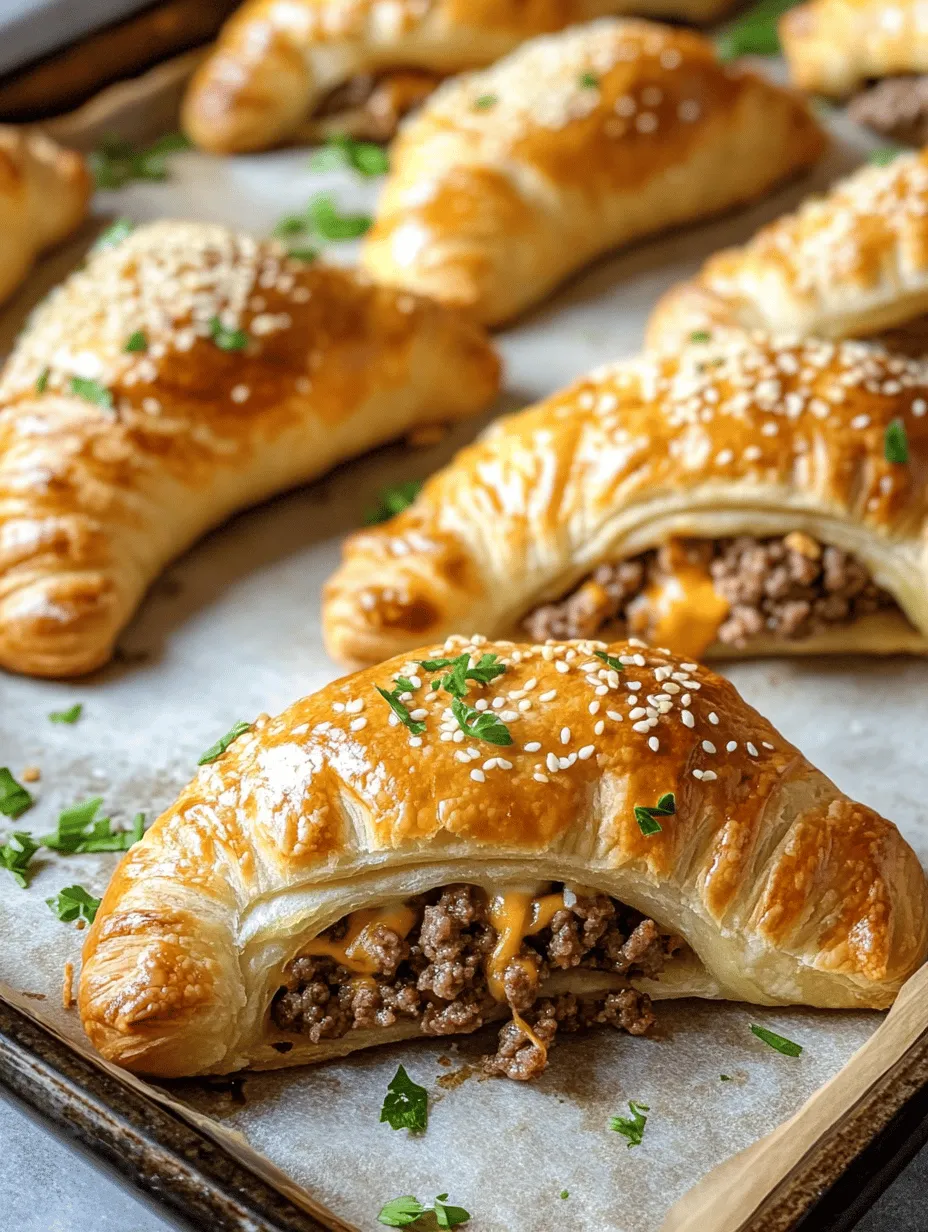

If you’re on the hunt for a meal that’s not only scrumptious but also incredibly convenient, look no further than cheeseburger pockets. These delightful handheld treats encapsulate all the beloved flavors of a classic cheeseburger, offering a fun twist that both kids and adults can enjoy. The combination of savory ground beef, melted cheese, and a flaky crust makes them an irresistible choice for lunch, dinner, or even a satisfying snack. Whether you’re hosting a family dinner, planning a game night, or simply looking for a quick weeknight meal, cheeseburger pockets are the perfect solution.
What makes cheeseburger pockets particularly appealing is their versatility. You can whip them up for a casual gathering with friends or serve them as a unique addition to your weekly meal rotation. The beauty of this recipe lies not just in its simplicity but also in the myriad of ways you can customize it to suit your tastes. From the types of cheese you use to the seasonings and sauces you incorporate, cheeseburger pockets can be tailored to fit any occasion and preference.
Understanding the Ingredients
Before diving into the cooking process, it’s essential to understand the key ingredients that come together to create these delicious cheeseburger pockets. Each component plays a crucial role in flavor, texture, and overall enjoyment.
Ground Beef
When it comes to cheeseburger pockets, the foundation is high-quality ground beef. Selecting the best meat will have a significant impact on the flavor of your dish. Aim for ground beef with a good fat content—typically, an 80/20 ratio of meat to fat is ideal for achieving a juicy and flavorful filling. The fat not only enhances the taste but also ensures that the meat remains moist during cooking. If you’re looking for a healthier alternative, you can substitute ground turkey or chicken, although the flavor profile will change slightly.
Aromatics
Aromatics such as onions and garlic are indispensable in elevating the flavor profile of your cheeseburger pockets. Onions add sweetness and depth, while garlic infuses the mix with a robust aroma. When sautéed together, they create a fragrant base that enhances the overall taste of the filling. To achieve the perfect balance, finely chop your onions and garlic, and make sure to cook them until they’re softened and translucent before adding in the ground beef.
Cheese Varieties
Cheese is a quintessential component of cheeseburgers, and in this recipe, the choice of cheese can make all the difference. Combining sharp cheddar and creamy mozzarella creates a delightful contrast in flavor and texture. Cheddar provides a rich, tangy taste, while mozzarella adds that gooey, melty quality that everyone loves. Feel free to experiment with other cheese varieties, such as pepper jack for a spicy kick or Swiss cheese for a nutty flavor.
Crescent Roll Dough
One of the highlights of this recipe is the use of crescent roll dough. This pre-made dough is both convenient and versatile, making it an ideal choice for creating the pockets. The dough bakes up golden and flaky, providing a delightful contrast to the savory filling inside. Handling crescent roll dough is straightforward; it typically comes in a tube, which you can easily unroll and cut into triangles to create your pockets.
Optional Ingredients
To further personalize your cheeseburger pockets, consider incorporating optional ingredients such as mustard, ketchup, or even pickles into the filling. These condiments can add an extra layer of flavor that mimics the experience of eating a traditional cheeseburger. Additionally, sprinkling sesame seeds on top of the pockets before baking can give them a delightful crunch and an authentic burger bun feel.
Step-by-Step Instructions for Making Cheeseburger Pockets
Now that we’ve covered the essential ingredients, it’s time to get into the nitty-gritty of preparing your cheeseburger pockets. Follow these step-by-step instructions to ensure a successful and delicious outcome.
Prepping the Oven
Before you begin cooking, it’s crucial to prep your oven. Preheat it to 375°F (190°C) to ensure that your cheeseburger pockets bake evenly. While the oven is heating, take a moment to grease a baking sheet with cooking spray or line it with parchment paper. This will prevent the pockets from sticking and ensure they come out easily once they’re baked to perfection.
Cooking the Beef
Start by browning the ground beef in a large skillet over medium heat. Use a spatula or wooden spoon to break the meat into smaller pieces as it cooks. This not only helps in achieving an even cook but also ensures that each pocket has a well-distributed filling. Cook the beef until it’s no longer pink, which should take about 5-7 minutes. After the meat is fully cooked, drain any excess fat from the skillet to keep the filling from becoming greasy.
Adding Aromatics
Once the beef is browned and drained, it’s time to add the aromatics. Add the finely chopped onions and garlic to the skillet with the beef. Sauté them together for about 3-4 minutes, or until the onions become soft and translucent. This step is vital, as it allows the flavors to meld together beautifully. The aroma of the onions and garlic will fill your kitchen, tantalizing your taste buds and signaling that something delicious is on the way.
Seasoning
Next, it’s time to season the beef mixture. A balance of flavors is essential for creating a mouthwatering filling. Add a splash of Worcestershire sauce to bring in a savory depth, along with salt and pepper to taste. Stir the mixture well to ensure that the seasonings are evenly distributed. This step is crucial, as it allows each bite of your cheeseburger pockets to be flavorful and satisfying.
Incorporating Cheese
With the beef and aromatics well-seasoned, it’s time to incorporate the cheese. Remove the skillet from the heat and stir in the shredded cheddar and mozzarella until the cheese melts into the mixture, creating a creamy and delicious filling. Make sure that the cheese is evenly distributed throughout the mixture for optimal cheesiness in every bite.
Preparing Crescent Rolls
Now that your filling is ready, it’s time to prepare the crescent rolls. Carefully unroll the dough on a clean, flat surface. You’ll notice that it comes in a rectangle with perforated lines, making it easy to separate into triangles. Gently press along the perforations to create distinct triangles without tearing the dough. This will be the pocket that holds all the delicious beef and cheese filling.
With these initial steps complete, you’re well on your way to crafting homemade cheeseburger pockets that are sure to impress. The combination of rich flavors, gooey cheese, and flaky dough is an enticing prospect for any mealtime. Just wait until you see how simple it is to pull these delicious pockets together! Stay tuned for the next part, where we will guide you through the assembly and baking process for your cheeseburger pockets.
Filling the Pockets: Best Practices for Portioning and Adding Condiments
When it comes to filling your cheeseburger pockets, portion control is crucial. You want to ensure that each pocket is stuffed enough to deliver a satisfying bite without overflowing. A good rule of thumb is to use about two tablespoons of filling per pocket. This amount provides a hearty filling while allowing the dough to fold and seal properly.
Before you start filling, consider the balance of flavors and textures. Spread a thin layer of your favorite condiment, such as mustard or ketchup, on the inside of the dough to enhance the flavor profile. Layering the condiments directly on the dough helps to create a delightful taste experience as you bite into the pockets.
Be cautious with the amount of liquid condiments used; too much can lead to soggy pockets. If you prefer a creamier texture, consider using mayo or a homemade burger sauce, but apply it sparingly. After spreading your condiments, add the cooked meat mixture, followed by a sprinkle of cheese. This layering not only keeps the cheese from getting soggy but also helps it melt perfectly during baking.
Sealing Techniques: Ensuring a Secure Seal to Prevent Leaks During Baking
Sealing your cheeseburger pockets correctly is essential to ensure they bake evenly and do not leak filling. Start by placing your filling in the center of the dough circle, leaving enough space around the edges for sealing. A tip for creating a perfect seal is to use a small brush or your finger to wet the edges of the dough with water. This moisture helps the dough stick together better.
Once the edges are moistened, carefully fold the dough over the filling to create a half-moon shape. Press the edges together firmly. For added security, you can crimp the edges with a fork, which not only seals the pockets but also adds a decorative touch. Be meticulous during this step; any openings could lead to the filling leaking out while baking, resulting in a mess and potential loss of flavor.
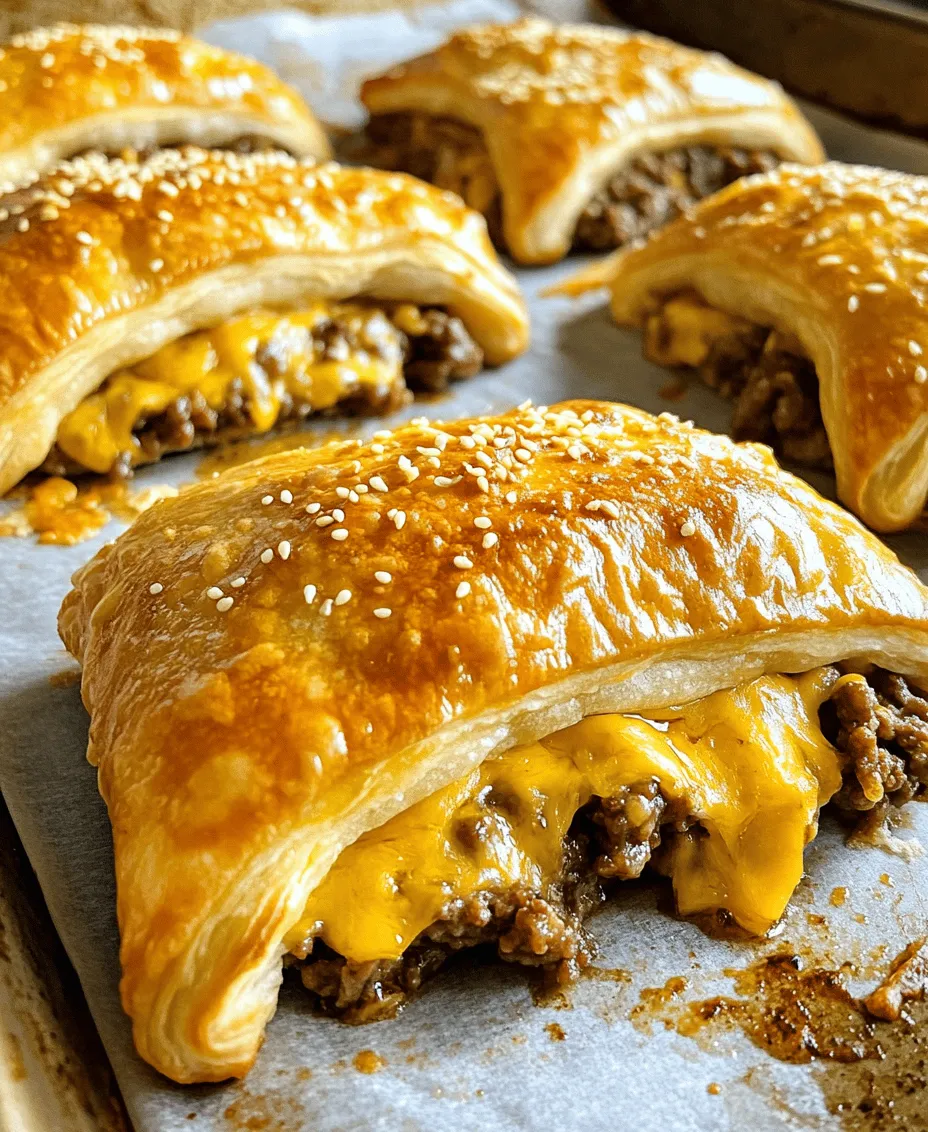
Baking Process: Ideal Baking Conditions for Golden-Brown Perfection
To achieve golden-brown and crispy cheeseburger pockets, preheat your oven to 400°F (200°C). Line a baking sheet with parchment paper to prevent sticking and ensure even baking. Once your pockets are filled and sealed, place them on the prepared baking sheet, leaving enough space between each pocket for even heat distribution.
Before placing the pockets in the oven, brush the tops with a little melted butter or an egg wash (a mixture of beaten egg and water). This simple step enhances browning and gives the pockets a beautiful, shiny finish.
Bake for 20-25 minutes or until the pockets are golden brown and the filling is bubbling. If you’re making a larger batch, consider rotating the baking sheets halfway through to ensure even cooking. For a crispy bottom, you can place the baking sheet on the lower rack of the oven during the last few minutes of baking.
Serving Suggestions: Ideas for Pairing with Sides or Dips
Cheeseburger pockets are versatile and can be paired with various sides or dips to elevate your meal. Serve them alongside a fresh salad for a light and refreshing contrast, or opt for classic sides such as fries or onion rings for a more indulgent experience.
For dipping sauces, consider offering a selection that complements the cheeseburger flavor. Traditional options like ketchup or mustard are always a hit, but you can also try barbecue sauce, ranch dressing, or even a spicy aioli for an extra kick.
To create a full meal, you might also consider serving the pockets with a side of coleslaw or pickles, which can provide a crunchy texture and tangy flavor that balances out the richness of the cheeseburger filling.
Nutritional Information
Understanding the nutritional content of your cheeseburger pockets can help you make informed choices. The main ingredients typically include ground beef, cheese, and dough. Here’s a breakdown of the key nutrients you can expect from a standard serving:
– Protein: Ground beef and cheese are excellent sources of protein, essential for muscle repair and growth.
– Carbohydrates: The dough provides carbohydrates, which are vital for energy.
– Fats: Cheese and the meat contribute saturated fats, making these pockets indulgent but also a source of energy.
– Vitamins and Minerals: Depending on additional ingredients like vegetables, you can also gain vitamins A, C, and several B vitamins, along with minerals such as calcium and iron.
When adjusting portion sizes, consider using leaner meats like ground turkey or chicken to reduce fat content. You can also opt for low-fat cheese varieties to create a lighter version of this dish without sacrificing flavor.
Creative Variations and Substitutions
Cheeseburger pockets are a blank canvas for your culinary creativity. Here are some variations and substitutions to consider:
– Alternative Proteins: Instead of traditional beef, experiment with ground turkey, chicken, or even plant-based meat alternatives for a healthier or vegetarian option. This flexibility allows you to cater to various dietary preferences and restrictions.
– Cheese Alternatives: While cheddar is a classic choice, don’t hesitate to explore different cheese blends. Pepper jack adds a spicy kick, while mozzarella offers a milder taste. You can also use vegan cheese for dairy-free pockets.
– Vegetable Additions: Incorporating finely chopped vegetables such as bell peppers, onions, or spinach not only boosts the nutritional value but also adds flavor and texture. Sauté the vegetables with the meat for a well-rounded filling.
– Gluten-Free Options: If you have dietary restrictions, consider using gluten-free dough alternatives such as almond flour or cauliflower-based crust. This adjustment allows everyone to enjoy cheeseburger pockets without compromising their dietary needs.
Storing and Reheating Cheeseburger Pockets
If you have leftovers (which is often the case with this delicious dish), proper storage is key to maintaining freshness. Allow the cheeseburger pockets to cool completely before transferring them to an airtight container. They can be stored in the refrigerator for up to three days or frozen for up to three months.
For reheating, the oven is your best bet to retain the pockets’ crispy texture. Preheat your oven to 350°F (175°C), place the pockets on a baking sheet, and heat for about 10-15 minutes, or until warmed through. If you’re in a hurry, a microwave can be used, but be aware that it may make the dough a little soft.
Conclusion
Making cheeseburger pockets at home is an easy and satisfying way to enjoy a classic favorite with a personal twist. The recipe allows for creativity in filling choices and serving styles, making it a perfect option for busy weeknights or gatherings with friends and family.
With the guidance provided, you’re well-equipped to experiment with different flavors and ingredients, ensuring that every batch of cheeseburger pockets is uniquely yours. Embrace the process, have fun with the variations, and enjoy the delicious results that come from your kitchen. Whether you stick to the traditional recipe or create your own signature version, these pockets are sure to be a hit!
Cheeseburger Pockets
Ingredients