

Introduction
Crumbl cookies have become a sensation across the United States, thanks to their indulgent flavors and sumptuous textures. These cookies are known for their large size and luxurious toppings, making them the star attraction in bakeries and dessert tables. What’s even better than enjoying a delicious cookie from your favorite bakery is the experience of recreating those iconic flavors right in your own kitchen. By making your own Crumbl-inspired chocolate chip cookies, you can cater to your taste preferences and enjoy the warm, gooey delights fresh out of the oven.
These chocolate chip cookies offer a delightful blend of textures and flavors. The crispy edges contrast beautifully with the soft, chewy center, while the semi-sweet and optional milk chocolate chips provide a rich chocolate flavor with every bite. Perfectly sweetened and lightly salted, these cookies are ideal for a variety of occasions – from casual family gatherings to more festive dessert parties. Let’s explore how to bring this delightful treat to life in your own oven.
Recipe Overview
– Total Time: 30 minutes
– Prep Time: 15 minutes
– Yields: 24 cookies
– Difficulty: Not specified in the recipe
These Crumbl-inspired chocolate chip cookies are a delicious twist on a classic favorite, boasting a satisfying flavor profile that combines sweetness with a hint of saltiness. With a generous yield of 24 cookies, they are perfect for serving at family gatherings, dessert parties, or simply enjoying with a glass of milk after a long day. Whether you want to impress guests or treat yourself, this recipe is sure to deliver a delightful experience.
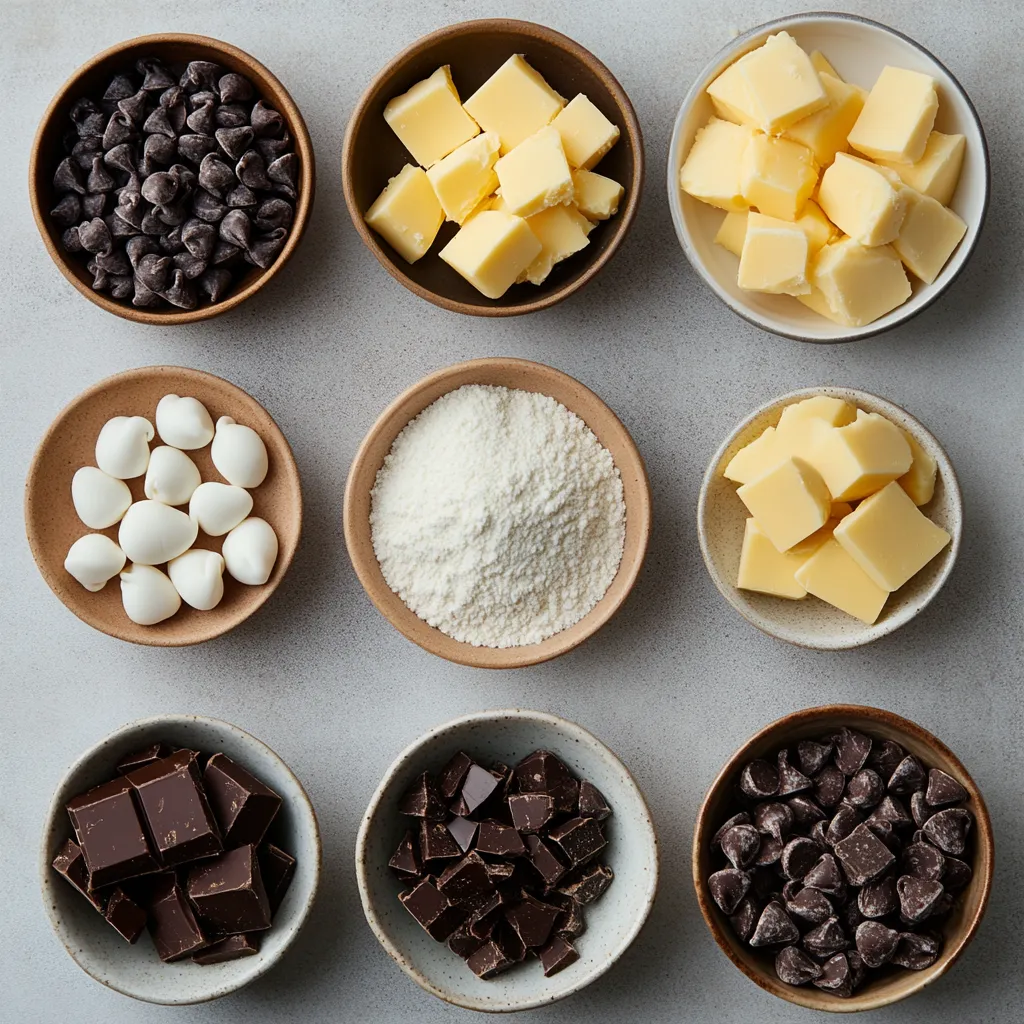
Ingredients
– 1 cup unsalted butter, softened to room temperature
– 1 cup packed brown sugar
– 1/2 cup granulated sugar
– 2 large eggs, at room temperature
– 1 tablespoon pure vanilla extract
– 3 cups all-purpose flour
– 1 teaspoon baking soda
– 1/2 teaspoon baking powder
– 1 teaspoon fine sea salt
– 2 cups semi-sweet chocolate chips
– 1 cup milk chocolate chips (optional, for an extra layer of flavor)
– Flaky sea salt for garnish (optional)
Detailed Breakdown of Ingredients and Their Roles
Each ingredient in this chocolate chip cookie recipe serves a specific purpose that contributes to the overall flavor and texture.
– Unsalted Butter: Using unsalted butter that is softened to room temperature ensures easy blending with the sugars and creates that perfect creamy texture essential for cookies.
– Brown Sugar vs. Granulated Sugar: The combination of packed brown sugar and granulated sugar offers a nuanced sweetness. Brown sugar adds moisture and a slight chewiness, while granulated sugar helps achieve a crisp edge.
– Eggs: They play a crucial role by adding moisture and helping bind all the ingredients together, contributing to a softer cookie.
– Vanilla Extract: This ingredient enhances the overall flavor profile, lending warmth and depth to the sweetness.
– Baking Soda and Baking Powder: Both are leavening agents, but baking soda is more alkaline, which helps the cookies spread and creates a softer texture. Baking powder provides an additional lift, ensuring the cookies are perfectly fluffy.
– Fine Sea Salt: It helps to balance the sweetness of the cookies and accentuate the chocolate flavors, making each bite more flavorful.
– Chocolate Chips: Semi-sweet chocolate chips are a classic choice for chocolate chip cookies, while milk chocolate chips can be added for an extra layer of sweetness and richness.
– Optional Toppings: Flaky sea salt can be sprinkled on top for an added touch of elegance and flavor, highlighting the sweetness of the cookies and making them visually appealing.
Instructions
1. Preheat the Oven: Start by preheating your oven to 350°F (175°C). Line two baking sheets with parchment paper for easy cookie removal.
2. Cream Butter and Sugars: In a large mixing bowl, combine the softened butter, packed brown sugar, and granulated sugar. Use an electric mixer to beat the mixture on medium speed until it becomes light and fluffy, approximately 2-3 minutes.
3. Incorporate Eggs and Vanilla: Add the eggs one at a time, ensuring each is well blended before adding the next. Pour in the vanilla extract and mix until fully incorporated.
4. Mix Dry Ingredients: In a separate bowl, whisk together the all-purpose flour, baking soda, baking powder, and fine sea salt until well combined.
5. Combine Wet and Dry Mixtures: Gradually add the dry ingredient mixture to the wet ingredients, mixing gently until just combined. Be cautious not to overmix, as this can affect the texture of the cookies.
6. Fold in Chocolate Chips: Carefully fold in both the semi-sweet and optional milk chocolate chips with a spatula, ensuring they are evenly distributed throughout the cookie dough.
7. Scoop the Dough: Using a cookie scoop or a tablespoon, scoop out generous portions of dough and place them on the prepared baking sheets. Leave ample space between each cookie to allow for spreading during baking.
8. Sprinkle with Sea Salt: If desired, sprinkle a pinch of flaky sea salt on top of each cookie dough ball before placing them in the oven for added flavor.
9. Bake the Cookies: Bake in the preheated oven for 10-12 minutes or until the edges are a light golden brown and the centers remain soft and chewy.
10. Cool and Enjoy: Once baked, remove the cookies from the oven and let them cool on the baking sheets for about 5 minutes. Afterward, transfer them to a wire rack to cool completely.
Preparation Essentials
When preparing to bake these cookies, it is essential to consider ingredient temperatures and the equipment needed for a seamless process. Ensuring that both the eggs and the butter are at room temperature will promote smoother mixing and better overall texture in the finished cookies.
You’ll need some basic equipment, including mixing bowls, an electric mixer, a spatula, and a cookie scoop or tablespoon for portioning the dough. Additionally, baking sheets lined with parchment paper are necessary for easy removal of the cookies without them sticking. Having these tools ready will ensure a smooth baking experience, allowing you to focus on enjoying the delightful aroma and taste of your homemade cookies.
In the next segment, we will further explore the specifics of each step outlined above, ensuring you achieve cookie perfection with every batch.
Folding in chocolate chips: Techniques for even distribution
When incorporating chocolate chips into your cookie dough, an essential technique is to fold them in gently using a spatula. This method helps to achieve an even distribution throughout the dough while maintaining the airiness created during the creaming of the butter and sugars. Start from the bottom of the bowl and lift the dough over the chocolate chips – this way, you can ensure that the chocolate chips are nestled throughout the mixture. Avoid vigorous stirring, as this can lead to a denser cookie and may make the chips break apart.
Baking Tips
Ideal oven temperature for cookies
Achieving the perfect cookie begins with oven temperature. The recommended baking temperature for this chocolate chip cookie recipe is 350°F (175°C). This temperature allows the cookies to bake evenly, creating a golden exterior while keeping the centers soft. It’s advisable to use an oven thermometer for accuracy, as some ovens may have discrepancies in temperature settings.
Understanding cookie spread during baking
The spread of cookies during baking can vary based on several factors, including dough temperature, butter composition, and the balance of leavening agents. For these cookies, it’s crucial to ensure the butter is softened, not melted. If the dough is too warm or the butter too soft, the cookies may spread excessively in the oven, leading to flat cookies. Conversely, if the dough is too cold, they may not spread enough, resulting in thick cookies. Aim to scoop the dough and allow it to sit at room temperature for a brief period, if necessary.
Tips on checking for doneness (golden edges and soft centers)
To determine if your chocolate chip cookies are done, watch for the edges turning a light golden brown, while the centers should look slightly underbaked. This visual cue indicates that they will continue to cook on the baking sheet after being removed from the oven. The texture should remain chewy, even when the cookies are fully cooled.
Keeping cookies chewy or crispy: Adjusting baking time
The baking time can significantly affect the final texture of your cookies. For a chewier result, you may want to remove the cookies just as they begin to set but are slightly underbaked. On the other hand, if you prefer a crispier texture, extend the baking time by a minute or two. Remember, every oven varies, so it may take a few tries to find the perfect timing for your specific setup.
Flavor Enhancements
Discussing optional ingredients for customization (e.g., milk chocolate chips)
While this recipe calls for semi-sweet chocolate chips, incorporating milk chocolate chips adds a delightful layer of sweetness and a creamier flavor. This optional ingredient allows for personal preference in the taste profile. Additionally, featuring various sizes of chips can result in a more interesting chocolate distribution, enhancing the overall taste.
Alternative flavorings (e.g., adding nuts, extracts like almond)
Consider adding chopped nuts, such as walnuts or pecans, for an added crunch. Nuts not only elevate the taste but also add a richness that complements the chocolate. For an aromatic twist, a teaspoon of almond extract can be incorporated along with the vanilla. This subtle addition will amplify the flavor without overpowering the inherent chocolate richness.
Variations (e.g., using white chocolate, incorporating oats)
For those looking to change things up, consider substituting all or part of the semi-sweet chocolate chips with white chocolate chips. The sweetness of white chocolate pairs wonderfully with the buttery cookie base. Another variation includes the addition of rolled oats; this will yield a chewier texture and add heartiness. Simply replace half a cup of flour with oats to maintain the right consistency.
Presentation Ideas
Creative ways to serve the cookies
Presenting your cookies can enhance the overall experience. Arrange them in a stacked formation on a decorative platter, and for added flair, consider layering them between parchment paper or using a cute cake stand. This elevates the home-baked cookies to a gourmet level.
Decorative platters and garnishes
Using colorful serving platters not only showcases the cookies but also creates an inviting atmosphere. Garnishing with additional flaky sea salt, chocolate shavings, or drizzles of melted chocolate can make for a stunning presentation and an enticing visual appeal.
Pairing suggestions (milk, coffee, tea)
Pair your freshly baked cookies with a cold glass of milk, which is often considered the perfect accompaniment. Alternatively, serving them with a rich coffee or a cup of tea can enhance the dessert experience, creating a comforting balance of flavors.
Using flaky salt as a visual and flavor accent
Sprinkling flaky sea salt on top of each cookie before baking adds not only a sophisticated touch but also a balanced contrast to the sweetness of the chocolate. The salty crunch against the chocolatey sweetness elevates each bite, making them irresistible.
Storage and Shelf Life
Best practices for storing cookies to maintain freshness
To keep your cookies fresh, store them in an airtight container at room temperature. If you are stacking cookies, place parchment paper between layers to prevent them from sticking together. This method retains their texture and flavor for several days.
Recommendations for freezing cookies for later enjoyment
For longer-term storage, these cookies freeze exceptionally well. After baking, allow them to cool completely, then place them in a freezer-safe bag or container. They can be frozen for up to three months. To enjoy, simply take the desired number out, and let them sit at room temperature or reheat briefly in the oven.
Signs cookies are no longer fresh
Cookies can become stale or lose their texture over time. If they feel hard or crumbly, or if there is mold present, it’s time to discard them. Freshly baked cookies should retain a supple texture and rich aroma for optimal enjoyment.
Common Mistakes to Avoid
Overmixing dough: Why it affects texture
One of the most common mistakes when baking cookies is overmixing the dough. When you overmix, you develop the gluten in the flour, which can result in a tougher cookie. Mix just until the dry ingredients are incorporated to maintain a tender texture.
Skipping the refrigeration process: Potential impacts on cookie shape
Refrigerating the dough for at least 30 minutes before baking is not specified in the recipe, but it can greatly affect the shape and texture of the cookies. Chilling the dough allows the flavors to meld and helps control the spread during baking, resulting in thicker cookies.
Misunderstanding baking times: Adjusting for different oven types
Different types of ovens can yield varying results. Make note of your oven’s performance, as it may require adjustments in baking time. Thermometers can help ensure that your baking temp is accurate, but it’s crucial to keep an eye on the cookie color to avoid overbaking.
Not measuring ingredients accurately: Importance in baking
Baking is a science, and precise measurements are vital. Always use measuring cups designed for dry ingredients for flour and sugars, and ensure your oven is preheated. Incorrect measurements can dramatically alter the final product, affecting taste and texture.
Nutritional Information
Overview of calories and macronutrients per cookie
Each cookie from this recipe contains approximately 150 calories, with a general breakdown of around 7g of fat, 20g of carbohydrates, and 2g of protein. This breakdown may vary slightly depending on precise ingredient quantities and variations used.
Discussion on gluten and dairy considerations
This recipe includes all-purpose flour and butter, making it unsuitable for those with gluten or dairy sensitivities. For gluten-free alternatives, specific gluten-free flour blends can be used, and for dairy-free options, consider substituting with plant-based butters and dairy-free chocolate chips.
Potential for healthier swaps in the ingredient list
While this recipe is indulgent, some healthier modifications can include using whole wheat flour for a nuttier flavor and increased fiber, or substituting part of the sugar with a natural sweetener. Still, these changes may affect the cookie’s texture and taste, so adjustments should be made thoughtfully.
Conclusion
These Crumbl inspired chocolate chip cookies delight with their rich flavor and soft, chewy texture. Perfectly balanced with a hint of sea salt, they can be enjoyed fresh from the oven or stored for later. Dust them with some extra flaky salt for a gourmet touch that will impress anyone who tries them.

Crumbl Inspired Chocolate Chip Cookies Recipe
Ingredients
- 1 cup unsalted butter softened
- 1 cup packed brown sugar
- ½ cup granulated sugar
- 2 large eggs
- 1 tablespoon pure vanilla extract
- 3 cups all-purpose flour
- 1 teaspoon baking soda
- ½ teaspoon baking powder
- 1 teaspoon fine sea salt
- 2 cups semi-sweet chocolate chips
- 1 cup milk chocolate chips optional
- Flaky sea salt for garnish optional
Instructions
-
Preheat your oven to 350°F (175°C) and line two baking sheets with parchment paper.
-
In a large mixing bowl, cream together the softened butter, brown sugar, and granulated sugar until light and fluffy.
-
Add the eggs one at a time, mixing well after each addition, then stir in the vanilla extract.
-
In a separate bowl, whisk together the flour, baking soda, baking powder, and sea salt.
-
Gradually add the dry ingredients to the wet ingredients, mixing gently until just combined.
-
Fold in the semi-sweet and optional milk chocolate chips with a spatula.
-
Scoop generous portions of dough onto the prepared baking sheets, leaving space between each cookie.
-
Sprinkle with flaky sea salt if desired before baking.
-
Bake for 10-12 minutes until the edges are golden brown and centers are soft.
-
Let cool on the baking sheets for 5 minutes before transferring to a wire rack.