
Introduction to Bibingka: A Filipino Delight
Bibingka is a cherished traditional Filipino rice cake that has been a beloved staple of Philippine cuisine for centuries. With its origins rooted in the pre-colonial era, bibingka has evolved into a symbol of Filipino culture, often associated with festive celebrations and family gatherings. Particularly during the Christmas season, bibingka is more than just a dessert; it is a culinary tradition that brings people together, evoking memories of holiday festivities, family reunions, and the warm embrace of Filipino hospitality.
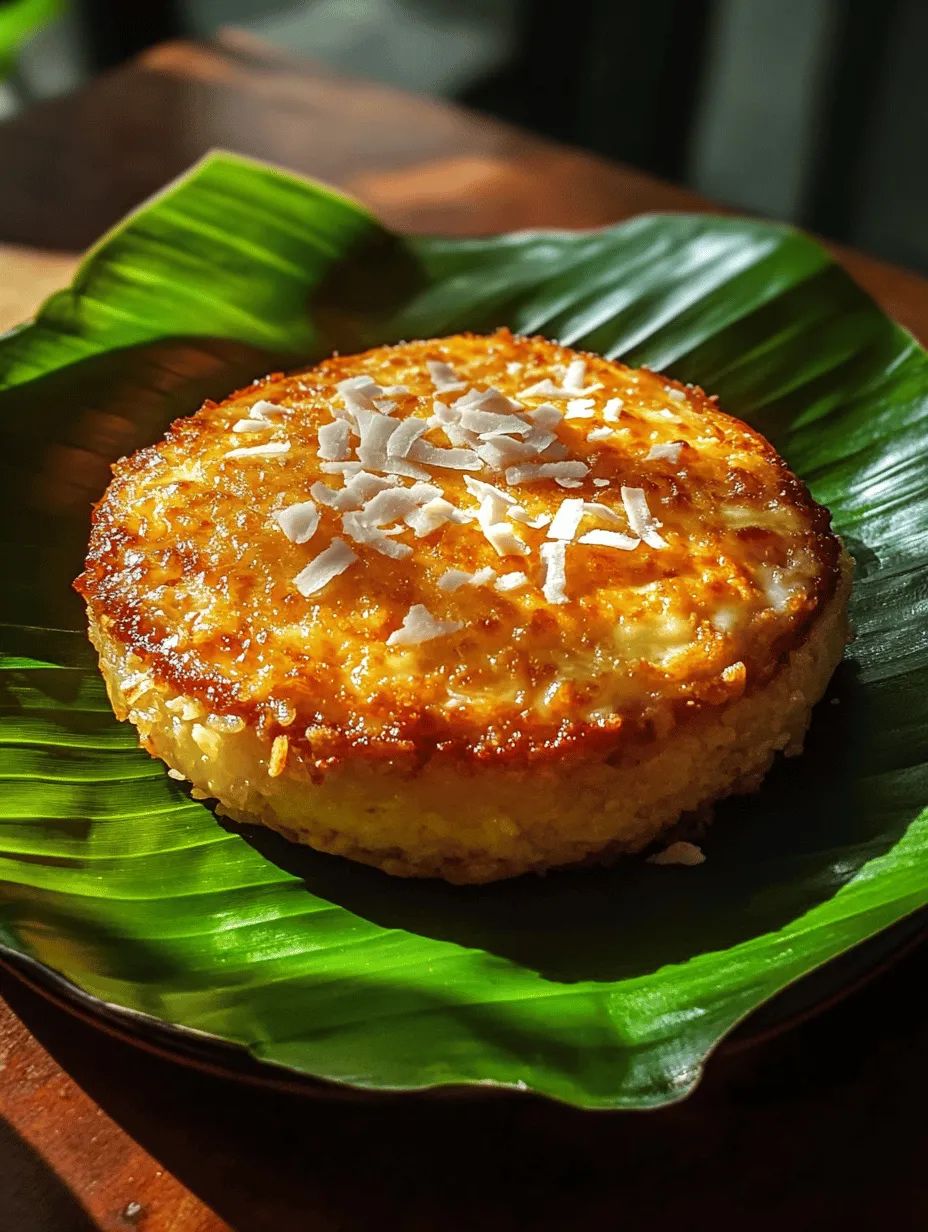
The preparation of bibingka typically involves a unique blend of ingredients that showcase the rich agricultural bounty of the Philippines. The cake’s delightful combination of flavors and textures makes it a standout treat. It boasts a slightly crisp exterior, a soft and fluffy interior, and a hint of smokiness from the traditional clay pots used for baking. The subtle sweetness of the rice cake is beautifully complemented by the creamy richness of coconut milk, while the optional addition of cheese and grated coconut introduces an exciting contrast that elevates the overall experience.
As we embark on this culinary journey to create bibingka, we will explore not only the recipe but also the cultural significance of this Filipino delicacy. With its distinctive flavors and delightful textures, bibingka is sure to win over hearts and taste buds alike.
The Ingredients for Bibingka Bliss
Creating the perfect bibingka requires a careful selection of ingredients, each contributing to the cake’s unique flavor and texture. Here’s a closer look at the essential components of this delightful rice cake:
Rice Flour
The foundation of bibingka is rice flour, which provides the necessary structure for the cake. Unlike wheat flour, rice flour is gluten-free, making bibingka a suitable option for those with gluten sensitivities. The use of rice flour gives the cake its characteristic chewiness while allowing it to maintain a light and airy texture.
Coconut Milk
Coconut milk is a key ingredient in bibingka, adding a rich creaminess that enhances the overall flavor profile. This ingredient not only contributes to the cake’s moistness but also infuses it with a distinctive tropical aroma. The use of fresh coconut milk, if available, elevates the dish even further, making the bibingka taste exceptionally authentic.
Sugar
To achieve the perfect balance of sweetness, sugar is added to the mixture. The amount of sugar can be adjusted according to personal preference, allowing for a customizable sweetness that caters to different palates. The sugar not only sweetens the cake but also contributes to its golden-brown crust when baked.
Water
Water is utilized in the recipe to adjust the consistency of the batter. This is crucial as it determines how thick or thin the batter will be, affecting the final texture of the bibingka. The right amount of water ensures that the cake bakes evenly and achieves that signature fluffy quality.
Baking Powder
Baking powder serves as the leavening agent in bibingka, helping the cake rise and achieve a light, fluffy texture. It is essential to use the correct amount of baking powder to ensure that the bibingka does not become dense or heavy.
Salt
A pinch of salt is added to the batter to enhance the flavors of the ingredients. While it may seem counterintuitive to add salt to a sweet dish, it actually helps to elevate the overall taste by balancing the sweetness and rounding out the flavors.
Melted Butter
Melted butter brings moisture and richness to the bibingka, creating a tender crumb. The buttery flavor complements the other ingredients, contributing to the cake’s overall sumptuousness. For a healthier alternative, coconut oil can be used, maintaining the tropical essence of the dish.
Eggs
Eggs play a critical role in binding the ingredients together while also contributing to the cake’s texture. They provide structure and stability, ensuring that the bibingka holds its shape after baking. The proteins in eggs also help create a slightly chewy and tender crumb.
Grated Fresh Coconut (Optional)
Adding grated fresh coconut is an optional step that enhances both the flavor and texture of the bibingka. It introduces an additional layer of tropical flavor while providing a delightful chewiness that contrasts beautifully with the soft cake. This ingredient is especially popular in regions where fresh coconuts are readily available.
Cheese
For those who enjoy a savory twist to their bibingka, the addition of cheese is highly recommended. Traditionally, salted cheese such as queso de bola or cheddar is used, creating a delicious contrast between the sweet cake and the salty cheese. This combination adds complexity to the flavor profile, making each bite a delightful surprise.
Banana Leaves
One of the most distinctive aspects of bibingka is its traditional presentation. The use of banana leaves not only serves as a natural lining for baking but also imparts a subtle aroma to the cake. Preparing the banana leaves involves soaking them in warm water to ensure they become pliable and easy to work with. This step is crucial for achieving an authentic bibingka experience, as the leaves also contribute to the overall aesthetic of the dish.
Preparation Steps for Perfect Bibingka
Now that we’ve gathered our ingredients, it’s time to dive into the preparation steps to create the perfect bibingka. Each step is essential for achieving the desired texture and flavor, so let’s go through the process in detail.
Preheating the Oven
Before any mixing begins, it’s important to preheat your oven to 375°F (190°C). This is a crucial step, as a properly preheated oven ensures even baking and helps achieve that beautiful golden crust on the bibingka. If you’re using a traditional clay pot, it’s advisable to place it in the oven during the preheating process to ensure the pot is hot enough to create a lovely char on the bottom of the cake.
Soaking and Preparing Banana Leaves
While the oven is heating up, take the time to prepare your banana leaves. Cut them into squares large enough to line your baking dish or pots. To ensure they are flexible and easy to work with, soak the leaves in warm water for about 10-15 minutes. This step not only softens the leaves but also enhances their aroma, which will infuse your bibingka as it bakes.
After soaking, carefully pat the leaves dry and place them into your baking dish, allowing the edges to hang over the sides. This will make it easier to remove the bibingka later, and it adds to the presentation of the dish.
Mixing Dry Ingredients
In a separate bowl, begin by combining your dry ingredients: rice flour, sugar, baking powder, and salt. Mixing these ingredients thoroughly is key to ensuring a lump-free batter. Using a whisk, blend them together until they are well incorporated. This step helps evenly distribute the leavening agent and sugar throughout the flour, promoting uniformity in the final product.
Combining Wet Ingredients
In another bowl, whisk together the coconut milk, melted butter, and eggs until well combined. If you’re using grated coconut, you can add it at this stage. This mixture will create the wet base for your bibingka, contributing to its rich flavor and moisture.
Once combined, gradually add this wet mixture to the dry ingredients, stirring gently until a smooth batter forms. Be careful not to overmix the batter, as this can lead to a denser cake. The goal is to achieve a thick yet pourable consistency, ready to be transformed into bibingka bliss.
Final Assembly
Now that your batter is prepared, it’s time for the final assembly. Pour the batter into the lined baking dish, filling it about three-quarters full to allow room for rising. If you’re adding cheese, sprinkle it on top of the batter for that savory touch.
With the oven preheated and your bibingka ready for baking, slide it into the oven and allow it to bake for approximately 30 to 40 minutes, or until the top is golden brown and a toothpick inserted into the center comes out clean.
As the bibingka bakes, the delightful aroma will fill your kitchen, enticing everyone within reach. This is where the magic happens, transforming simple ingredients into a deliciously fluffy rice cake that embodies the spirit of Filipino tradition.
Stay tuned for the next part of this journey, where we will delve deeper into the baking process, additional tips for achieving the perfect bibingka, and answers to common questions about this beloved Filipino delicacy.
Combining Wet Ingredients
Achieving the perfect bibingka begins with the careful combination of wet ingredients. The key to a velvety texture lies in ensuring a smooth consistency. Begin by whisking together the coconut milk and eggs in a large mixing bowl. The rich, creamy coconut milk not only adds flavor but also contributes to the bibingka’s signature moisture. Mixing the ingredients thoroughly allows for a uniform base that will lead to an even baking process.
To ensure that there are no lumps in your mixture, it’s important to whisk well until the eggs are fully incorporated and the coconut milk is blended seamlessly. This step guarantees that your bibingka will have a luscious texture, free of any unwanted clumps that could disrupt the experience of this traditional delicacy.
Folding in Optional Ingredients
Once your wet ingredients are well-mixed, it’s time to fold in any optional ingredients. This is where you can get creative with your bibingka. Whether you choose to add shredded cheese, sweet corn kernels, or even a hint of macapuno (young coconut), the technique of folding is crucial. Use a spatula to gently incorporate these additions into the batter, taking care not to overmix. Overmixing can lead to a dense texture, robbing your bibingka of its light and airy quality.
To fold properly, slide the spatula down the side of the bowl, scoop up the batter from the bottom, and lift it over the added ingredients. Rotate the bowl as you go to ensure even distribution without breaking down the batter’s structure.
Pouring and Topping
Now that your batter is ready, it’s time to pour it into your prepared baking pan. For a successful outcome, ensure that your pan is well-greased or lined with banana leaves, a traditional method that also infuses a subtle aroma into the bibingka. Pour the batter into the pan, using a spatula to create an even spread across the surface.
For added flavor and presentation, you can sprinkle a generous amount of cheese on top of the batter before it goes into the oven. The cheese will melt during baking, creating a delightful, gooey topping that complements the sweet, soft texture of the bibingka.
Baking the Bibingka to Perfection
The baking process is where the magic happens. Preheat your oven to 375°F (190°C) before placing your bibingka inside. This temperature is optimal for achieving a golden-brown top while ensuring the inside remains moist. Bake the bibingka for approximately 30 to 40 minutes, but keep an eye on it as ovens may vary.
A good indicator of doneness is a toothpick inserted into the center—if it comes out clean or with a few moist crumbs, your bibingka is ready. Additionally, the edges should start pulling away from the sides of the pan, and the top should be a lovely golden brown.
Once baked, allow your bibingka to cool for a few minutes in the pan before transferring it to a wire rack. This cooling period is essential for the flavors to settle and for the bibingka to firm up slightly, making it easier to slice and serve.
Serving Suggestions and Pairings
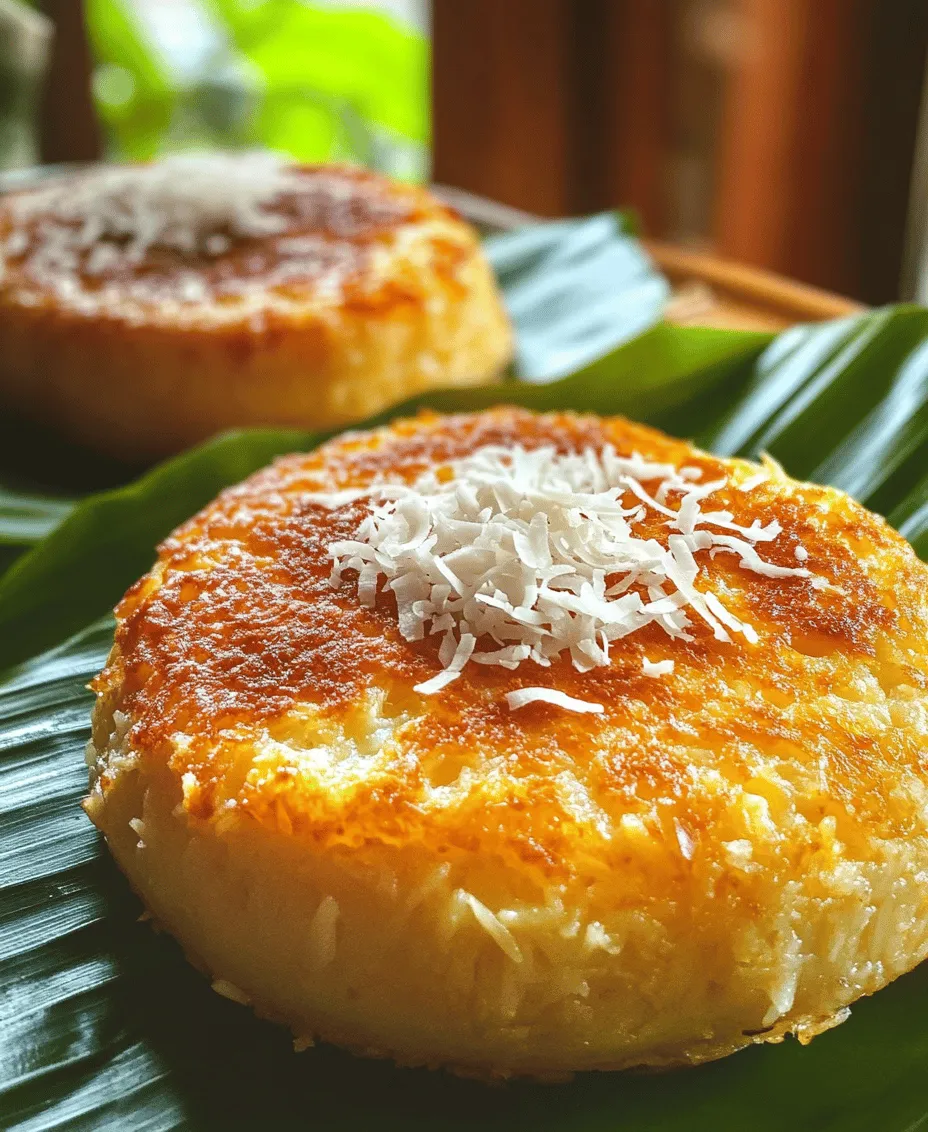
Bibingka is best enjoyed warm, and there are numerous delightful ways to serve this traditional treat. For a classic presentation, simply slice the bibingka into wedges and serve it as is, or with a spread of salted butter. The richness of the butter enhances the sweetness of the bibingka, creating a comforting combination.
Another traditional accompaniment is freshly grated coconut. Sprinkle some over the top of your bibingka for an added burst of flavor and texture.
For those looking to indulge, pairing bibingka with a steaming cup of coffee or tea can elevate the experience, making it an ideal snack for any time of day. The warmth of the drink complements the softness of the bibingka, creating a cozy atmosphere that encourages sharing and enjoyment.
Nutritional Insights of Bibingka
Understanding the nutritional profile of bibingka is important, especially for those mindful of dietary choices. Bibingka is primarily composed of carbohydrates from the rice flour, which makes it a great source of energy. The inclusion of coconut milk adds healthy fats, contributing to the dish’s creamy texture, while the eggs provide essential proteins.
A typical serving of bibingka can vary in calories based on additional ingredients like cheese or toppings, but it generally sits well within moderate calorie counts, making it a satisfying treat. For those with dietary restrictions, bibingka can be adapted; for instance, you can use gluten-free flour or reduce sugar for a lighter version.
The Cultural Significance of Bibingka
Bibingka holds a special place in Filipino culture, especially during festive occasions such as Christmas. Traditionally, it is sold by street vendors during the holiday season, often enjoyed after Simbang Gabi, a series of early morning masses leading up to Christmas. Sharing bibingka with family and friends is a cherished ritual that symbolizes togetherness and celebration.
Historically, bibingka can be traced back to the pre-colonial era, showcasing the rich culinary heritage of the Philippines. Its evolution has led to various regional adaptations, each with unique twists, such as the addition of different toppings or base ingredients, reflecting the diverse agricultural landscape of the country.
Conclusion: Embracing the Joy of Bibingka
In conclusion, the delightful flavors and textures of bibingka make it a beloved dish worth exploring in your own kitchen. From the careful selection of ingredients to the final baking process, each step contributes to the overall experience of enjoying this traditional treat.
Whether you serve it with butter, coconut, or alongside your favorite beverage, bibingka is more than just a snack; it is a celebration of culture, history, and community. So gather your loved ones, share a plate of warm bibingka, and embrace the joy of culinary traditions that bring us all together.
Bibingka Recipe
Ingredients