

Introduction
The festive season is the perfect time to indulge in sweet treats that not only taste delicious but also look beautiful on your dessert table. One such delight is the Festive Oreo Bliss Bites, which combine rich flavors and appealing textures. These no-bake bites are easy to prepare and promise to be a hit at holiday gatherings, making them an ideal choice for anyone looking to whip up a quick yet impressive dessert.
Imagine a bite-sized treat that captures the iconic flavor of Oreo cookies, enhanced by the creamy richness of softened cream cheese. Dipped in a velvety chocolate coating, these blissful bites become a celebration of taste and presentation, embodying the essence of festive cheer. Topped off with crushed peppermint candies and colorful sprinkles, they not only taste incredible but also boast an eye-catching appearance that can elevate any dessert table.
These Oreo Bliss Bites are perfect for various occasions—be it holiday parties, seasonal celebrations, or simply a sweet snack at home. They allow you to engage in the joyful spirit of baking without the fuss of traditional oven-baked recipes. The best part? There’s no baking involved, so you can spend more time enjoying the festivities with family and friends.
Recipe Overview
– Prep Time: 20 minutes
– Cook Time: 0 minutes
– Total Time: 1 hour 50 minutes
– Course: Dessert
– Cuisine: American
– Servings: 24 bites
– Calories: ~120 per bite
Festive Oreo Bliss Bites are a delightful no-bake dessert that brings together the iconic flavors of Oreo cookies and cream cheese, cloaked in luscious white and dark chocolate coatings. The addition of crushed peppermint candies offers a festive twist, while colorful sprinkles can add a touch of whimsy. These little bites are perfect for parties, celebrations, or as a sweet treat to enjoy at home.
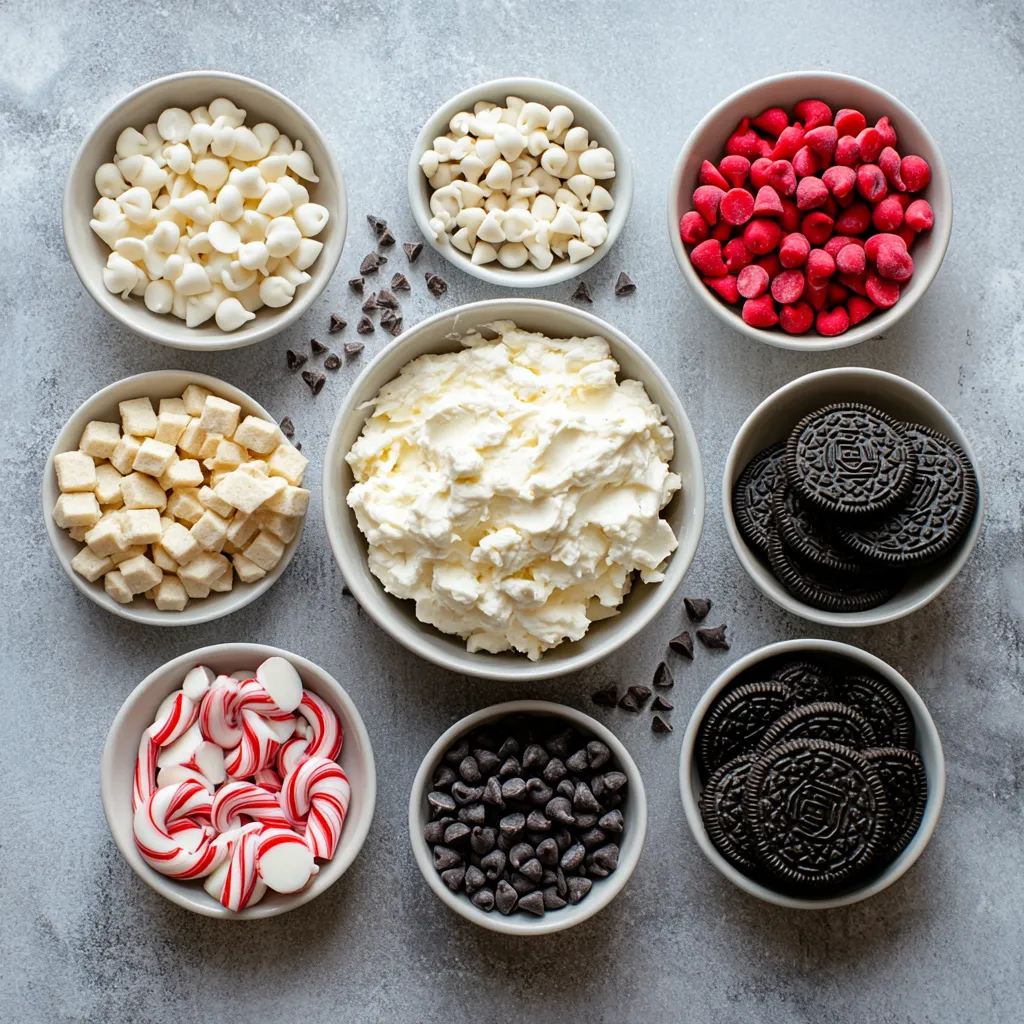
Ingredients
– Oreo cookies: 1 package (14.3 oz)
– Cream cheese: 8 oz, softened to room temperature
– White chocolate chips: 1 cup
– Dark chocolate chips: 1 cup
– Crushed peppermint candies (optional, for garnish): 1/2 cup
– Colorful sprinkles or edible glitter (for decoration)
Instructions
1. Begin by crushing the Oreo cookies into fine crumbs. You can use a food processor for a quick method or place the cookies in a zip-top bag and crush them with a rolling pin until they are finely ground.
2. In a large mixing bowl, combine the crushed Oreo crumbs with the softened cream cheese. Mix thoroughly until the two ingredients are well blended and form a cohesive mixture.
3. With clean hands, take small portions of the mixture and roll them into balls about 1 inch in diameter. Arrange these balls on a baking sheet lined with parchment paper.
4. Place the baking sheet in the freezer and let the Oreo balls chill for at least 30 minutes, or until they are firm to the touch.
5. While the balls are freezing, prepare the white chocolate coating. In a microwave-safe bowl, melt the white chocolate chips in 30-second intervals, stirring after each interval until the chocolate is completely smooth and melted.
6. Once the Oreo balls are firm, carefully dip each one into the melted white chocolate. Allow any excess chocolate to drip off before laying them back onto the parchment-lined baking sheet.
7. As soon as you coat the balls in white chocolate, sprinkle the crushed peppermint candies or colorful sprinkles on top while the chocolate is still wet, ensuring they stick well.
8. For an extra touch, you can repeat the dipping process using the dark chocolate chips for a delightful marbled appearance. Simply melt the dark chocolate and dip the balls again.
9. After all the Oreo balls are coated, return them to the refrigerator for at least 1 hour to allow the chocolate to set completely.
10. Serve chilled and indulge in your delightful festive treats!
Crushing the Oreos
Start with the process of crushing the Oreo cookies. Using a food processor allows for efficiency; alternatively, you can use a zip-top bag and rolling pin. The goal is to achieve fine crumbs, which will ensure a smooth mixture when combined with the cream cheese. If using the rolling pin method, take care to apply even pressure to avoid any large chunks.
It’s recommended to work in batches if you find it challenging to crush the entire package at once. Combining the cookies into fine crumbs not only boosts the texture of the dessert but also enhances the overall flavor profile.
Mixing the Ingredients
Once you’ve crushed the Oreos, the next step is to combine them with softened cream cheese. It is crucial that the cream cheese is at room temperature, as this makes it easier to incorporate and blend into the cookie crumbs. A thorough mix is necessary for a uniform flavor, so keep stirring until no clumps of cream cheese remain. The result should be a well-mixed and cohesive dough-like ball of goodness that sticks together well.
This step is vital for achieving the right consistency; a well-mixed dough will hold its shape better when formed into bites.
Shaping the Bites
Transform the cohesive mixture into bite-sized balls about 1 inch in diameter. This size is ideal for easy consumption and presentation, allowing each piece to be a perfect, two-bite treat. Using clean hands, roll the mixture in your palms gently, ensuring a smooth exterior.
When arranging the balls on a baking sheet lined with parchment paper, ensure they are spaced apart. This prevents them from sticking together when they harden in the freezer. The lined sheet also facilitates an easy cleanup after the bites have been rolled.
Freezing the Balls
Freezing is a crucial step in preparing these Oreo Bliss Bites. The freezing process allows the balls to firm up, ensuring they maintain their shape during the subsequent chocolate coating. It’s advised to chill them for at least 30 minutes; however, a longer chill will only serve to ensure even firmer bites.
While freezing, it’s important to check that the baking sheet is level so that the balls do not roll, potentially losing their shape. If extensive freezing is needed, wrapping the baking sheet with plastic wrap can help maintain the freshness of the mixture during the process. The handling and cooling of the bites will make the dipping phase less messy and more enjoyable.
Melting the White Chocolate
Melt the white chocolate chips carefully to achieve that smooth, drizzled consistency essential for coating your bliss bites. A microwave-safe bowl is best suited for this task. Always melt in 30-second intervals, stirring thoroughly after each interval to prevent any burning.
Checking the consistency of the chocolate is also crucial; it should be smooth and just the right thickness for dipping. If you notice the chocolate is too thick, consider adding a small amount of coconut oil to thin it out without compromising the taste. This attention to detail will allow the chocolate to coat evenly, enhancing both the flavor and the visual appeal of your Oreo Bliss Bites.
Dipping Process
Carefully dip each firm Oreo ball into the melted white chocolate, ensuring to cover it entirely. Allow any excess chocolate to drip back into the bowl, facilitating an even layer of coating. Place the coated balls back onto the parchment-lined baking sheet immediately after dipping.
For a festive touch, while the chocolate is still wet, sprinkle each bite with crushed peppermint candies or colorful sprinkles. This step not only enhances the visual look but also adds a delightful crunch.
If you’re feeling adventurous, you can take it a step further by repeating the dipping process with dark chocolate to create a marbled effect. This extra layer of chocolate not only enhances the flavor complexity but also adds an elegant touch that is sure to impress.
The process might feel meticulous, but taking the time to coat each bite accurately will ramp up their appeal. After all the hard work, returning the well-decorated bites back to the refrigerator allows the chocolate to set completely, ensuring a fun yet controlled treat to enjoy later. These steps cement the Festive Oreo Bliss Bites as the go-to dessert for any celebratory occasion!
ites fresh and delicious, proper storage is key.
Coating the Bites
Carefully dip each Oreo ball into the melted white chocolate, ensuring each bite is evenly coated.
– Allow excess chocolate to drip off before placing them back on the parchment paper. This helps prevent pooling of chocolate underneath the bites, which can lead to a messy appearance and uneven coating.
– Take your time with this step; a steady hand will ensure a clean and appealing finish that showcases the delightful treat within.
Adding Garnishes
Sprinkling toppings while the chocolate is still wet is crucial for achieving that festive charm.
– Use crushed peppermint candies or colorful sprinkles to add texture and visual interest to each Oreo Bliss Bite. This step is essential for ensuring that toppings stick well to the chocolate coating; if you wait until the chocolate hardens, the toppings won’t adhere properly.
– Consider varying the distribution of sprinkles or peppermint to create unique patterns on each bite, lending a personalized touch to your presentation.
Optional Dark Chocolate Dip
Adding a layer of dark chocolate not only enhances the flavor contrast but also creates an engaging visual effect.
Preparing the Dark Chocolate
For those looking to create a marbled effect, prepare the dark chocolate in the same manner as the white chocolate.
– The melting process is straightforward: microwave high-quality dark chocolate chips in 30-second intervals, stirring in between until fully melted. Using high-quality chocolate enhances the flavor profile and complements the sweetness of the Oreo filling.
– Ensure the dark chocolate is smooth and free of lumps; this will make the dipping process easier and yield a more professional-looking finish.
Re-dipping Technique
To achieve a layered look, gently dip the already coated bites into dark chocolate.
– Allow any excess dark chocolate to drip off, just like you did with the white chocolate. Take care not to disturb the white chocolate layer underneath, as this will maintain the beautiful marbling effect.
– Transfer them back to the parchment-lined baking sheet, taking care not to touch the chocolate until it has set.
Setting the Chocolate
Allowing time for the chocolate to set is an important final step.
Refrigeration
After all bites are coated, return them to the refrigerator for chilling.
– Chill for at least 1 hour to ensure the chocolate sets completely. This process provides a satisfying firmness to the bites, making them even more enjoyable when served.
– The cool environment helps the chocolate harden properly, maintaining the integrity of the decorations.
Checking for Doneness
It’s important to check the chocolate for proper set before serving.
– The chocolate should be firm and dry to the touch when ready. A firm exterior ensures a delightful contrast to the creamy filling and prevents smudging during handling.
– If the chocolate appears soft or tacky, allow for additional chilling time – rushing this step can lead to undesirable results.
Presentation Tips
Creating an attractive presentation can elevate your Oreo Bliss Bites from simple dessert to a stunning centerpiece.
Arranging the Bites
Consider using a decorative platter or cake stand for an elegant display.
– Layer the bites in an appealing manner, ensuring they are spaced adequately for visual impact. A well-arranged display invites guests to indulge and adds a festive mood to any gathering.
– Mini cupcake liners not only make for a charming presentation but also make it hygienic and easy for guests to serve themselves. This can be a great addition for parties or potluck events.
Garnishing Ideas
Enhancing the visual appeal of your dessert can tempt even the most discerning guests.
– Utilize leftover crushed peppermint or colorful sprinkles to reposition added charm. A light dusting across the surface or a sprinkle around the serving area can tie the entire presentation together.
– For an extra festive flourished, consider adding edible glitter for a sparkly finish, making the bites enticing and celebratory, perfect for holiday gatherings or special occasions.
Serving Suggestions
Elevate the overall experience of enjoying Oreo Bliss Bites by thoughtfully considering complementary items.
Pairing Options
Pairing your Oreo Bliss Bites with suitable beverages or textures can create a delightful contrast.
– Consider serving with a warm beverage like hot chocolate or coffee. The warmth of these drinks complements the cool, chocolate-covered bites, creating a balance in temperature and flavor.
– For added texture and flavor, pairing with nuts or fresh fruits can add an interesting contrast; think of how a salty almond or a juicy raspberry could enhance each bite.
Storage Recommendations
To keep your Oreo Bliss Bites fresh and delicious, proper storage is key.
– Store your completed bites in an airtight container in the refrigerator to maintain their firmness and flavor. Proper storage not only preserves the quality but also extends their shelf life, allowing you to enjoy these treats for several days after preparation.
– If preparing ahead of time, you can also freeze the bites for longer storage; just remember to separate them with parchment paper to prevent sticking. When ready to serve, simply thaw them in the refrigerator.
Crafting and decorating these delightful Oreo Bliss Bites turns a simple treat into an impressive dessert that’s sure to please guests of all ages. With their rich flavors and appealing appearance, they are an excellent addition to any dessert table or celebration.

Festive Oreo Bliss Bites: A Simple No-Bake Dessert
Ingredients
- 1 package Oreo cookies
- 8 oz cream cheese softened
- 1 cup white chocolate chips
- 1 cup dark chocolate chips
- ½ cup crushed peppermint candies
- colorful sprinkles or edible glitter
Instructions
- Crush the Oreo cookies into fine crumbs using a food processor or a rolling pin.
- Combine the crushed Oreo crumbs with softened cream cheese in a large mixing bowl and mix until well blended.
- Roll small portions of the mixture into balls about 1 inch in diameter and place them on a parchment-lined baking sheet.
- Freeze the Oreo balls for at least 30 minutes until firm.
- Melt the white chocolate chips in a microwave-safe bowl in 30-second intervals, stirring until smooth.
- Dip each firm Oreo ball into the melted white chocolate, allowing excess to drip off.
- Sprinkle crushed peppermint candies or colorful sprinkles on top while the chocolate is still wet.
- Optionally, dip the balls in melted dark chocolate for a marbled effect.
- Refrigerate the coated Oreo balls for at least 1 hour to set the chocolate.
- Serve chilled and enjoy your festive treats!