
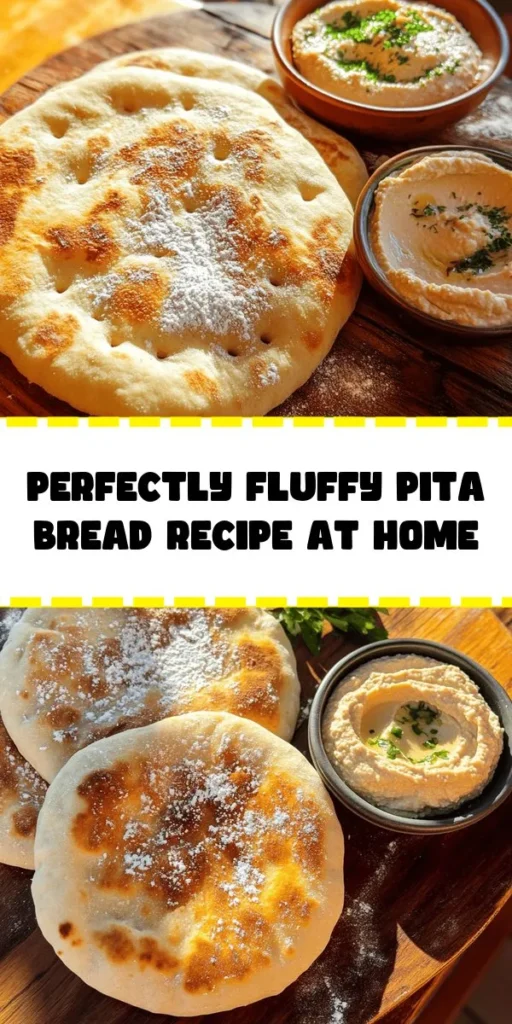
Introduction
Pita bread is a staple of Middle Eastern cuisine, celebrated for its unique pocket design and versatility in various dishes. From being the perfect vehicle for dips like hummus and baba ghanoush to serving as a wrap for grilled meats and fresh vegetables, pita bread has earned its place in the hearts (and stomachs) of food lovers around the world. This soft, fluffy bread not only complements a wide array of meals but also brings a sense of authenticity and tradition to any table.
While store-bought pita bread may be convenient, nothing beats the aroma and texture of freshly baked pita made from scratch. Homemade pita bread is incredibly soft, with a delightful chewiness that store-bought varieties often lack. Moreover, preparing pita at home allows you to control the ingredients, ensuring that everything is fresh and free from preservatives. In this article, we will guide you through the process of making fluffy Arabic dough for pita bread, emphasizing its simplicity and the delicious results that await.
Understanding Pita Bread
Pita bread, often referred to as Arabic bread, is a round, flatbread that is traditionally baked at high temperatures. The defining characteristic of pita is its ability to puff up during baking, creating a pocket that can be filled with various ingredients. This unique feature not only adds to the bread’s appeal but also makes it highly functional for a myriad of culinary applications.
In Middle Eastern culture, pita bread holds significant importance. It is often a fundamental part of communal meals, where it serves as both a utensil and an accompaniment. Pita is used to scoop up dishes like falafel, shawarma, and grilled kebabs, embodying the essence of sharing and togetherness that defines many Middle Eastern dining experiences. Furthermore, in regions like Lebanon, pita is often served fresh alongside meals, reinforcing its status as a beloved staple.
In addition to its cultural significance, homemade pita bread offers numerous nutritional benefits. Unlike many commercial options that may contain added sugars, preservatives, and unhealthy fats, homemade pita can be crafted with wholesome ingredients. By utilizing all-purpose flour, salt, and olive oil, you can create a bread that is not only delicious but also packed with nutrients. Making pita at home allows you to enjoy a more wholesome product, ensuring that you nourish your body with every bite.
Ingredients Breakdown
To make fluffy Arabic dough for fresh pita bread, you will need a handful of simple ingredients, each playing a crucial role in achieving the perfect texture and flavor. Here’s a breakdown of each component:
All-Purpose Flour
All-purpose flour is the foundation of our pita dough. It contains a balanced amount of protein, which is essential for gluten development. Gluten is what gives the bread its structure and elasticity, contributing to that characteristic chewiness. For the best results, opt for high-quality all-purpose flour, as this will greatly influence the texture of your final product.
Salt
Salt is more than just a flavor enhancer; it plays a critical role in dough structure. It strengthens gluten strands, helping the dough to rise properly and maintain its shape during baking. Additionally, salt enhances the overall flavor of the pita, ensuring that it is not bland. Use fine sea salt for even distribution throughout the dough.
Sugar
Sugar may seem like an unusual addition to bread dough, but it serves multiple purposes. First, it acts as food for the yeast, aiding in fermentation and contributing to the dough’s rise. Secondly, sugar helps to achieve a beautiful golden-brown crust during baking by promoting the Maillard reaction. Even a small amount can significantly impact the flavor profile of your pita.
Instant Yeast
Instant yeast is a game-changer for home bakers. Unlike active dry yeast, it does not require proofing in warm water, allowing for a more straightforward preparation process. Instant yeast works quickly, making it perfect for recipes that call for a rapid rise. It helps create the light, airy texture we associate with fluffy pita bread, ensuring that each piece puffs up beautifully in the oven.
Warm Water
Water is a vital ingredient in any bread recipe, and in this case, warm water is essential for activating the yeast. The ideal temperature for warm water is between 100°F to 110°F (38°C to 43°C). If the water is too hot, it can kill the yeast; too cold, and the yeast won’t activate properly. Using warm water also helps to create a more pliable dough, making it easier to work with.
Olive Oil
Olive oil adds moisture and flavor to the dough, enriching the pita and improving its texture. It contributes to a softer final product and helps prevent the bread from becoming too dense. Additionally, olive oil boasts health benefits, including heart-healthy fats, making it a nutritious choice for this recipe.
Extra Flour
Extra flour is essential for dusting during preparation. As you knead and shape the dough, you may find that it sticks to your work surface or hands. Having extra flour on hand ensures that you can manage the dough without it becoming too sticky, allowing for easier handling and shaping.
Step-by-Step Instructions for Dough Preparation
Now that we understand the essential ingredients for our fluffy Arabic dough, let’s proceed with the step-by-step instructions to prepare it.
Mixing Dry Ingredients
The first step in creating the perfect pita dough is to mix the dry ingredients. In a large mixing bowl, combine the all-purpose flour, salt, sugar, and instant yeast. It’s crucial to mix these ingredients thoroughly, as this ensures even flavor distribution and uniformity in the dough.
Using a whisk or a fork, gently combine the dry ingredients until they are well mixed. This step is essential as it prevents clumping and ensures that the yeast and salt are evenly incorporated. Choosing the right bowl is equally important—opt for a large mixing bowl that provides ample space for the dough to expand during fermentation.
Creating the Dough
Once the dry ingredients are well mixed, it’s time to create the dough by combining the wet and dry ingredients. Make a well in the center of the dry mixture and pour in the warm water and olive oil. Using a wooden spoon or your hand, begin mixing the ingredients until a shaggy dough begins to form.
As you mix, pay attention to the texture of the dough. If it feels too dry, you can add a little more warm water, a tablespoon at a time, until the dough comes together. Conversely, if the dough feels too sticky, sprinkle a little extra flour as needed. The goal is to achieve a dough that is slightly tacky but not overly sticky.
Signs That the Dough is Coming Together Properly
As you mix the dough, you’ll notice it starting to pull away from the sides of the bowl. This is a good indicator that your dough is coming together properly. Continue mixing until all the flour is incorporated and you have a cohesive mass. At this point, you can turn the dough out onto a lightly floured surface to begin kneading.
Kneading is a crucial step in developing the gluten structure of the dough. Use the heel of your hand to push the dough away from you, then fold it back over itself. Rotate the dough a quarter turn and repeat the process. Knead the dough for about 8 to 10 minutes, or until it becomes smooth and elastic. If the dough sticks to your hands, dust your fingers with a bit of flour.
Once the dough has reached the desired consistency, it’s ready for the next steps in our pita-making journey. This dough will soon transform into fluffy, warm pita bread that will elevate your culinary experience. As we continue, we will explore the next stages of this delightful recipe, ensuring that your homemade pita turns out perfectly every time.
Kneading the Dough
Kneading is a crucial step in the process of making fluffy Arabic dough for fresh pita bread. This technique not only develops the gluten structure but also helps to incorporate air into the dough, resulting in a light and airy texture. When kneading, you should aim for a dough that is smooth and elastic, which indicates that the gluten has developed properly.
Importance of Kneading for Gluten Development
Gluten, a protein found in wheat flour, provides the structure needed for bread to rise. When flour is mixed with water, gluten proteins bond and create a network that traps gas produced by yeast during fermentation. This process is essential for achieving the desired puffiness in pita bread. Kneading the dough effectively encourages these proteins to form a strong gluten structure, contributing to the overall texture of the finished bread.
Tips for Achieving the Right Dough Consistency and Texture
1. Knead by Hand or Machine: While you can knead the dough by hand, using a stand mixer fitted with a dough hook can save time and effort. If kneading by hand, use the heel of your palms to push the dough away from you, then fold it back over itself. Repeat this process for about 10 minutes until the dough is smooth and elastic.
2. Hydration Level: The dough should be slightly tacky but not overly sticky. If the dough is too dry, it can result in a tough pita. If it’s too wet, it may not hold its shape. Adjust the flour or water as necessary to achieve the perfect consistency.
3. Resting: Allow the dough to rest for about 10 minutes after kneading. This relaxation period allows the gluten to settle, making it easier to shape the dough later.
First Rise
After kneading, it’s time for the first rise. This fermentation process is essential for developing the flavor and texture of the pita bread.
Explanation of the Fermentation Process and Its Impact on Flavor and Texture
During the first rise, yeast ferments the sugars in the dough, producing carbon dioxide gas and alcohol. This process not only causes the dough to rise but also enhances the flavor profile. The longer the dough ferments, the more complex and rich the flavor becomes. Additionally, the fermentation process helps to create a light and airy texture in the final product.
Optimal Conditions for Rising Dough
For optimal rising, place the dough in a warm, draft-free area. The ideal temperature for yeast activity is between 75°F and 85°F (24°C to 29°C). You can create a suitable environment by preheating your oven for a few minutes and then turning it off, placing the dough inside with the door slightly ajar. Cover the bowl with a damp kitchen towel or plastic wrap to retain moisture, ensuring the dough rises properly.
Shaping and Second Rise
Once the dough has doubled in size, it’s time to shape it into individual pita rounds.
Techniques for Dividing and Shaping Dough Balls
1. Dividing the Dough: Gently punch down the risen dough to release excess gas. Turn it out onto a lightly floured surface and divide it into equal portions, typically about 8 to 10 pieces, depending on your preferred size of the pita.
2. Shaping: Take each piece of dough and form it into a ball by tucking the edges under and rolling it against the surface with your palm. This creates a smooth top and ensures uniformity.
3. Flattening: Use a rolling pin to flatten each ball into a disc, keeping the thickness uniform. Aim for about 1/4 inch (6 mm) thick to ensure even cooking. An uneven thickness can result in some pitas puffing while others do not.
Importance of Uniform Thickness for Even Baking
Uniform thickness is crucial for ensuring that the pitas bake evenly. If some areas are thicker than others, they may not puff properly, leading to flat, dense bread. Take your time when rolling out the dough to achieve consistent discs.
Baking the Pita Bread
Now that your pita discs are ready, it’s time to bake them to perfection.
Preheating the Oven
Preheating your oven is essential for achieving the high temperatures needed for puffing pita bread. Aim for a temperature of 475°F to 500°F (245°C to 260°C).
Importance of High Temperatures for Puffing Pita Bread
The high temperature causes the moisture in the dough to rapidly steam, creating pockets of air that make the pita bread puff up. This is what gives pita its signature pocket, allowing it to be filled with a variety of delicious fillings.
Explanation of Using a Pizza Stone Versus Baking Sheets
Using a pizza stone can significantly enhance your baking results. A pizza stone retains heat well and provides an even cooking surface, which helps the pitas puff up nicely. If you don’t have a pizza stone, you can still use a baking sheet, but it’s advisable to preheat the sheet in the oven before placing the pitas on it to ensure optimal results.
Baking Process
When your oven is preheated, it’s time to bake the pitas.
How to Know When the Pita is Ready (Visual and Textural Cues)
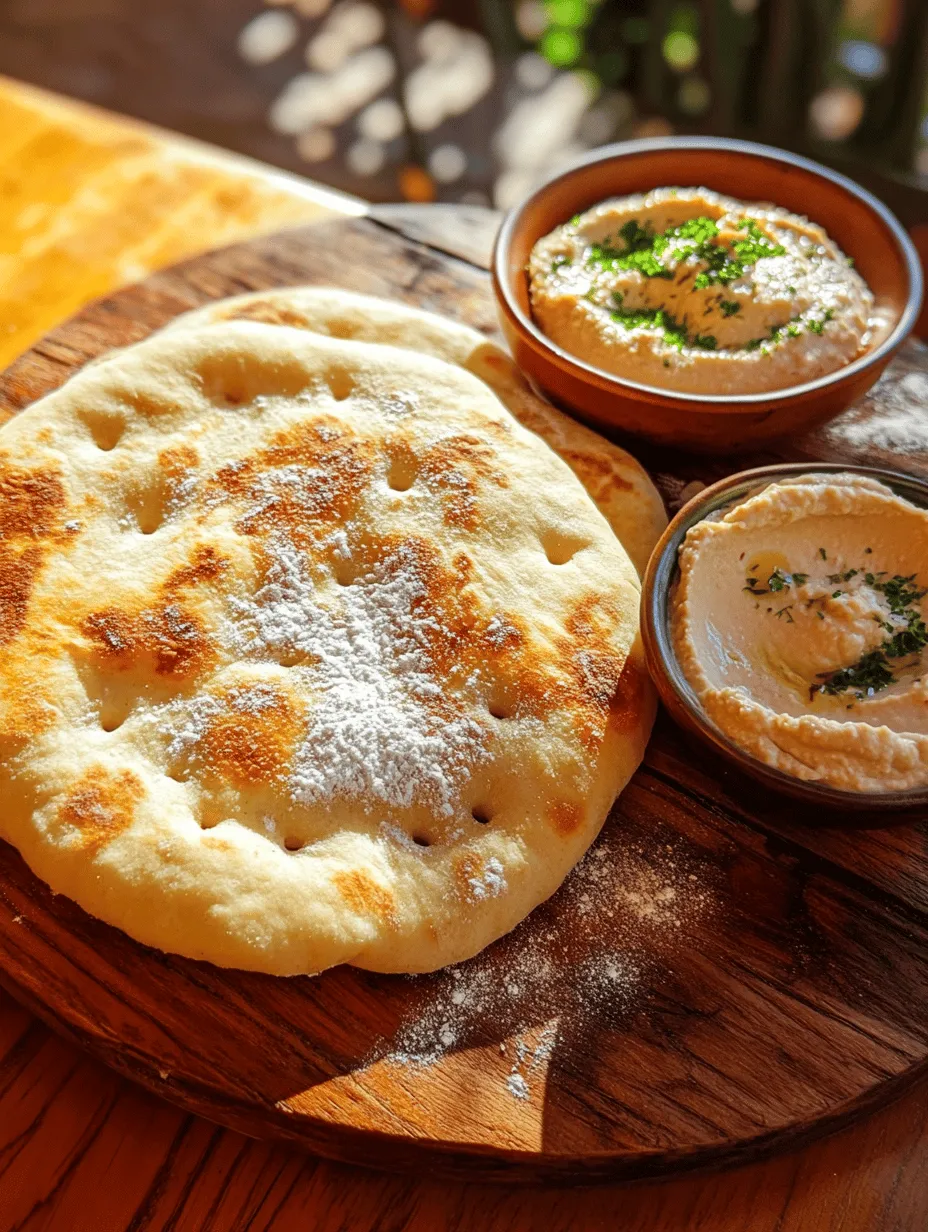
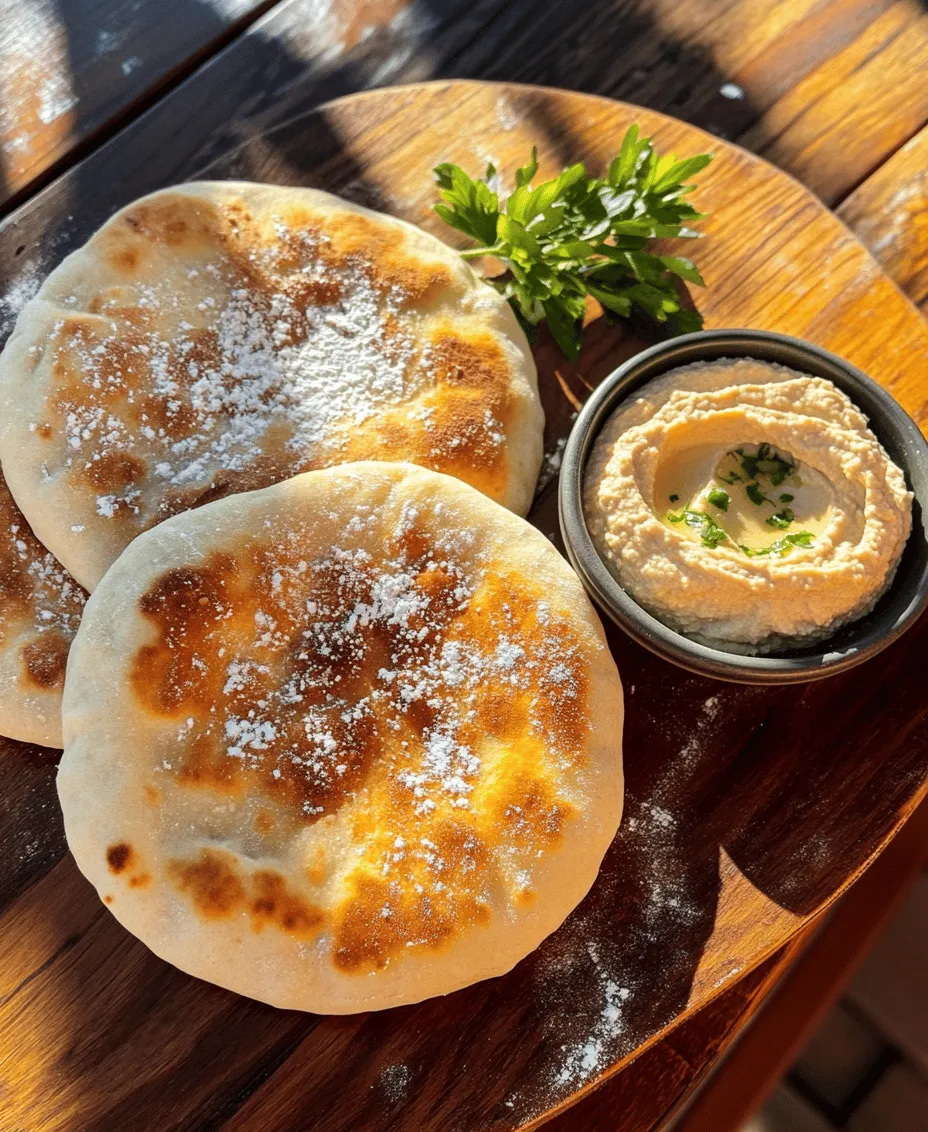
Place the rolled-out pitas on the hot surface and bake for about 3 to 5 minutes. Watch closely as they puff up; this is a sign that they are cooking properly. The surface should become lightly golden, but be cautious not to overbake, as this can dry them out. A perfectly baked pita will feel soft to the touch and should have formed a pocket.
Explanation of the Puffing Process and How It Creates the Pocket
The puffing process occurs when steam is created inside the pita as it bakes. The heat causes the moisture in the dough to convert into steam, expanding and pushing the outer edges apart, forming a pocket. This characteristic is what makes pita bread perfect for stuffing with fillings.
Keeping Pita Soft
Once baked, it’s important to retain the softness of your pita bread.
Importance of Covering Baked Pita to Retain Moisture and Softness
Immediately after baking, stack your pitas and cover them with a clean kitchen towel or place them in a container with a lid. This will trap steam and moisture, preventing the pitas from drying out. If you let them cool uncovered, they may become tough and lose their delightful softness.
Serving Suggestions
Freshly baked pita bread is incredibly versatile and can be enjoyed in numerous ways.
Traditional Accompaniments: Hummus, Baba Ganoush, and Other Dips
Pita bread is traditionally served with a variety of dips. Hummus, made from blended chickpeas, tahini, garlic, and lemon juice, is a classic pairing that complements the flavor of the bread beautifully. Baba ganoush, a smoky eggplant dip, is another delicious accompaniment. You can also serve it with tzatziki, a yogurt-based dip, or a spicy muhammara for an added kick.
Creative Uses for Pita Bread: Wraps, Sandwiches, and Personal Pizzas
Beyond dips, pita bread can be transformed into wraps and sandwiches. Fill the pockets with grilled meats, falafel, fresh vegetables, or salads for a quick and satisfying meal. Additionally, you can use pita as a base for personal pizzas—top with tomato sauce, cheese, and your favorite toppings, then bake until melted and bubbly.
Pairing with Various Middle Eastern Dishes to Enhance the Dining Experience
Pita bread pairs wonderfully with various Middle Eastern dishes such as shawarma, kebabs, and tabbouleh. Its soft texture and mild flavor make it the perfect vehicle for enjoying rich and flavorful meals, enhancing your dining experience.
Conclusion
Making fluffy Arabic dough for pita bread is a rewarding process that culminates in a delicious and versatile staple. From the kneading phase to the shaping and baking, each step contributes to creating the light and airy pockets that are perfect for filling with your favorite ingredients.
As you become more comfortable with the process, don’t hesitate to experiment with different fillings and flavors. Try incorporating herbs or spices into the dough for added complexity, or serve your pitas with a variety of dips and dishes to create a flavorful feast.
Homemade pita bread is not only a delightful addition to any meal but also a healthier alternative to store-bought options, allowing you to control the ingredients and flavors. Embrace the joy of baking and enjoy the satisfaction that comes with crafting your own bread—a simple yet profound way to enhance your culinary repertoire.
Arabic Dough
Ingredients