
Introduction
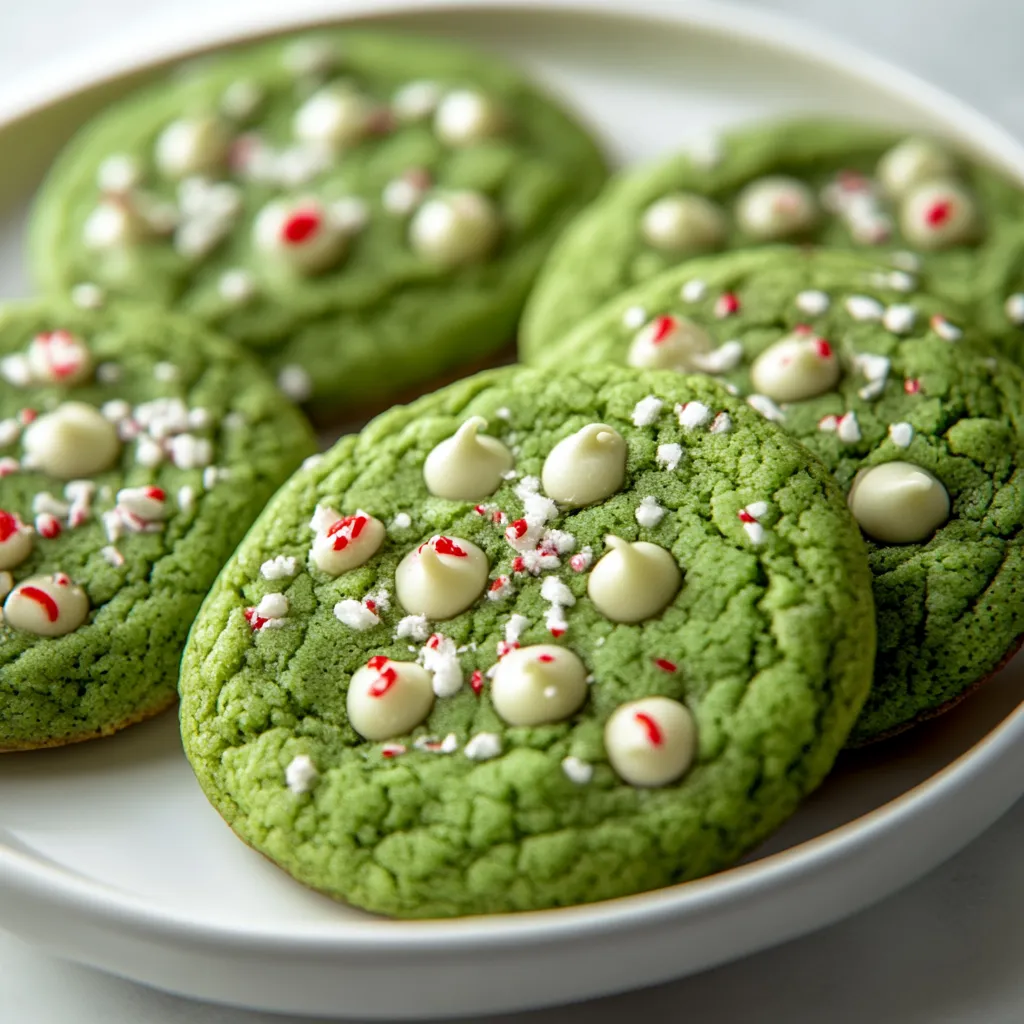
Understanding the joy of baking during the holiday season is essential for creating lasting memories. Grinchy Delight Cookies embody the essence of Christmas with their vibrant green hue and delightful flavors of white chocolate and peppermint. These cookies are festive not just in appearance but in flavor, bringing joy to every bite. The combination of the creamy white chocolate chips and the crunchy peppermint candies creates a harmonious blend of taste and texture that will delight both children and adults alike.
These cheerful cookies are perfect for various occasions—from holiday gatherings to cookie exchanges, or simply to enjoy with family at home. Baking these cookies offers a wonderful opportunity to create a special moment in the kitchen, filled with laughter and the sweet aromas of the season. Their unique look is sure to catch the attention of your guests, making them an exciting addition to your holiday dessert table.
Recipe Overview
– Total Time: 30 minutes
– Prep Time: 20 minutes
– Servings: 24 cookies
– Difficulty: Not specified in the recipe
Ingredients
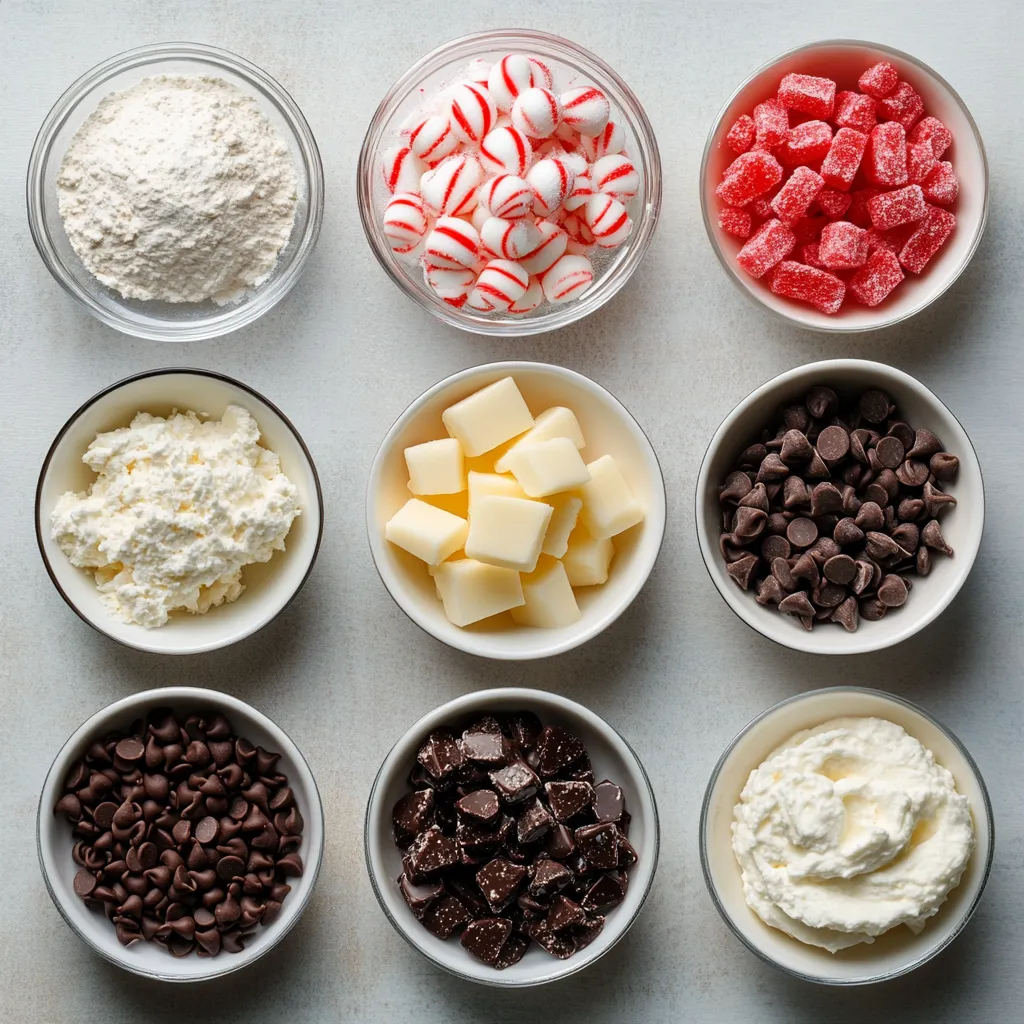
– 1 cup unsalted butter, softened to room temperature
– 1 cup granulated sugar
– 1 cup packed brown sugar
– 2 large eggs
– 2 teaspoons pure vanilla extract
– 3 cups all-purpose flour
– 1 teaspoon baking powder
– 1 teaspoon baking soda
– 1/2 teaspoon salt
– 1 teaspoon green food coloring
– 1 cup white chocolate chips
– 1/2 cup crushed peppermint candies
– Whipped cream, for optional topping
Butter and Sugars
– Unsalted butter: Softened to room temperature for optimal texture
– Granulated sugar: Provides sweetness and moisture
– Brown sugar: Packed for depth of flavor and chewiness
Eggs and Vanilla
– Large eggs: Essential for binding ingredients and providing structure
– Pure vanilla extract: Enhances the overall flavor profile
Dry Ingredients
– All-purpose flour: The foundation of the cookie dough
– Baking powder and baking soda: Leavening agents that contribute to texture
– Salt: Balances the sweetness effectively
Color and Flavor
– Green food coloring: A fun, thematic touch to fit the holiday spirit
– White chocolate chips: Provide creamy sweetness
– Crushed peppermint candies: Add a festive, crunchy element
Optional Topping
– Whipped cream: Can elevate the cookies both aesthetically and taste-wise
Instructions
1. Preheat the Oven: Start by preheating your oven to 350°F (175°C). Prepare a baking sheet by lining it with parchment paper to prevent sticking.
2. Cream Butter and Sugars: In a large mixing bowl, combine the softened butter, granulated sugar, and packed brown sugar. Beat them together using an electric mixer on medium speed until the mixture is light, fluffy, and well blended. This step is crucial as it incorporates air into the mixture, which leads to a tender cookie texture.
3. Incorporate Eggs and Vanilla: Add the eggs to the butter-sugar mixture one at a time. Ensure that each egg is fully incorporated before adding the next. Once combined, mix in the vanilla extract until everything is well blended. The eggs help to bind the ingredients together, while the vanilla enhances the flavor profile, contributing to the overall taste of the cookies.
4. Mix Dry Ingredients: In a separate bowl, whisk together the all-purpose flour, baking powder, baking soda, and salt. This ensures an even distribution of the leavening agents, making sure that your cookies rise uniformly during baking.
5. Combine Mixtures: Gradually add the dry ingredients to the wet mixture. Stir gently until just combined, being careful not to overmix. Overmixing can result in tough cookies, so it’s important to stop as soon as there are no visible flour streaks.
6. Add Color and Flavor: Introduce the green food coloring to the dough, mixing until you achieve your desired Grinch-like hue. Gently fold in the white chocolate chips and crushed peppermint candies for a festive crunch. The food coloring not only adds to the visual appeal but also sets the mood for the holiday spirit.
7. Scoop the Dough: Using a cookie scoop or a tablespoon, drop rounded portions of dough onto your prepared baking sheet. Leave about 2 inches of space between each cookie to allow for spreading while baking.
8. Bake: Place the baking sheet in the preheated oven and bake for 10-12 minutes. The edges should appear slightly golden, while the centers may look a bit soft. Remember, they will continue to firm up as they cool, so it’s important not to overbake.
9. Cool and Decorate: After baking, let the cookies cool on the baking sheet for 5 minutes. Then, transfer them to a wire rack to cool completely. For an extra festive flair, consider adding a dollop of whipped cream on top before serving. This not only enhances the presentation but also provides a creamy contrast to the crunchy texture of the cookies.
10. Serve and Savor: Share these delightful Grinchy cookies with family and friends, spreading joy and holiday spirit with every delicious bite!
Baking these Grinchy Delight Cookies is an enjoyable experience that will not only satisfy your sweet tooth, but also create a festive atmosphere in your home. As you measure, mix, and bake, take a moment to appreciate the aromas and flavors unfolding in your kitchen—a reminder that cooking is a blend of creativity and affection.
Optional Presentation Tips
For an inviting and beautiful display, consider arranging the cookies on a festive platter. To enhance the visual appeal, sprinkle additional crushed peppermint on top of the cookies before serving. This creates a striking presentation that adds to the holiday spirit and makes the cookies even more visually enticing.
How to add eggs and vanilla seamlessly into the mixture for consistent flavor
When incorporating eggs into the butter-sugar mixture, it’s essential to add them one at a time. This allows each egg to fully blend into the mixture, resulting in a uniformly combined base that will contribute to the final texture. Start by cracking the first egg into the mixing bowl. Beat it in using your electric mixer on low speed until it’s completely absorbed. This gradual process ensures the emulsification of the fats and liquids, leading to a smooth, cohesive mixture that enhances the flavor profile. Next, repeat with the second egg before mixing in the vanilla extract. Use the same gentle mixing to integrate it smoothly, ensuring that the vanilla is evenly distributed throughout the dough.
Mixing Dry Ingredients
The importance of whisking dry ingredients separately for even distribution cannot be overstated. By whisking together the all-purpose flour, baking powder, baking soda, and salt in a separate bowl before combining them with wet ingredients, you promote uniform leavening within the cookie dough. This technique breaks up any potential clumps of flour and ensures that the baking agents are evenly distributed, which helps in creating a consistent rise and crumb structure in the cookies. The salt also gets evenly integrated through this whisking method, preventing pockets of saltiness that could alter the flavor of your cookies.
Combine Mixtures
Techniques for folding dry and wet ingredients to avoid overmixing are crucial in achieving the perfect cookie texture. After gently combining the whisked dry ingredients into the wet mixture, use a rubber spatula or wooden spoon to fold the ingredients together. Start at the bottom of the bowl and lift the mixture over itself in a gentle motion. Be cautious not to overmix; the goal is to combine the ingredients until no dry flour is visible. Overmixing leads to the development of gluten, which can result in tough cookies instead of the desired tender texture.
Achieving the Perfect Color
When it comes to incorporating green food coloring, it’s important to do this without affecting the consistency of your dough. Start by adding a few drops of food coloring to your combined dough. Using a spatula, carefully fold in the color to evenly distribute it, checking the dough’s consistency as you go. If you want a more vibrant green, you can add more color, but be mindful not to overwork the dough. Excessive mixing can alter the texture, leading to undesirable results. Just a gentle folding motion will help maintain the soft and fluffy quality that makes these cookies exceptional.
Adding Mix-Ins
Guide yourself with clear steps when folding in the white chocolate chips and crushed peppermint candies. These ingredients can add both texture and delightful flavors, so it’s vital to handle them delicately. Once the dough is nearly combined, sprinkle in the chocolate chips and crushed peppermint. Using your spatula, fold the ingredients into the dough. Aim for an even distribution while again being careful with the mixing to maintain the cookies’ soft consistency. This method ensures that each cookie contains a bite of sweetness from the chocolate and a refreshing crunch from the peppermint.
Shaping the Cookies
Advice on using a cookie scoop or tablespoon for uniform cookie sizes is essential for even baking. To avoid irregular cookie sizes, which can lead to uneven baking, use a standard cookie scoop—often called a disher. This tool allows for consistent portioning that ensures that all cookies will bake at the same rate. Alternatively, a tablespoon can suffice if you don’t have a scoop; just be sure to fill it to the same level each time you measure. Leaving about 2 inches of space between each dough mound on the baking sheet is equally important. This space helps cookies expand and develop their signature texture without merging into one another.
Baking Techniques
Timing and indicators to ensure optimal baking results are vital. After placing the baking sheet in the oven, monitor the cookies closely starting at the 10-minute mark. Look for the edges to turn a light golden brown, while the centers may appear slightly underdone or soft. The cookies will continue to cook thanks to residual heat after being taken out of the oven, so it’s best to err on the side of caution to prevent them from overbaking and becoming dry.
Cooling and Decorating
Proper cooling of the cookies is essential to achieving a delightful texture. Allow them to cool on the baking sheet for about 5 minutes after removing them from the oven; this helps them set properly. After this initial cooling, transfer them to a wire rack to cool completely. If you choose to add whipped cream or an additional sprinkle of crushed peppermint as decoration, do so once the cookies are fully cooled to maintain their structural integrity.
Serving Suggestions
Presenting the Grinchy Delight Cookies attractively can create a festive appeal. Arrange the cookies on a vibrant, festive platter that complements their bright green color. For an extra touch of holiday charm, scatter additional crushed peppermint over the top or around the base of the cookies. This not only enhances visual appeal but encourages the delicious combination of flavors within the cookies.
Flavor Pairings
When considering beverages or treats that pair well with the cookies, think about classic options like hot chocolate or peppermint tea. The sweetness of the white chocolate and freshness of the peppermint in the cookies harmonize beautifully with these drinks, creating a warm, comforting experience. For an adult gathering, consider serving them alongside peppermint-infused cocktails for a sophisticated twist.
Storage Tips
Best practices for storing leftover cookies involve ensuring that they remain soft and fresh over time. Place the cooled cookies in an airtight container lined with parchment paper to absorb any moisture. It’s recommended to layer the cookies with additional parchment between each layer to prevent them from sticking together. Stored this way, they can last about a week without losing quality.
Freezing Techniques
For those who want to preserve their Grinchy Delight Cookies longer, freezing is a fantastic option. After the cookies have cooled completely, arrange them in a single layer on a baking sheet and freeze them for about 1-2 hours until solid. Then, transfer the cookies to a freezer-safe bag or container, sealing tightly to prevent freezer burn. They can last for up to three months in the freezer. To enjoy them, simply thaw at room temperature or warm them briefly in the microwave.
Occasion Suitability
These festive cookies are particularly well-suited for various occasions. With their vibrant green color and festive flavors, they make a perfect addition to holiday gatherings, family celebrations, or office parties. Their whimsical appearance and delightful taste make them a great conversation starter and a sweet treat that can bring holiday cheer to any gathering.
Family Gatherings
Grinchy Delight Cookies are a hit at family events during the holiday season due to their colorful aesthetic and appealing flavors. The combination of sweetness and crunch makes them a family favorite, especially among children. Their playful color encourages participation from younger bakers, making cookie-making a fun family tradition.
Cookie Exchanges
In a cookie exchange setting, these cookies can stand out with their unique design and festive flavors. Their vibrant green hue and the choice of mix-ins make these cookies memorable among a variety of baked treats. Presentation with decorative elements can also enhance their appeal, ensuring they catch the eye and excite the taste buds of everyone at the exchange.
Grinchy Delight Cookies are a festive treat that delivers a delightful combination of flavors and textures. Their bright green color, paired with the sweetness of chocolate and the crunch of peppermint, makes them a seasonal favorite. With a quick preparation time, these cookies can easily bring joy and festive spirit to any occasion.
Grinchy Delight Cookies Recipe for Holiday Cheer
Ingredients
- 1 cup unsalted butter softened
- 1 cup granulated sugar
- 1 cup packed brown sugar
- 2 large eggs
- 2 teaspoons pure vanilla extract
- 3 cups all-purpose flour
- 1 teaspoon baking powder
- 1 teaspoon baking soda
- ½ teaspoon salt
- 1 teaspoon green food coloring
- 1 cup white chocolate chips
- ½ cup crushed peppermint candies
- Whipped cream for optional topping
Instructions
-
Preheat your oven to 350°F (175°C) and line a baking sheet with parchment paper.
-
In a large bowl, cream together the softened butter, granulated sugar, and brown sugar until light and fluffy.
-
Add the eggs one at a time, mixing well after each addition, then stir in the vanilla extract.
-
In a separate bowl, whisk together the flour, baking powder, baking soda, and salt.
-
Gradually add the dry ingredients to the wet mixture, stirring gently until just combined.
-
Mix in the green food coloring until the desired hue is achieved, then fold in the white chocolate chips and crushed peppermint.
-
Scoop rounded portions of dough onto the prepared baking sheet, leaving space between each cookie.
-
Bake for 10-12 minutes until the edges are golden and the centers are soft.
-
Let the cookies cool on the baking sheet for 5 minutes before transferring to a wire rack.
-
Serve with a dollop of whipped cream on top for an extra festive touch.