

Introduction
There’s something universally appealing about donuts. Perhaps it’s their soft, fluffy texture or the sweet glaze that beckons from the display case. Each bite offers a comforting nostalgia, transporting us back to childhood mornings spent savoring these delightful treats. For many, the mere mention of donuts conjures up images of cozy bakeries, warm kitchens, and the enticing smell of freshly made pastries. But what if you could recreate that experience at home? Enter the “melt in your mouth” glazed donut—a treat so delectable that it practically dissolves on your tongue.
These donuts stand out not just for their taste, but for their incredible texture. With a crisp exterior and a soft, airy interior, they embody the perfect balance of crunch and tenderness. The allure of making donuts at home lies in the ability to customize each batch, ensuring freshness and allowing for unique flavor profiles. While store-bought options are convenient, nothing quite compares to the satisfaction of biting into a homemade donut, still warm from the fryer and coated in a luscious glaze.
In this recipe, we’ll take you through each step needed to create these melt-in-your-mouth glazed donuts, sharing tips and tricks to ensure your baking experience is as rewarding as the final product. From selecting the right ingredients to mastering the frying technique, we’ll cover everything you need to know. So, roll up your sleeves and prepare for a delightful adventure in the world of homemade donuts!
The Allure of Donuts
Donuts have a rich history that spans cultures and centuries. Their origins can be traced back to the early 19th century in the United States, although variations of fried dough can be found in many cultures worldwide. The Dutch are credited with bringing the first recipes for “olykoeks” or oily cakes to America, which eventually evolved into the beloved donut we know today. Over time, donuts have transformed from simple fried cakes into an extensive array of varieties, each with its own unique twist.
Around the globe, donuts take on many forms. In Germany, you might encounter Berliner, a jelly-filled donut dusted with sugar. Meanwhile, in Poland, paczki are rich, filled pastries traditionally enjoyed on Fat Thursday. In Japan, the popular “dorayaki” consists of two fluffy pancakes filled with sweet red bean paste. Despite these regional variations, the glazed donut remains a classic favorite, cherished for its simplicity and delightful sweetness.
Glazed donuts, in particular, hold a special place in the hearts of many. Their glossy finish and sweet flavor create an irresistible combination that invites you to indulge. The glaze itself can be customized with flavors ranging from vanilla to chocolate, making it a versatile treat that appeals to diverse palates. Whether paired with a cup of coffee in the morning or enjoyed as an afternoon snack, glazed donuts are a timeless indulgence that brings joy to countless people.
Ingredients Breakdown
Creating melt-in-your-mouth glazed donuts at home requires careful selection of ingredients. Each component plays a vital role in achieving that perfect texture and flavor. Below is a breakdown of the essential ingredients needed for this recipe and their contributions to the final product.
Main Ingredients for the Donuts
1. All-Purpose Flour: This is the foundation of your donuts, providing the necessary structure and texture. All-purpose flour strikes a balance between softness and strength, allowing the donuts to rise while maintaining a tender crumb.
2. Granulated Sugar: Not only does sugar add sweetness, but it also contributes to the moisture of the donuts. This ingredient helps create a golden-brown crust when fried, enhancing the overall flavor profile.
3. Baking Powder: As a leavening agent, baking powder is crucial for achieving fluffy donuts. It releases carbon dioxide when mixed with wet ingredients, causing the batter to rise during frying.
4. Ground Nutmeg: This aromatic spice enhances the flavor of the donuts, adding a warm and slightly nutty taste. Nutmeg pairs beautifully with the sweetness of the sugar, creating a well-rounded flavor.
5. Eggs: Eggs serve as a binding agent, helping to incorporate all the ingredients into a cohesive batter. They also add richness and contribute to the overall fluffiness of the donuts.
6. Whole Milk: Milk provides moisture and a creamy texture to the batter. It also helps activate the baking powder, ensuring the donuts rise properly while frying.
7. Unsalted Butter: Butter adds richness and flavor to the donuts. Using unsalted butter allows you to control the saltiness of the final product, ensuring a balanced taste.
8. Vanilla Extract: This aromatic ingredient elevates the flavor profile of the donuts, imparting a sweet, fragrant essence that complements the other ingredients perfectly.
9. Oil for Frying: The choice of oil is key to achieving crispy, golden donuts. A neutral oil with a high smoke point, such as vegetable oil or canola oil, is ideal for frying, as it allows the donuts to cook evenly without imparting unwanted flavors.
Glaze Ingredients
Once your donuts are fried to perfection, it’s time to prepare the glaze that will take them to the next level of indulgence. The glaze is a simple yet essential component that adds sweetness and visual appeal.
1. Powdered Sugar: The primary ingredient in the glaze, powdered sugar provides the necessary sweetness and smooth texture. It dissolves easily, allowing you to create a silky glaze that coats the donuts beautifully.
2. Milk: Milk is used to achieve the desired consistency of the glaze. By adjusting the amount of milk, you can create a thicker or thinner glaze, depending on your preference.
3. Vanilla Extract: Similar to the donut batter, vanilla extract adds depth of flavor to the glaze, enhancing the overall taste experience.
4. Salt: A pinch of salt helps balance the sweetness of the glaze, preventing it from becoming overly sugary. This small addition elevates the flavor and brings out the other ingredients’ nuances.
With these ingredients in hand, you’re well on your way to creating melt-in-your-mouth glazed donuts that will impress your family and friends. The next step is to gather your kitchen essentials and prepare to dive into the delightful process of donut making.
Stay tuned as we delve deeper into the step-by-step instructions for crafting these heavenly treats!
Step-By-Step Guide to Making Melt In Your Mouth Donuts
Preparing the Donut Dough
To create the perfect melt-in-your-mouth donuts, start with a solid foundation by preparing the dough. Begin by gathering your ingredients, which typically include all-purpose flour, sugar, yeast, milk, eggs, butter, and vanilla extract.
1. Mixing Dry and Wet Ingredients: In a large mixing bowl, combine the dry ingredients: flour, sugar, yeast, and a pinch of salt. Whisk them together until evenly distributed. In a separate bowl, mix the wet ingredients: warm milk, melted butter, eggs, and vanilla extract. It’s crucial that the milk is warm but not hot, as temperatures that are too high can kill the yeast.
2. Combining Ingredients: Gradually pour the wet mixture into the dry ingredients. Use a spatula or wooden spoon to combine them gently. The key here is to mix until just combined. Overmixing can lead to tough donuts, so be careful to stop when no dry flour remains visible.
3. Kneading the Dough: Once the ingredients are combined, transfer the dough onto a lightly floured surface. Knead the dough for about 5-7 minutes until it becomes smooth and elastic. This step helps develop the gluten structure necessary for that soft, pillowy texture.
4. Letting the Dough Rise: Place the kneaded dough in a greased bowl, cover it with a clean kitchen towel or plastic wrap, and let it rise in a warm, draft-free area for about 1 to 1.5 hours, or until it has doubled in size. This fermentation process is essential for flavor and texture.
Shaping the Donuts
Once the dough has risen, it’s time to shape it into donuts.
1. Rolling Out the Dough: After the dough has risen, punch it down to release excess air. Dust your work surface with flour and roll out the dough to about ½-inch thickness. Use a rolling pin for even thickness.
2. Cutting Out the Donuts: Use a donut cutter or two round cookie cutters (one larger for the outer ring and one smaller for the hole) to cut out donuts. Be careful to cut through the dough smoothly, as twisting the cutter can result in uneven shapes.
3. Handling Scraps: Gather any scraps of dough, knead them gently back together, and roll them out again to cut out more donuts. However, try to limit the number of times you re-roll the dough, as this can affect the final texture.
4. Second Rise: Place the cut donuts on a baking sheet lined with parchment paper. Cover them again with a towel and let them rise for another 30-45 minutes until they puff up. This final rise is essential for achieving that airy texture.
Frying the Donuts
Frying is where the magic happens, transforming your dough into delicious golden-brown donuts.
1. Preparing for Frying: In a large, deep skillet or a Dutch oven, heat oil to 350°F (175°C). Use a thermometer to ensure the oil reaches the right temperature, as too hot oil can burn the donuts, while too cool oil can lead to greasy results.
2. Frying the Donuts: Carefully drop a few donuts into the hot oil at a time, making sure not to overcrowd the pan. Fry each side for about 1-2 minutes or until they turn a deep golden color. Use a slotted spoon to gently flip them.
3. Signs of Perfectly Cooked Donuts: When the donuts are cooked, they should float to the top and have a light, airy texture. Remove them from the oil and place them on a plate lined with paper towels to absorb excess oil.
Making the Glaze
A delicious glaze is what takes these donuts from good to unforgettable.
1. Achieving the Right Consistency: In a medium bowl, whisk together powdered sugar and milk until smooth. The consistency should be thick but pourable. If too thick, add more milk a teaspoon at a time until desired consistency is reached.
2. Flavor Variations: For a twist, you can add flavorings such as vanilla extract, almond extract, or even a splash of coffee or chocolate syrup to the glaze. Mix well to combine.
Glazing the Donuts
Now that your donuts are fried and the glaze is ready, it’s time to finish them off.
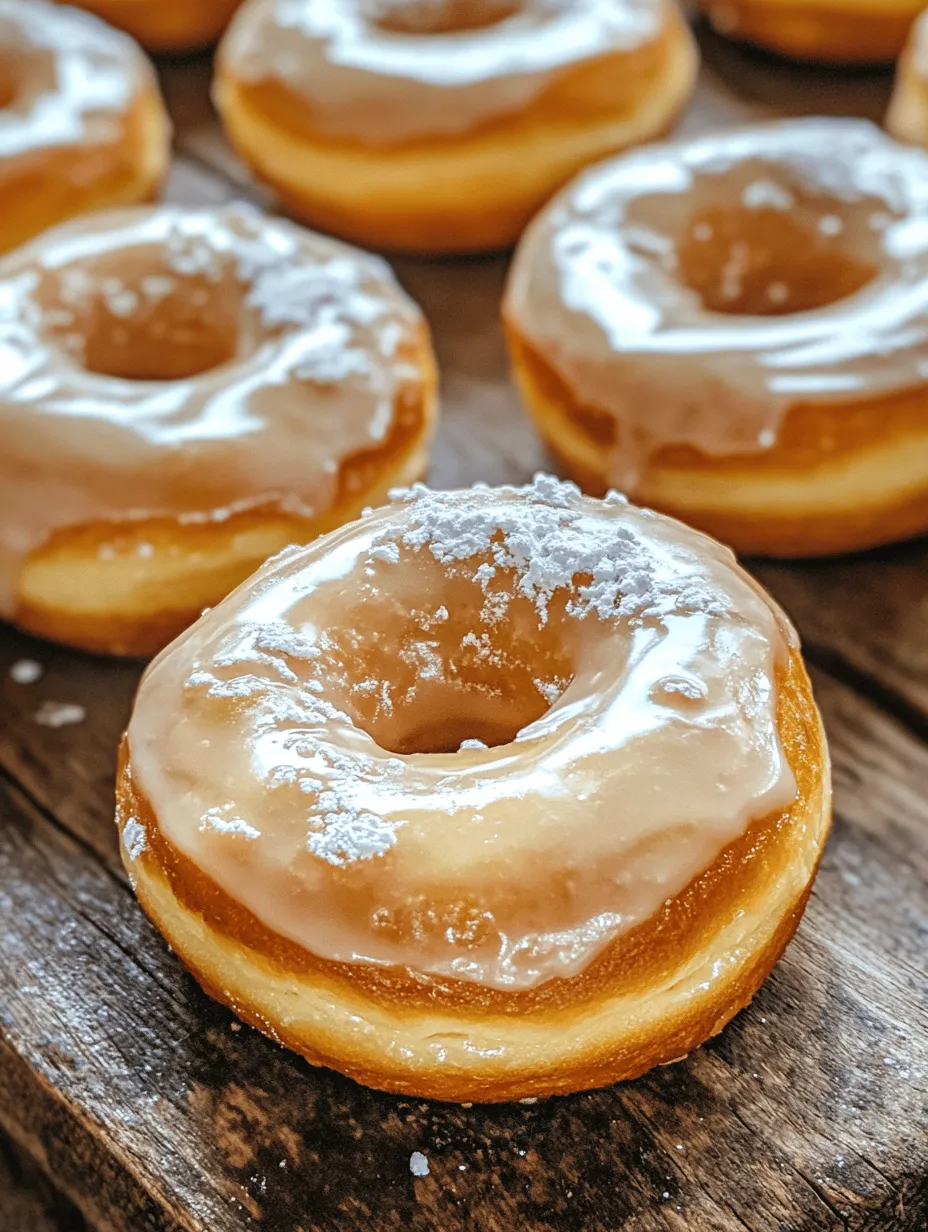
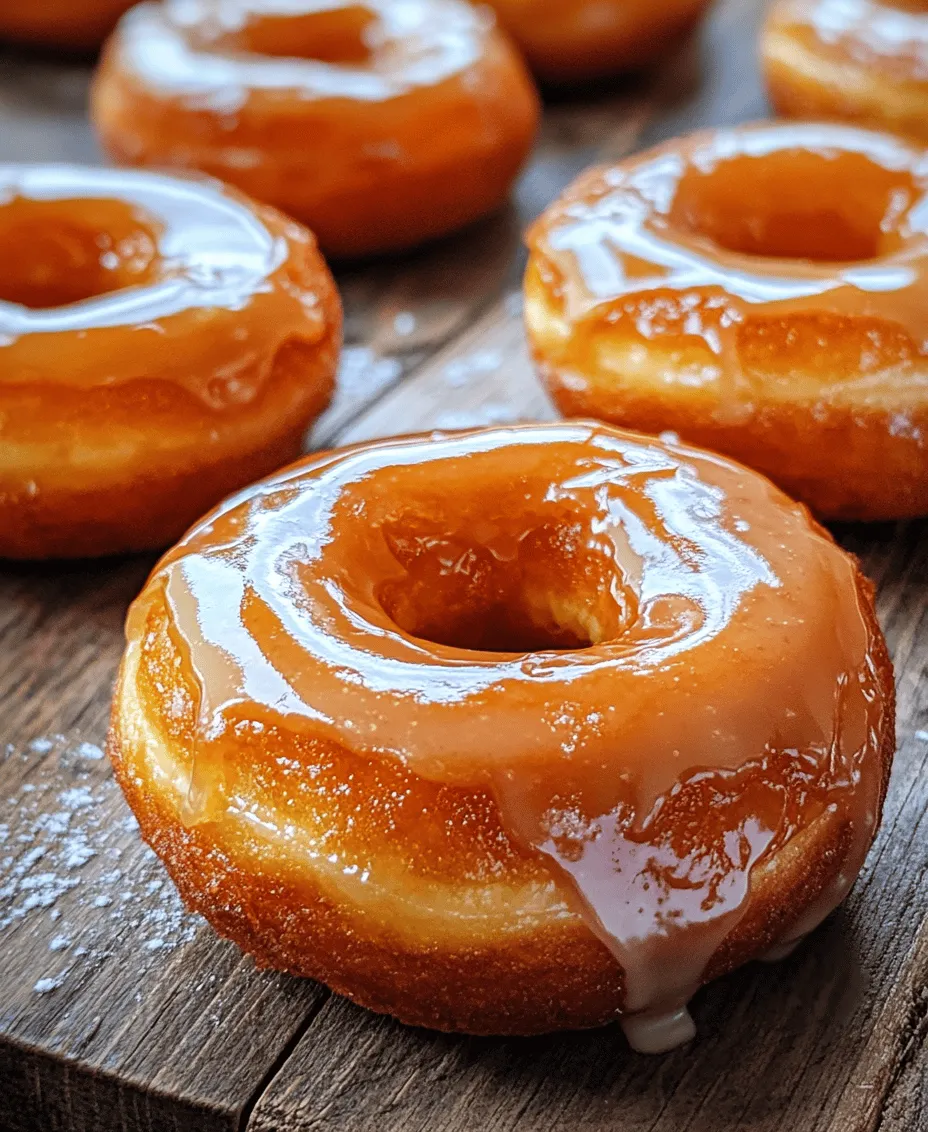
1. Dipping the Donuts: Dip the tops of each warm donut into the glaze, allowing the excess to drip back into the bowl. For an extra layer of flavor, you can sprinkle some toppings like chopped nuts, sprinkles, or coconut flakes immediately after glazing.
2. Allowing the Glaze to Set: Place the glazed donuts on a wire rack to allow the glaze to set properly and prevent them from becoming soggy.
3. Presentation Tips: Arrange the donuts on a decorative platter or cake stand for a beautiful presentation. Consider adding a few fresh fruits or flowers around the donuts for an appealing visual display.
Serving Suggestions
Donuts are best enjoyed fresh, so here are some tips to enhance your experience:
1. Pairing with Beverages: Enjoy your glazed donuts with a hot cup of coffee, a glass of cold milk, or a soothing cup of tea. The rich flavors of the donuts complement these beverages beautifully.
2. Serving at Gatherings: Donuts make a perfect centerpiece for breakfast or brunch gatherings. Arrange a variety of flavors and shapes to create an eye-catching spread. Consider serving them alongside fresh fruits or a yogurt parfait for a delightful contrast.
Storage and Shelf Life
To enjoy your homemade donuts over a few days, proper storage is essential:
1. Storing Donuts: Place donuts in an airtight container at room temperature for up to 2 days. If you want to keep them longer, consider refrigerating them, although they may lose some of their freshness.
2. Reheating Tips: If you have leftovers, you can refresh them by placing them in a microwave for a few seconds or warming them in an oven at 350°F (175°C) for about 5-7 minutes. This will help restore their texture and warmth.
Conclusion
Making homemade glazed donuts is not just about satisfying your sweet tooth; it’s an experience that brings joy to the kitchen. From mixing the dough to frying and glazing, each step is filled with anticipation and excitement. The result is a batch of soft, fluffy donuts that will delight your family and friends.
We encourage you to try this recipe and share your experiences. Whether you’re indulging in these donuts for breakfast, dessert, or as a sweet treat any time of the day, they are sure to impress. Embrace the joy of baking and the happiness that comes from creating something delicious from scratch. Enjoy every bite of your melt-in-your-mouth glazed donuts!
Melt In Your Mouth Glazed Donuts Recipe
Ingredients