

Introduction
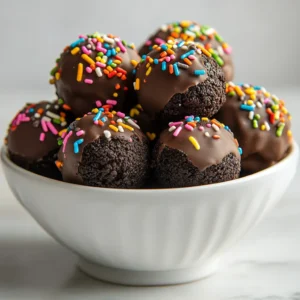
The ultimate no-bake dessert that combines the beloved flavors of Oreos and cream cheese is here to delight your taste buds! No-Bake Oreo Cake Balls provide a quick and easy solution for satisfying your sweet cravings without the need for an oven. These delicious treats capture the essence of classic cookies and cream, turning them into bite-sized desserts that are perfect for any occasion. Whether it’s a birthday party, a family gathering, or simply a sweet craving at home, these cake balls deliver maximum flavor with minimal effort.
The best part about these No-Bake Oreo Cake Balls is that they require just a handful of ingredients and a short amount of time to prepare. The process of making these delightful treats is engaging and fun for all ages, making them a fantastic activity to do with friends or family. Plus, with their rich chocolate coating and fun decorations, they are visually appealing and make for an impressive dessert that will surely be the highlight of any table.
In this article, we will delve into the specifics of creating these delectable treats, from the ingredients to the intricate steps involved, ensuring your experience is as enjoyable as indulging in the finished product. With just a few simple steps, you’ll have a tray full of No-Bake Oreo Cake Balls ready to be devoured in no time.
Recipe Overview
– Prep Time: 15 minutes
– Cook Time: Not specified in the recipe
– Total Time: 45 minutes
– Course: Dessert
– Cuisine: American
– Servings: 12
– Calories: Approximately 150 per serving
No-Bake Oreo Cake Balls are a fusion of crunchy cookies and creamy filling, coated in sweet chocolate. These bite-sized desserts are perfect for parties, celebrations, or simply a sweet treat at home. With a prep time of just 15 minutes, you can whip up a batch of these cake balls and allow them to chill for a satisfying dessert ready to be enjoyed within 45 minutes total.
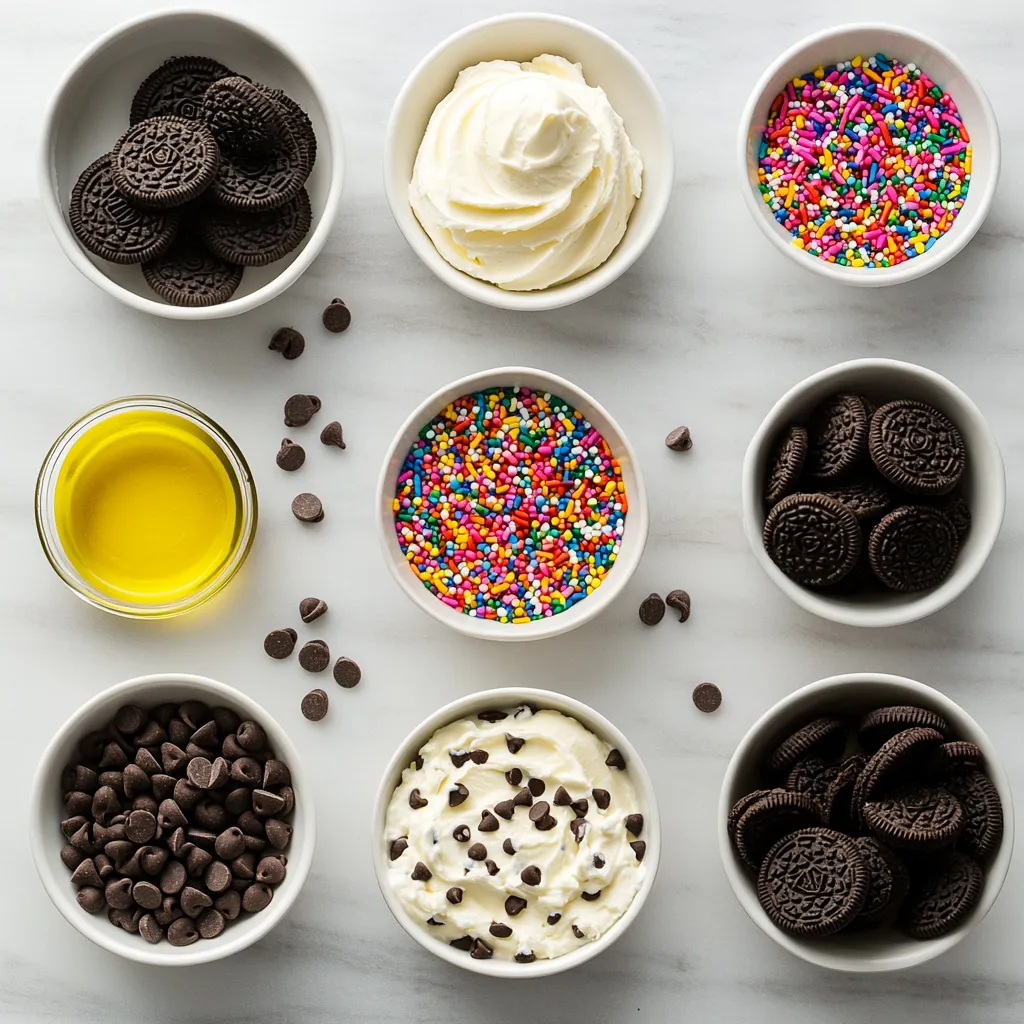
Ingredients
– 24 Oreo cookies, finely crushed
– 8 oz cream cheese, softened to room temperature
– 1 cup semi-sweet chocolate chips, melted
– 1 tablespoon vegetable oil
– Colorful sprinkles or additional crushed Oreos for decoration
Equipment Needed
Essential Kitchen Tools
To prepare these No-Bake Oreo Cake Balls effectively, a few essential kitchen tools are needed:
– Mixing Bowl: A spacious bowl is essential for combining the cookie and cream cheese mixture thoroughly.
– Baking Sheet: This will be used to set the rolled cake balls before freezing, helping them maintain their shape.
Preparation Accessories
In addition to the main tools, these accessories will enhance your experience:
– Parchment Paper: Line the baking sheet with parchment paper to prevent sticking and allow for easy transport.
– Fork: This handy tool will be used for dipping the cake balls into the melted chocolate, ensuring an even coating.
Step-by-Step Instructions
Mixing the Base
Combining Ingredients: Begin by blending the crushed Oreo cookies with softened cream cheese in a spacious mixing bowl. Make sure the cream cheese is at room temperature to achieve a smooth mixture. This step is essential as a cohesive mixture ensures that the cake balls hold together well during rolling. Stir until no lumps remain, and the mixture resembles a thick, doughy consistency.
Achieving Consistency: It’s important to mix the ingredients until you reach a smooth and cohesive texture. A well-mixed batter will yield perfectly shaped cake balls that are not only delicious but also visually appealing.
Shaping the Cake Balls
Portioning the Mixture: Using your hands, scoop out portions of the mixture and roll them into approximately 1-inch diameter balls. This size is ideal for popping in your mouth and makes for a perfect dessert portion. It might get a bit sticky, but the creamy mixture will form nicely into round shapes.
Arranging on Baking Sheet: Once you’ve rolled the mixture into balls, place each one onto the parchment-lined baking sheet. Ensure there’s enough space between each cake ball, as they will be coated with chocolate later, and need room to remain separate.
Freezing the Cake Balls
Initial Chilling: Transfer the baking sheet to the freezer for about 15 minutes, allowing the shape to firm up. This chilling period is crucial as it helps the cake balls hold their shape, making them easier to dip in chocolate later. After this time, they should be firm to the touch, making the next steps much smoother.
Preparing the Chocolate Coating
Melting the Chocolate: While the cake balls are chilling, prepare the chocolate coating. In a microwave-safe bowl, combine the semi-sweet chocolate chips and vegetable oil. Heat in the microwave in 30-second intervals, stirring in between each interval. This prevents the chocolate from burning and ensures you have a silky smooth coating.
Ensuring Smoothness: Continue to heat and stir until the mixture is completely melted and smooth. The addition of vegetable oil not only helps to create a shiny finish but also thins out the chocolate, making it easier to coat the cake balls thoroughly.
Coating the Cake Balls
Dipping Technique: Once the cake balls have chilled and are firm, remove them from the freezer. Using a fork, dip each ball into the melted chocolate, ensuring it is fully coated. Take your time during this step to achieve an even layer of chocolate that covers the entire surface.
Removing Excess Chocolate: After dipping, gently tap the fork against the bowl to allow excess chocolate to drip off before placing the coated cake ball back onto the parchment-lined baking sheet. This step is essential to avoid clumping and ensure a neat appearance.
Decorating the Cake Balls
Before the chocolate sets, generously sprinkle each cake ball with either colorful sprinkles or additional crushed Oreo cookies for an added crunch and visual appeal. This final touch not only enhances the flavor but also adds a festive element to your No-Bake Oreo Cake Balls.
By following these steps, you will have created delightful No-Bake Oreo Cake Balls that are not only fun to make but also a treat everyone will love!
the convenience of a no-bake recipe. With a quick prep time and straightforward instructions, this treat is perfect for both novice and experienced bakers alike. Their versatility also allows for a range of flavor variations and presentation ideas to suit any occasion.
Adding the Finishing Touches
Before the chocolate sets on your cake balls, this is the perfect moment to add a touch of flair. Using colorful sprinkles or additional crushed Oreos offers both decoration and texture, making each bite visually appealing and exciting for your guests. You can get creative with the type of sprinkles you use; consider themed colors for holidays or special occasions to elevate your dessert’s appeal even further.
Final Chilling
Completing the Process
Once you’ve decorated the chocolate-coated cake balls, carefully place the baking sheet back into the refrigerator. Allow them to chill for at least 30 minutes to ensure that the chocolate hardens completely. This step is vital, not just for aesthetic purposes, but also to help maintain the cake balls’ structural integrity when served. Patience is essential here; the longer they chill, the more enjoyable they will be once served.
Serving Suggestions
Presentation Ideas
Arranging these delectable cake balls on a decorative serving platter can enhance their visual appeal. Consider a platter that complements the colors of the sprinkles or the theme of your gathering. For an extra touch of elegance, drizzle any remaining melted chocolate over the tray and garnish with fresh mint leaves, providing a refreshing contrast to the sweetness of the cake balls.
Perfect Pairings
To complement the rich flavors of your No-Bake Oreo Cake Balls, consider serving them alongside warm beverages. Coffee or tea pairs wonderfully, enhancing the sweet and creamy experience with warm, comforting notes. For an adult-friendly option, a light dessert wine can also enhance the delectable flavors and make for a sophisticated serving choice.
Variations of No-Bake Oreo Cake Balls
Flavor Profiles
Experimenting with different flavors can take your cake balls to the next level. Try substituting the classic Oreo cookies with mint Oreos or even peanut butter-filled variants, which will introduce a new taste profile to your dessert. Additionally, adding flavor extracts such as vanilla or almond to the cream cheese filling provides a delightful twist that can elevate the overall experience.
Decoration Options
To create a unique look, consider adding a two-toned effect by drizzling contrasting chocolate over the cake balls. This not only enhances their visual appeal but also adds an extra layer of flavor. For those who enjoy a nutty crunch, sprinkle crushed nuts on top before the chocolate has set, providing a textural contrast that can be highly satisfying.
Nutritional Information
Serving Size
It’s helpful to know the serving size when indulging in these treats. Each serving consists of one cake ball, and with a total of 12 servings per batch, you can easily share them during gatherings or keep them all for yourself.
Caloric Breakdown
With approximately 150 calories per serving, these cake balls present a delicious yet manageable indulgence. You can enjoy the delightful combination of flavors without excessive calorie intake, making them a suitable option for dessert lovers who are mindful of their caloric consumption.
Tips for Making Perfect Cake Balls
Consistency is Key
One of the most crucial aspects of achieving the perfect cake balls lies in the consistency of your mixture. Ensure your cream cheese is softened to room temperature to facilitate easy mixing and binding. A smooth and cohesive mixture is essential for forming the balls and ensuring they maintain their shape when coated in chocolate.
Chilling Time
Never underestimate the importance of chilling time. Skipping or reducing the chilling time can result in mismanaged cake balls that won’t hold their shape during the coating process. Chilling them thoroughly is vital to creating a beautiful, intact dessert that is pleasing to both the eyes and the palate.
Troubleshooting Common Issues
Crumbly Mixture
If you encounter a crumbly mixture that refuses to hold together, don’t despair. A common solution is to add a little more softened cream cheese to help bind the mixture efficiently. It’s all about finding that perfect balance between the cookies and the cream cheese, so don’t hesitate to adjust as necessary.
Chocolate Not Coating Properly
Should you find that your chocolate isn’t coating the cake balls as smoothly as desired, it might be that it isn’t fully melted and smooth. Reheat your chocolate briefly to achieve the right texture for coating, ensuring that your cake balls have an even and shiny sheathing.
Conclusion
No-Bake Oreo Cake Balls are a delightful dessert option that combines a satisfying texture with rich flavors while offering versatility for various occasions. With thoughtful decoration choices and the ability to experiment with flavors, these cake balls can become a staple in any dessert repertoire. Ideal for sharing or enjoying solo, their ease of preparation and deliciousness make them a winning treat.
No-Bake Oreo Cake Balls Recipe: A Simple Indulgence
Ingredients
- 24 Oreo cookies finely crushed
- 8 oz cream cheese softened to room temperature
- 1 cup semi-sweet chocolate chips melted
- 1 tablespoon vegetable oil
- Colorful sprinkles or additional crushed Oreos for decoration
Instructions
- In a mixing bowl, combine the crushed Oreo cookies with the softened cream cheese until smooth.
- Scoop out portions and roll them into small balls, about 1 inch in diameter.
- Place the balls on a parchment-lined baking sheet.
- Freeze the baking sheet for about 15 minutes to firm up the cake balls.
- Melt the chocolate chips and vegetable oil in a microwave-safe bowl, stirring until smooth.
- Dip each firm cake ball into the melted chocolate, ensuring full coverage.
- Tap off excess chocolate and return the coated balls to the baking sheet.
- Sprinkle with colorful sprinkles or crushed Oreos before the chocolate sets.
- Refrigerate for at least 30 minutes to harden the chocolate.
- Serve chilled and enjoy the delightful flavors!