
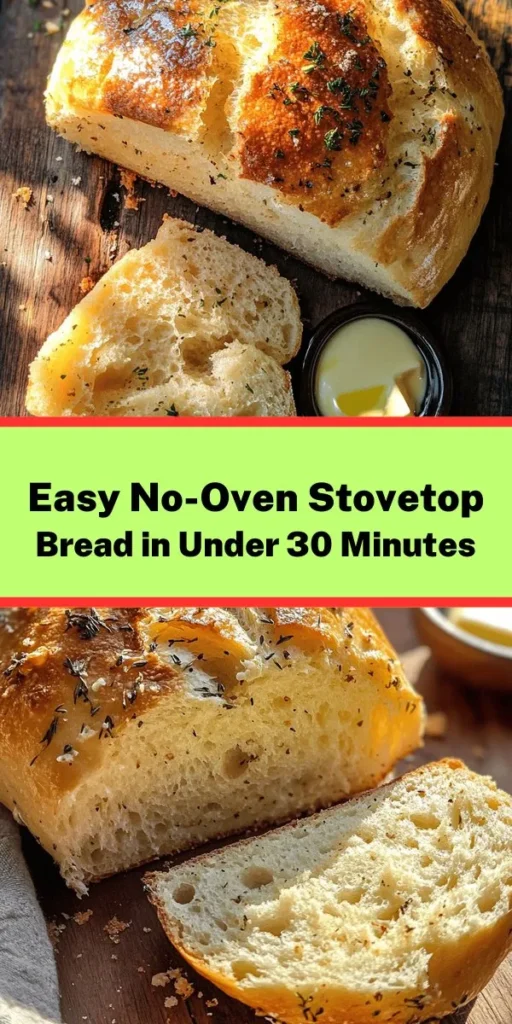
Introduction
In recent years, the culinary landscape has undergone a transformation, with stovetop cooking gaining traction among home cooks. Whether it’s due to the convenience of not having to preheat an oven, the allure of quick meal preparation, or the desire for versatile cooking methods, stovetop techniques have become increasingly popular. One of the most exciting innovations in this realm is the concept of no-oven bread baking. Yes, you can now enjoy freshly baked bread right from your stovetop.
The No-Oven Stovetop Bread recipe is a delightful solution for those who crave the aroma and taste of homemade bread but may not have access to an oven. This method not only simplifies the bread-making process but also opens up a world of possibilities for customization. Imagine the satisfaction of biting into a warm, fluffy slice of bread that you’ve made yourself, all without the hassle of traditional baking.
Making bread at home comes with a multitude of benefits. First and foremost, it guarantees freshness—there’s nothing quite like the taste of warm bread straight from the pan. Additionally, home-baked bread allows you to tailor flavors and ingredients to your liking. Whether you prefer a plain loaf or one studded with herbs, cheese, or seeds, the choice is yours. With just a few simple ingredients and a stovetop, you can create a delicious loaf that fits your dietary preferences and culinary creativity.
Understanding the Ingredients
To embark on your no-oven bread-making journey, let’s first explore the essential ingredients you’ll need. Each component plays a crucial role in achieving the perfect texture and flavor in your stovetop bread.
All-Purpose Flour
All-purpose flour serves as the foundation of the bread. It provides the structure and body needed for the loaf to rise and hold its shape. The protein content in all-purpose flour allows for gluten development, which is essential for achieving that desirable chewy texture in the bread. If you’re looking for a healthier alternative, you can consider using whole wheat flour or a blend of flours to add more depth and nutrition to your loaf.
Baking Powder
Baking powder acts as the leavening agent, responsible for the rise in your bread. Unlike yeast, which requires time to ferment and develop flavors, baking powder provides a quick and straightforward solution for leavening. It releases carbon dioxide gas when combined with moisture and heat, creating air pockets that make the bread light and fluffy. This is particularly advantageous in stovetop bread-making, where time-saving methods are often key.
Salt
Salt is a vital ingredient in bread-making, as it enhances flavor and strengthens the dough. It balances the sweetness of any added sugars and helps in controlling yeast activity (if using yeast in other recipes). In this stovetop version, salt not only adds flavor but also contributes to the overall structure of the bread by strengthening the gluten network.
Sugar
While sugar is optional in this recipe, it can add a touch of sweetness to your bread. This is particularly useful if you’re planning to use the bread for sweet applications, such as French toast or as a base for desserts. Even a small amount can enhance the overall flavor profile, making your bread more enjoyable.
Water or Milk
The moisture content is crucial for achieving the right dough consistency. Water or milk will hydrate the flour, allowing the gluten to develop and the dough to come together. Using milk can impart a richer flavor and a slightly softer texture due to its fat content, while water keeps the bread light and airy.
Olive Oil or Melted Butter
Incorporating olive oil or melted butter into the dough contributes to both flavor and texture. Fats help to tenderize the bread, creating a softer crumb and a more enjoyable eating experience. Additionally, fats can help extend the shelf life of the bread, keeping it fresher for longer.
Optional Toppings
One of the best aspects of making bread at home is the ability to customize it to your taste. Consider adding toppings such as herbs, cheese, seeds, or even nuts to elevate the flavor and texture of your loaf. These optional ingredients can transform a simple stovetop bread into a gourmet experience. For example, a sprinkle of garlic powder and rosemary can create a fragrant herb bread, while a handful of grated cheese can turn your loaf into a savory treat.
Step-by-Step Instructions
Now that you’re familiar with the key ingredients, let’s dive into the step-by-step process of making your no-oven stovetop bread. This section will guide you through each stage, ensuring you achieve the best results possible.
Combining Dry Ingredients
The first step in making your stovetop bread is to combine the dry ingredients. In a large mixing bowl, add the all-purpose flour, baking powder, salt, and, if desired, sugar. Use a whisk or a fork to thoroughly mix these ingredients together. Proper mixing ensures that the baking powder and salt are evenly distributed throughout the flour, which is crucial for consistent rising and flavor in the final product.
Tip: It’s a good practice to sift the flour before measuring it out. This will aerate the flour and help avoid any lumps, leading to a smoother dough.
Creating the Dough
Once your dry ingredients are well combined, it’s time to create the dough. Start by making a well in the center of the dry mixture. Gradually add your chosen liquid—water or milk—while simultaneously mixing with a wooden spoon or your hands. The goal is to hydrate the flour and form a cohesive dough.
If you’re using olive oil or melted butter, add it at this stage as well. As you mix, you may find that you need to adjust the amount of liquid depending on the humidity of your environment or the specific brand of flour used. The dough should be slightly sticky but manageable. If it’s too dry, add a little more liquid; if it’s too wet, sprinkle in a touch more flour until you achieve the right consistency.
Tip: When mixing the dough, avoid overworking it. Kneading too much can result in tough bread rather than the desired soft and fluffy texture.
Shaping the Dough
Once your dough is well mixed and has reached the right consistency, it’s time to shape it. Lightly flour your work surface and transfer the dough onto it. Gently knead the dough for about 1-2 minutes, just until it comes together into a smooth ball. This brief kneading helps to develop the gluten slightly without overworking the bread.
After kneading, flatten the dough into a disc shape about 1 inch thick. You can use a rolling pin or simply your hands for this step. The thickness will affect the cooking time, so aim for a uniform thickness to ensure even cooking.
Tip: If you want to make smaller rolls or pieces of bread, divide the dough into portions before flattening.
As you prepare your stovetop bread, the anticipation of enjoying a warm slice is sure to build. The next steps will focus on cooking your bread on the stovetop, ensuring it develops a beautiful crust and soft interior. Stay tuned for the continuation of this recipe, where we’ll explore the cooking technique that makes no-oven bread baking both fun and rewarding.
Kneading the Dough: Tips for Developing Gluten and Texture
Kneading is an essential step in bread making that helps to develop gluten, giving the bread its structure and chewiness. When kneading your dough for the no-oven stovetop bread, aim for a balance between thoroughness and gentleness. Here are some tips to ensure you achieve the perfect texture:
1. Knead for Time: Knead the dough for about 8-10 minutes. The dough should become smooth and elastic. To check if it’s ready, perform the “windowpane test” by stretching a small piece of dough; if it stretches thin without tearing, it’s well-kneaded.
2. Use the Right Technique: Use the heel of your hand to push the dough away from you, then fold it back over itself. Rotate the dough a quarter turn and repeat. This method effectively develops gluten without exhausting you.
3. Avoid Excess Flour: While it’s tempting to add more flour if the dough feels sticky, try to resist. A slightly tacky dough will yield a softer, fluffier bread. If needed, sprinkle flour sparingly to prevent sticking.
4. Resting Periods: Allow the dough to rest for 5-10 minutes during kneading. This rest period can help relax the gluten strands, making the dough easier to shape later.
Shaping the Bread: Guidance on Thickness and Optional Flavor Enhancements
Once kneading is complete, it’s time to shape your dough. This step not only impacts the appearance of your bread but also its texture and flavor.
1. Shaping Technique: Gently flatten the dough into a disc shape, about 1 to 1.5 inches thick. If you prefer a thicker bread, adjust the thickness accordingly, but ensure it cooks through evenly.
2. Flavor Enhancements: You can incorporate various flavor elements at this stage. For instance, add chopped herbs like rosemary or thyme directly into the dough. For a savory twist, mix in grated cheese or sautéed garlic.
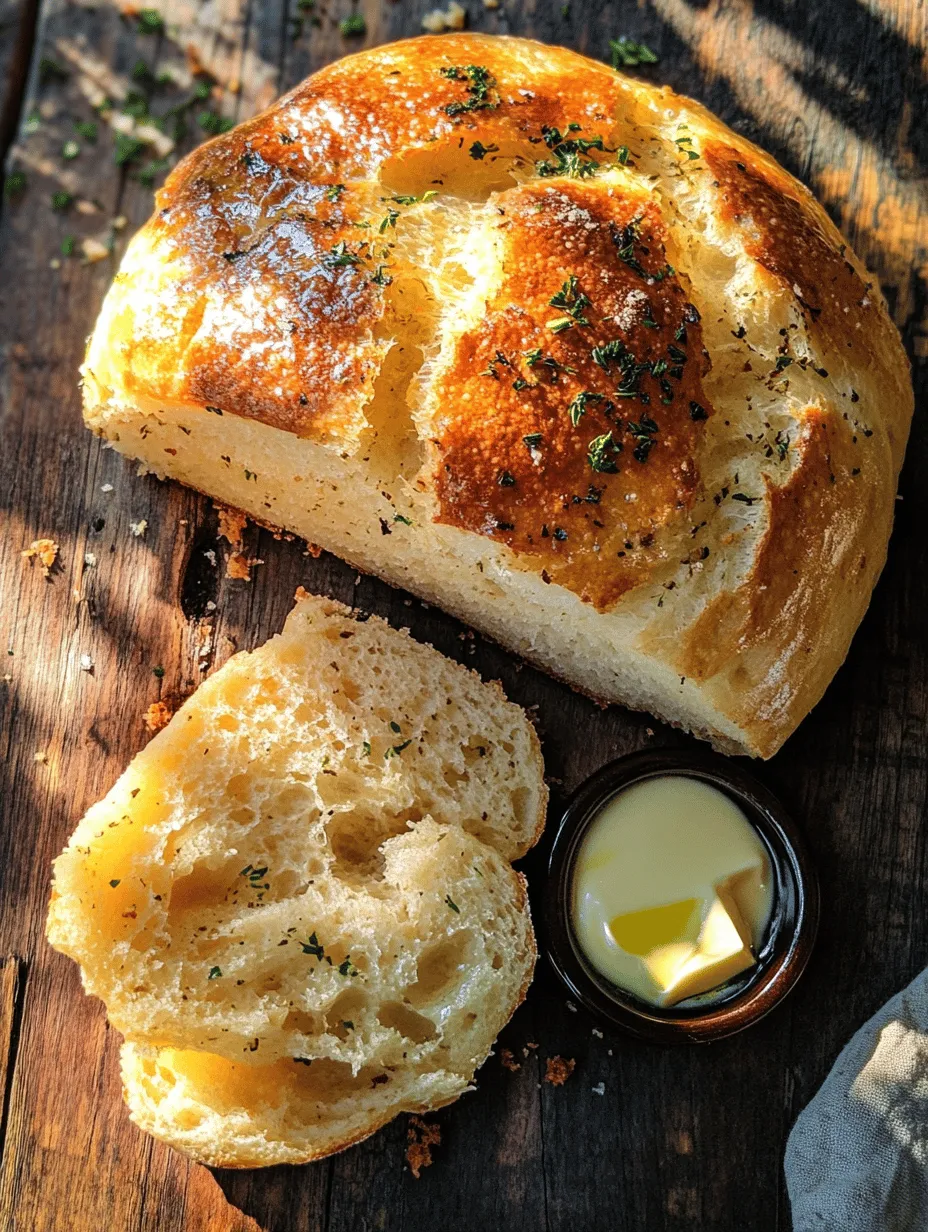
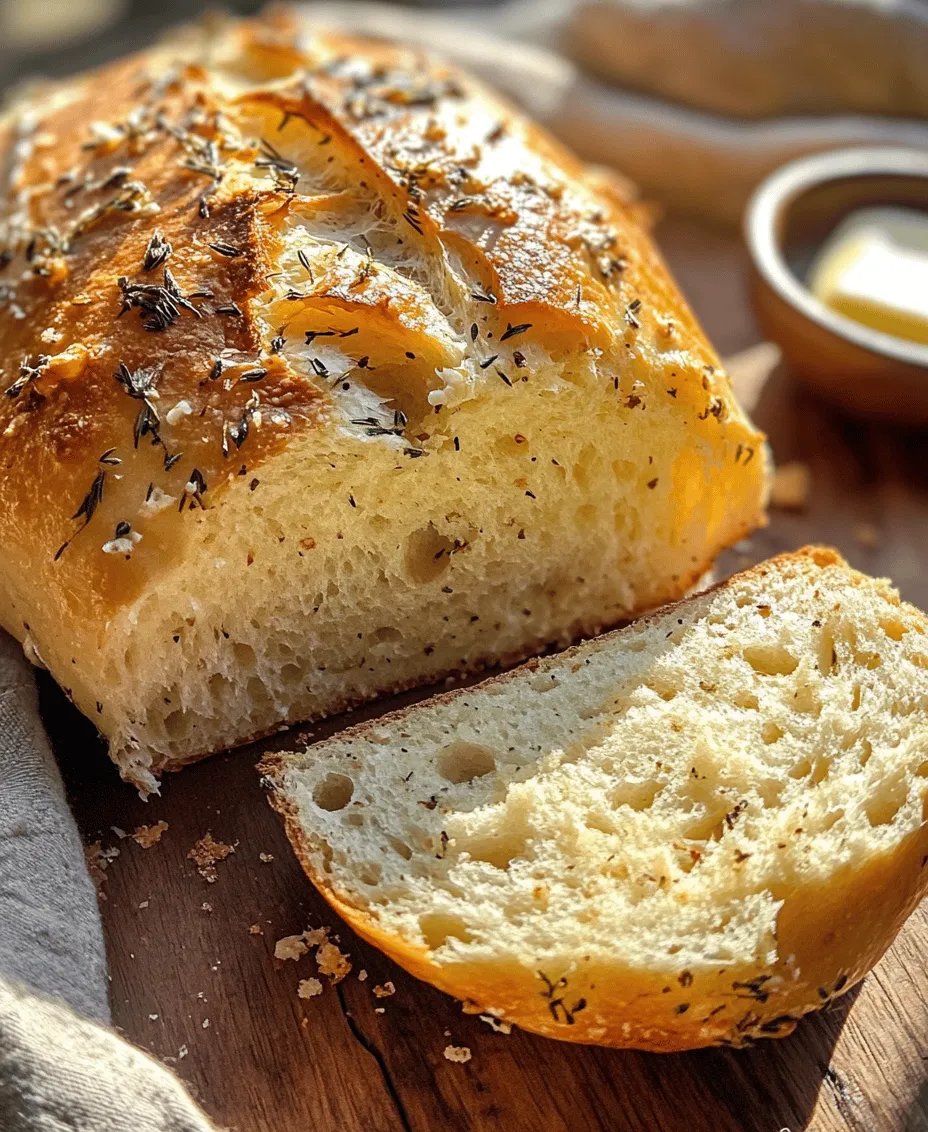
3. Surface Toppings: Before cooking, consider sprinkling the top with sesame seeds, poppy seeds, or coarse salt. This not only adds visual appeal but also enhances the flavor and texture of the crust.
Cooking Process
Using the Skillet: Choosing the Right Pan and Heat Settings
Selecting the right skillet is crucial for cooking your stovetop bread. A heavy-bottomed skillet or cast iron pan works best, as it distributes heat evenly and retains warmth.
1. Preheating the Pan: Preheat your skillet on low to medium-low heat for about 5 minutes. You want a steady, gentle heat that won’t scorch the bread. Test the heat by sprinkling a few drops of water on the surface; if they sizzle and evaporate quickly, the pan is ready.
2. Cooking the Bread: Carefully place the shaped dough into the skillet. Cover the pan with a lid to trap steam, which helps the bread rise and cook evenly. Cook for about 8-10 minutes on one side before flipping.
Importance of Covering the Pan: How Steam Affects the Bread’s Rise
Covering the pan is essential for two reasons:
1. Steam Creation: The steam released from the dough, trapped under the lid, creates a moist environment that allows the bread to expand and rise. This is especially important for stovetop cooking, as it mimics the effects of an oven.
2. Even Cooking: The lid helps to distribute heat evenly, reducing the likelihood of burning the bottom while the top remains undercooked. Always check the bread halfway through cooking to ensure the heat is appropriate.
Checking for Doneness: Visual Cues for Perfect Golden-Brown Bread
To determine if your stovetop bread is done, look for these indicators:
1. Color: The top should be a golden-brown color. If it appears too pale, it likely needs more time, while a dark brown may indicate it’s overcooked.
2. Sound: Tap the bottom of the bread lightly; it should sound hollow. This is a classic sign of doneness in bread.
3. Texture: Allow the bread to cool slightly before slicing. The texture should be soft and airy, while the crust remains pleasantly chewy.
Tips for Flavor Variations
One of the delights of making no-oven stovetop bread is its versatility. Here are some suggestions for customizing your bread:
1. Herbs and Spices: Incorporate dried herbs like oregano, basil, or dill into the dough for an aromatic twist. Spices such as cumin, paprika, or chili flakes can also add depth.
2. Different Flavor Profiles: For an Italian flair, consider adding sun-dried tomatoes and basil. For a Mediterranean twist, mix in olives and feta cheese. Alternatively, create a savory version with sautéed onions and cheddar cheese.
3. Liquid Choices: You can alter the dough’s flavor and texture by changing the liquid used. For a richer bread, use milk instead of water. Alternatively, substitute part of the water with vegetable or chicken broth for added flavor.
Serving Suggestions
Once your stovetop bread is cooked to perfection, it’s time to enjoy it. Here are some serving ideas:
1. Warm and Fresh: Serve the bread warm, straight from the skillet, with a drizzle of olive oil or a spread of butter. It also pairs beautifully with fresh herbs.
2. Pairing Ideas: Enjoy your stovetop bread alongside soups, salads, or dips. It’s perfect for sopping up hearty stews or creamy sauces.
3. Creative Uses: Transform your bread into delightful meals. Use it as a base for bruschetta topped with tomatoes and basil or as a sandwich bread filled with your favorite ingredients. It can also be cut into strips and served with hummus or tzatziki.
Storing and Reheating Stovetop Bread
To maintain the freshness of your stovetop bread, follow these best practices:
1. Storing Leftovers: Allow the bread to cool completely before storing. Wrap it in plastic wrap or place it in an airtight container to keep moisture in while preventing it from getting stale. It can be stored at room temperature for up to 2 days.
2. Freezing: For longer storage, slice the bread and freeze it in an airtight bag. It will hold up well for up to a month. You can toast slices straight from the freezer.
3. Reheating: To restore the bread’s texture and flavor, reheat it in a skillet over low heat for a few minutes. Alternatively, wrap it in foil and warm it in an oven preheated to 350°F (175°C) for about 10 minutes.
Conclusion
Making no-oven stovetop bread is not only easy but also immensely satisfying. This method allows you to produce freshly baked bread without the need for an oven, making it accessible for everyone. With the ability to customize flavors and enjoy it in various ways, this bread is a perfect addition to any meal.
Don’t hesitate to experiment with different herbs, spices, and serving styles. The joy of homemade bread lies in its versatility and the personal touch you can bring to it. So gather your ingredients, put on your apron, and enjoy the delightful process of creating your own stovetop bread today.
No-Oven Stovetop Bread
Ingredients