
Introduction
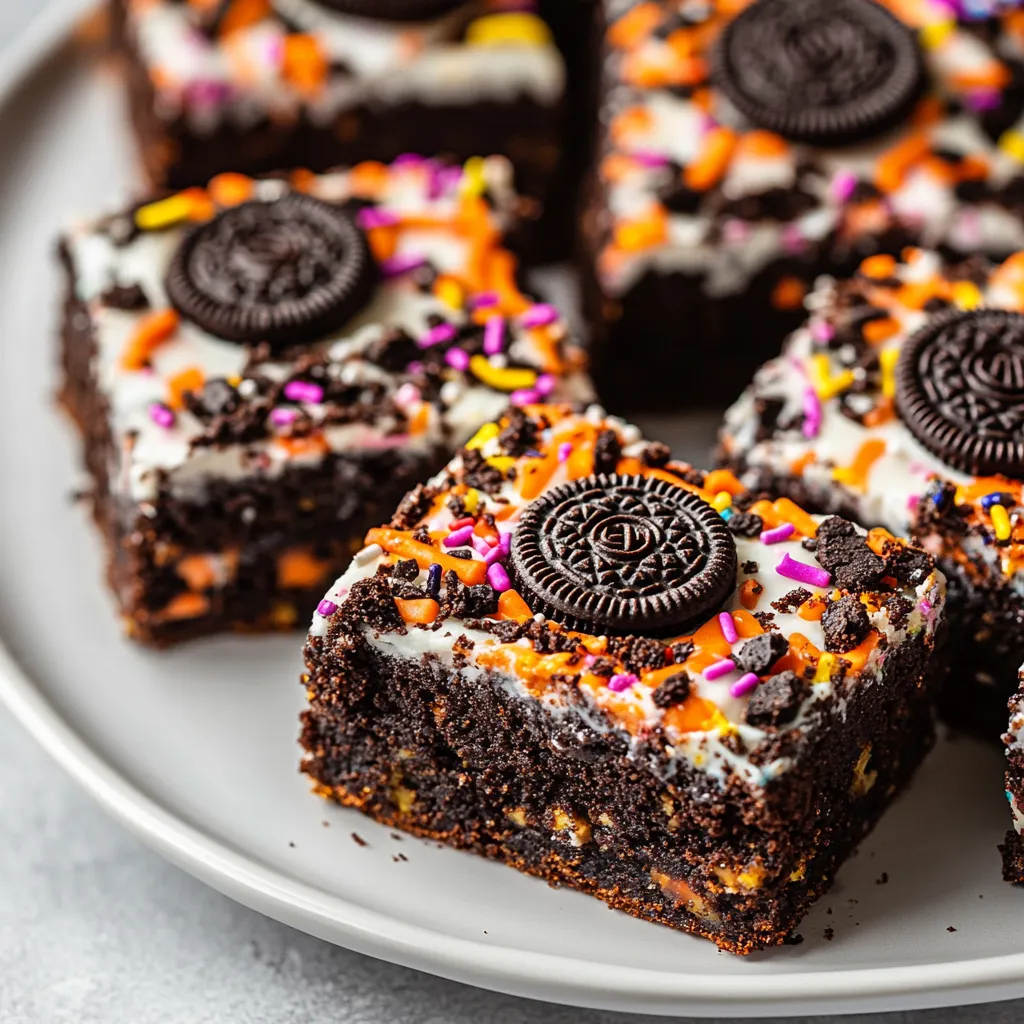
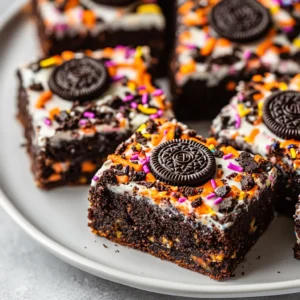
The arrival of Halloween brings not only spooky decorations and costumes but also the perfect opportunity to indulge in themed treats. One such delight is the Spooktacular Halloween Oreo Brownies, a rich and fudgy dessert that combines the beloved flavors of chocolate and cookies while allowing the festive spirit to shine through with colorful sprinkles. This recipe encapsulates the fun of Halloween while satisfying your sweet tooth in the best way possible.
These brownies are perfect for Halloween gatherings, whether it’s a party or a cozy night in with friends and family. Their rich chocolate flavor is elevated by the crunchy bits of Halloween-themed Oreo cookies and cheerful, vibrant sprinkles that make them visually appealing. Not only do they taste great, but they also add a festive touch to any Halloween spread. Prepare to impress your guests and children alike with these delightful brownies that are as fun to make as they are to eat.
Recipe Overview
– Total Time: Approximately 40-45 minutes (including baking and cooling time)
– Yield/Servings: Not specified in the recipe
– Difficulty: Not specified in the recipe
Ingredients
Required Ingredients
– 1 cup (2 sticks) unsalted butter, softened
– 2 cups granulated sugar
– 4 large eggs, at room temperature
– 1 teaspoon pure vanilla extract
Dry Ingredients
– 1 cup all-purpose flour
– 1 cup unsweetened cocoa powder
– 1 teaspoon baking powder
– 1/2 teaspoon salt
Fun Add-ins
– 1 cup crushed Halloween-themed Oreo cookies (plus extra for garnish)
– 1/2 cup mini chocolate chips
– 1/2 cup vibrant Halloween sprinkles

Instructions
1. Preheat your oven to 350°F (175°C). Prepare a 9×13 inch baking pan by greasing it lightly or lining it with parchment paper for easy removal later.
2. In a medium saucepan, melt the unsalted butter over low heat. Once fully melted, take it off the heat and mix in the granulated sugar until the mixture is smooth and well combined.
3. Add the eggs one at a time to the butter-sugar mixture, stirring thoroughly after each addition. Then, incorporate the pure vanilla extract, mixing until fully blended.
4. In a separate bowl, whisk together the all-purpose flour, unsweetened cocoa powder, baking powder, and salt until well combined.
5. Gradually fold the dry ingredients into the wet mixture, stirring gently until just combined. Avoid overmixing to keep the brownies fudgy.
6. Carefully fold in the crushed Halloween Oreo cookies and mini chocolate chips, ensuring they are evenly distributed throughout the brownie batter.
7. Pour the brownie batter into the prepared baking pan, spreading it out evenly. Sprinkle extra crushed Oreos and a generous handful of colorful Halloween sprinkles on top for a festive touch.
8. Bake in the preheated oven for 25-30 minutes. To check for doneness, insert a toothpick into the center; it should come out with a few moist crumbs, indicating the brownies are ready.
9. Allow the brownies to cool in the pan for about 10-15 minutes. Once slightly cooled, lift them out using the edges of the parchment paper and transfer them to a wire rack to cool completely.
10. Once cooled, cut into squares and serve.
Preparing the Baking Pan
Choosing the right pan is essential for even cooking when making brownies. A 9×13 inch baking pan is the standard size for brownie recipes, providing ample space for the batter to spread evenly while ensuring that the brownies bake thoroughly. This size allows the brownies to achieve the perfect fudgy texture that is sought after in a good brownie recipe.
When preparing the baking pan, you have two primary options: greasing it lightly or opting for parchment paper. Greasing involves applying a thin layer of butter or cooking spray to the surface of the pan, while parchment paper offers a more foolproof method for easy removal. By lining the pan, you not only ensure that the brownies come out intact but also maintain their beautiful presentation without the risk of sticking. Either method will work, but parchment paper is recommended for a hassle-free experience.
Melting the Butter
The first step in creating the indulgent base for your brownies is to melt the unsalted butter. Using softened butter is crucial for achieving a smooth batter, as it blends more easily with the sugar and ensures an even setup for your brownie mixture. The melting process should be done slowly over low heat to prevent burning and create a creamy, luscious base for your brownies.
To melt the butter properly, place it in a medium saucepan and keep the heat low, stirring occasionally. It’s essential to monitor the butter closely during this process. Once fully melted, remove the saucepan from the heat and proceed to mix in the granulated sugar, stirring until the mixture is smooth and consistently blended.
Combining Sugar and Butter
Achieving the perfect texture in your brownies largely depends on how well you combine the melted butter and granulated sugar. Mixing these two ingredients together creates an emulsion, which is vital for binding the brownies and maintaining their moistness. The warmth from the melted butter helps dissolve the sugar, resulting in a smooth and creamy base that significantly enhances the final product.
Utilizing a whisk or spatula to mix the sugar with melted butter will help in achieving this smooth consistency. Begin by adding the sugar to the melted butter and stirring until the mixture appears uniform and glossy. This careful blending step sets the stage for the addition of eggs, leading to fudgy brownies that are both rich and delicious.
Incorporating Eggs and Vanilla
Once your butter and sugar mixture has reached a smooth consistency, it’s time to add the large eggs. Incorporating the eggs one at a time is key to ensuring proper blending, as each egg adds moisture and helps create the desired structure in your brownies. Stirring thoroughly after each addition incorporates air into the mixture, contributing to the end result’s lightness.
In addition to the eggs, the pure vanilla extract should be added at this stage. Vanilla enhances the overall flavor profile of the brownies, complementing the rich chocolate notes. Mixing these ingredients until fully blended will create a cohesive batter that serves as the foundation for your delightful Halloween Oreo Brownies.
This careful incorporation of eggs and flavorings not only contributes to the taste but also plays a crucial role in the texture of the final brownies, ensuring they remain soft, chewy, and utterly scrumptious.
Adding Eggs One at a Time
Incorporating eggs one at a time into the brownie batter is a crucial technique in baking. This method allows for better emulsification of the ingredients, which is vital for achieving that perfect brownie texture. Each egg contributes to the overall moisture and structure of the brownies, enhancing their richness. By adding the eggs individually and mixing thorough after each addition, you prevent overmixing, which could lead to tougher brownies. This careful approach ensures that the final product has a soft and fudgy interior, which is characteristic of a well-baked brownie.
The Role of Vanilla Extract
Pure vanilla extract plays a significant role in enhancing the flavor of your brownies. Its subtle sweetness works harmoniously with the chocolate and the unique flavor profile of the Oreo cookies. The depth and complexity that vanilla brings can elevate the overall taste, making the brownies not only sweet but also rich and aromatic. When baking, it is essential to use high-quality vanilla extract, as it impacts the final flavor of the brownies significantly. A well-balanced blend of rich chocolate and vanilla will provide an indulgent experience with each bite.
Whisking Dry Ingredients
Combining the Dry Mixture
Mixing the all-purpose flour, cocoa powder, baking powder, and salt in a separate bowl is essential to ensure all the leavening agents are distributed evenly throughout the brownie batter. This step is crucial because it minimizes the risk of clumps, which can lead to uneven texture and flavor in the finished product. By taking the time to properly combine these dry ingredients, you create a homogenous mixture that will contribute to even baking and a consistent taste in every bite.
Importance of Whisking
Whisking the dry ingredients thoroughly is vital in baking as it helps to aerate the mixture, making it easier to incorporate into the wet ingredients. If any lumps remain, particularly of cocoa powder or flour, they can result in pockets of dense mixture when baked. A well-whisked dry mixture leads to a smoother batter and, ultimately, a more appealing brownie with a uniform crumb structure.
Folding Dry Ingredients into Wet Mixture
Techniques for Folding
When it comes to incorporating the dry ingredients into the wet mixture, it’s important to use the folding technique gently. This method involves using a spatula to lift the batter from the bottom of the bowl and gently folding it over itself. This technique helps maintain the airiness of the mixture, which is key to achieving a fudgy brownie texture. Overworking the batter can lead to the development of gluten, resulting in a tougher brownie instead of the desired soft and chewy treat.
Avoiding Overmixing
One of the most common pitfalls in brownie baking is overmixing the batter after adding the flour mixture. While it may be tempting to mix until completely smooth, aim to stop when the batter is just combined and a few lumps remain. This approach ensures that the brownies retain their fudgy sweetness, rather than becoming dry or chewy, providing that melt-in-your-mouth quality that is desirable in a well-cooked brownie.
Adding Cookies and Chocolate Chips
Distribution of Add-ins
Carefully folding in the crushed Halloween Oreo cookies and mini chocolate chips ensures that these delightful inclusions are evenly distributed throughout the brownie batter. This distribution is key not only for flavor but also for texture, as each brownie will get bites of cookies and chocolate, enhancing the overall experience. The end result is a brownies packed with crunchy Oreo bits and melty chocolate in every piece.
Choosing Your Ingredients
Working with Halloween-themed Oreos offers a festive twist that brings a seasonal charm to your brownies. Their unique flavors and colorful crème contribute to aesthetic appeal and provide a playful element. The inclusion of mini chocolate chips deepens the chocolate flavor, ensuring that every bite is not just a treat for the eyes but also for the palate.
Baking the Brownies
Preheating the Oven
Preheating the oven to 350°F (175°C) is an essential step in the baking process. Consistently setting this temperature ensures that the brownies will bake evenly and that the heat can circulate adequately around the pan. Good baking practices begin with a well-preheated oven to prevent varying baking times, which can compromise texture and flavor.
Baking Time and Testing Doneness
The suggested baking time of 25 to 30 minutes is generally optimal for brownies in a 9×13 inch pan. To check for doneness, inserting a toothpick into the center should yield a few moist crumbs. This testing method is vital as it indicates that the brownie is cooked through yet still retains a fudgy center, which is the hallmark of an ideal brownie. Removing the brownies from the oven too soon could leave them undercooked, while leaving them too long can lead to a drier texture.
Cooling and Serving
Importance of Cooling
Allowing the brownies to cool in the pan is very beneficial, as it gives them time to set properly. The cooling period not only firms up the brownies, making them easier to cut but also enhances the flavors. As brownies cool, the flavors meld and deepen, resulting in a more satisfying taste experience. Ideally, cool them for about 10-15 minutes before lifting them out, as this ensures they maintain their shape.
Cutting the Brownies
Utilizing parchment paper to lift the brownies out of the pan helps achieve clean, even cuts. When you cut cooled brownies into squares, a sharp knife is recommended to avoid tearing and crumbling. A professional presentation can elevate a simple homemade dessert into a festive centerpiece, drawing attention to the delightful fudge texture and colorful toppings.
Creative Presentation Ideas
Festive Plating
Arranging brownies on a festive platter can enhance their visual appeal. Utilize Halloween-themed decorations such as eerie cobwebs or small decorative pumpkins around the platter to create a seasonal atmosphere. Ensuring that each piece is evenly cut adds to the professional-looking presentation that will impress your guests.
Garnishing the Brownies
For even more visual flair, consider garnishing the brownies with additional crushed Oreos or a drizzle of melted chocolate. Creative use of vibrant Halloween sprinkles not only adds texture but also incorporates a fun, colorful element that captures the spirit of the season. This attention to detail in presentation transforms simple brownies into a festive treat that enhances any Halloween celebration.
Conclusion
The Spooktacular Halloween Oreo Brownies offer a delightful combination of rich chocolate flavor and playful textures from the Oreos and chocolate chips. With careful attention to mixing, baking, and presentation, these brownies can be a standout dessert for any festive gathering. The thoughtful preparation and cooling process culminate in a treat that is both visually appealing and delicious, making them a memorable addition to your Halloween celebrations.
Spooktacular Halloween Oreo Brownies Recipe
Ingredients
- 1 cup unsalted butter softened
- 2 cups granulated sugar
- 4 large eggs at room temperature
- 1 teaspoon pure vanilla extract
- 1 cup all-purpose flour
- 1 cup unsweetened cocoa powder
- 1 teaspoon baking powder
- ½ teaspoon salt
- 1 cup crushed Halloween-themed Oreo cookies
- ½ cup mini chocolate chips
- ½ cup vibrant Halloween sprinkles
Instructions
-
Preheat your oven to 350°F (175°C) and prepare a 9×13 inch baking pan.
-
Melt the unsalted butter in a medium saucepan over low heat, then mix in the granulated sugar until smooth.
-
Add the eggs one at a time, stirring well after each addition, then mix in the vanilla extract.
-
In a separate bowl, whisk together the flour, cocoa powder, baking powder, and salt.
-
Gradually fold the dry ingredients into the wet mixture until just combined.
-
Fold in the crushed Oreos and mini chocolate chips evenly.
-
Pour the batter into the prepared pan and sprinkle with extra Oreos and sprinkles.
-
Bake for 25-30 minutes, checking for doneness with a toothpick.
-
Cool in the pan for 10-15 minutes, then transfer to a wire rack to cool completely.
-
Cut into squares and serve.