
Introduction
The irresistible aroma of freshly baked cinnamon rolls can brighten any day and create instant comfort. Warm glazed cinnamon rolls are one of those delightful treats that evoke memories of early morning breakfasts or cozy family brunches. With their soft, fluffy dough and rich, sugary, cinnamon-flavored filling, these rolls are not just a dessert; they are a heartfelt experience that brings people together.
Imagine pulling a batch of these warm beauties from the oven, the sweet scent wafting through your home. The anticipation builds as you drizzle a creamy glaze over each roll, transforming these simple ingredients into a heavenly treat. Whether you are celebrating a special occasion or just indulging on a weekend morning, these cinnamon rolls are sure to be the star of the show.
Recipe Overview
– Prep Time: 20 minutes
– Cook Time: 30 minutes
– Total Time: 1 hour 50 minutes
– Course: Dessert
– Cuisine: American
– Servings: 12
– Calories: Approximately 250 per roll
These warm glazed cinnamon rolls are a classic American dessert that features fluffy dough, a rich cinnamon-sugar filling, and a creamy glaze. With a total time of just 1 hour and 50 minutes, you can prepare a batch that serves 12 people, making it perfect for family gatherings or a cozy brunch.
Ingredients
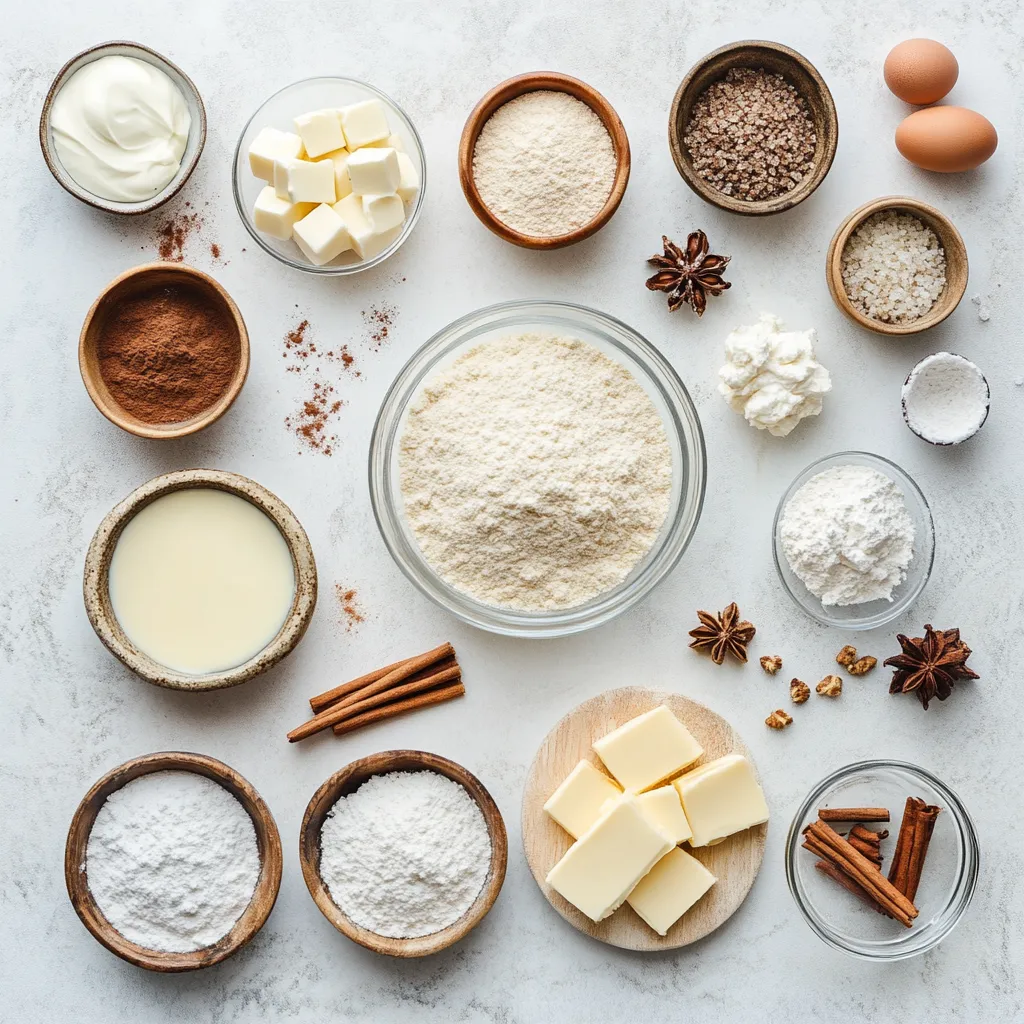
– 2 cups all-purpose flour
– 1/4 cup granulated sugar
– 1 packet (2 1/4 tsp) active dry yeast
– 1/2 cup warm milk (around 110°F)
– 1/4 cup unsalted butter, melted
– 1/4 tsp salt
– 1 large egg
– 1 tbsp ground cinnamon
– 1/4 cup packed brown sugar
– 1 cup powdered sugar
– 2 tbsp cream cheese, softened
– 1-2 tbsp milk (for the glaze)
Instructions
1. In a large mixing bowl, combine the warm milk, active dry yeast, and granulated sugar. Allow the mixture to sit undisturbed for about 5 minutes, or until it becomes frothy, indicating the yeast is active.
2. Once frothy, incorporate the melted butter, salt, and the large egg into the yeast mixture. Stir until well combined.
3. Gradually add the all-purpose flour to the mixture, stirring continuously until a soft dough begins to form. Transfer the dough to a floured surface and knead for approximately 5 minutes, or until the dough is smooth and elastic.
4. Place the kneaded dough in a greased bowl, cover it with a clean kitchen towel, and let it rise in a warm, draft-free area for about 1 hour, or until it has doubled in size.
5. Preheat your oven to 350°F (175°C). Once the dough has risen, roll it out on a floured surface into a rectangular shape about 1/4 inch thick.
6. Evenly spread the softened butter over the surface of the dough. Sprinkle the brown sugar and ground cinnamon over the buttered dough, ensuring an even distribution.
7. Starting from one long edge, tightly roll the dough into a log shape. Slice the log into 12 equal pieces and arrange them in a greased baking dish, cut side up.
8. Bake in the preheated oven for 25-30 minutes, or until the rolls are golden brown and puffed. Allow them to cool slightly in the pan.
9. While the rolls are cooling, prepare the glaze by mixing the powdered sugar, softened cream cheese, and milk in a bowl. Whisk until the mixture is smooth and creamy.
10. Drizzle the glaze generously over the warm cinnamon rolls just before serving, allowing it to melt slightly into the rolls.
The Role of Yeast in Baking
Understanding Active Dry Yeast
Yeast is a crucial ingredient in baking, especially for recipes that involve leavened dough like cinnamon rolls. Active dry yeast, a common choice among home bakers, is essential for creating that light and airy texture we love in baked goods. It consists of live yeast cells that become dormant while in the package. Once activated in a warm environment, these cells spring to life and begin consuming sugars, releasing carbon dioxide in the process. This gas creates tiny bubbles in the dough, causing it to rise and become fluffy.
How to Activate Yeast
Activating yeast correctly is foundational for the success of your cinnamon rolls. Start by combining warm milk, a source of sugar (in this case, granulated sugar), and the yeast itself. The strategic warm temperature of about 110°F is crucial, as too hot or too cold milk can hinder yeast activation. Allow this mixture to sit for about 5 minutes, during which you should see bubbles forming and the mixture becoming frothy. This frothiness is a telltale sign that the yeast is alive and ready to work its magic in your dough.
Preparing the Dough
Mixing the Ingredients
The initial mixing of the ingredients sets the stage for your dough. Begin with the frothy yeast mixture and combine it with melted unsalted butter, salt, and a large egg. The butter adds richness while the egg contributes to both structure and flavor. Stir until well-mixed, ensuring that all ingredients are integrated before proceeding to the next step.
Kneading the Dough
Kneading is a crucial step that develops the gluten in the dough, which gives the rolls their chewy texture. Transfer the mixture to a floured surface and begin kneading by folding the dough over itself and pressing down. The goal is to achieve a smooth and elastic texture, which typically takes about 5 minutes of dedicated kneading. If the dough sticks to your hands, you may need to add a bit more flour, but be careful not to incorporate too much, as this can lead to tougher rolls.
The Rising Process
Importance of Letting Dough Rise
Letting the dough rise is where the real magic happens. This phase, called proofing, allows the yeast to ferment and produce gases, which expand the dough. This not only contributes to the volume and texture of the rolls but also enhances the flavor through the fermentation process. A well-risen dough promises light and airy rolls that melt in your mouth.
Ideal Conditions for Rising
The environment in which your dough rises significantly impacts its success. It is best to find a warm, draft-free area to place your covered bowl. A cozy kitchen or warmed oven (turned off) often works well. Allow the dough to rise for about 1 hour, watching as it doubles in size. This is a great time to prep your baking dish and gather the filling ingredients, building anticipation for the delightful rolls to come.
Shaping the Cinnamon Rolls
Rolling the Dough
When it comes to forming the perfect cinnamon roll, the way you roll the dough is crucial. Once you’ve rolled your dough out to a rectangular shape about 1/4 inch thick, it’s critical to start rolling from one long edge tightly. This ensures that the filling, consisting of brown sugar and ground cinnamon, stays intact while creating layers in each roll. Use your fingertips to hold the edge of the dough in place while rolling it tightly, maintaining consistent pressure as you go.
Another important aspect of this process is cutting even slices after you have formed your log. Using a sharp knife or dental floss (which can be an excellent tool for clean cuts) helps ensure that each piece is uniform in size. This not only aids in even baking but also promotes an appealing presentation once baked. Aim for about 1 inch in thickness for each slice, which will provide a perfect balance of dough and filling in each roll.
Arranging in the Baking Dish
Once your rolls are sliced, it’s time to arrange them in a greased baking dish. Optimal spacing matters here; the rolls should be placed close together but not touching. As they bake, they will rise and expand, filling any gaps. This results in soft, pillowy rolls that are easy to pull apart. For added impact, consider placing the rolls cut side up so that their swirls are visible, showcasing the beautiful cinnamon and sugar contrast.
Prior to baking, think about presentation—those first impressions matter! Before placing the dish in the oven, sprinkle a pinch of sugar on top of the rolls for a lightly caramelized finish, or even incorporate some chopped nuts for texture and flavor contrast.
Baking the Cinnamon Rolls
Preheating the Oven
Preheating your oven to 350°F (175°C) is an essential step in achieving perfectly baked cinnamon rolls. The ideal baking temperature allows the dough to bake evenly, preventing the edges from becoming too dry while ensuring the center remains fluffy and tender. Preheating matters because it allows your rolls to start cooking immediately when placed inside, promoting proper rising and browning.
Baking Time
Baking the cinnamon rolls for 25-30 minutes will yield the best results. To ensure they are done, look for visual cues: the rolls should be golden brown on top and puffed up. The edges will start to pull away from the sides of the baking dish, which indicates perfect doneness. If you’re unsure, you can also use a toothpick inserted into the center of one of the rolls; it should come out clean if they are fully baked. Allow the rolls to cool slightly in the pan before glazing to prevent the glaze from melting instantly away.
Making the Glaze
Ingredients for the Glaze
The key components for the cream cheese glaze are powdered sugar, softened cream cheese, and milk. This combination creates a smooth and creamy glaze that enhances the warm rolls, providing that lush finish. The powdered sugar provides sweetness without overwhelming other flavors, while the cream cheese introduces a delicious tang. Adjusting the consistency with milk is crucial; add just enough to make the glaze drizzle smoothly but not so much that it becomes overly runny.
Mixing Techniques
Achieving a smooth glaze involves correctly incorporating the cream cheese with the powdered sugar. Begin by whisking the softened cream cheese until it’s creamy and free of lumps before gradually adding in the powdered sugar. This method helps prevent clumps in your glaze. Once combined, introduce milk one tablespoon at a time until you reach the desired consistency. The result should be a luscious glaze that’s thick enough to hold its shape but pourable enough to drape over the cinnamon rolls beautifully.
Serving Suggestions
Best Way to Serve
These delicious rolls shine eloquently when served warm out of the oven. For presentation, arrange them on a decorative platter and generously drizzle the cream cheese glaze over the top. If you desire, sprinkle a little ground cinnamon on top or around the platter for an aesthetically pleasing touch. Pairing the warm cinnamon rolls with a cup of coffee, hot chocolate, or a warm glass of milk will elevate the experience and indulgence.
Optional Additions
For those seeking to enhance their serving, consider adding fresh berries such as raspberries or strawberries on the side. They not only bring vibrant color to the platter but also introduce a refreshing balance to the sweet rolls. Additionally, a dollop of whipped cream adds richness and a light texture that complements the cinnamon rolls perfectly. Customizing your dish with unique garnishes can make your presentation stand out, making it not just a tasty treat but an eye-catching centerpiece for any table.
Storing Leftovers
Best Practices for Storage
To keep your cinnamon rolls fresh after baking, it’s important to allow them to cool completely before storage. This prevents condensation from forming, which can lead to sogginess. Once cool, place the rolls in an airtight container or wrap them tightly in plastic wrap. They can be stored at room temperature for a day or two, or in the refrigerator for a longer shelf life.
Reheating Tips
When you’re ready to enjoy the leftover rolls, reheating them properly is vital to maintaining their softness. The best methods include using a microwave for about 15-20 seconds or placing them in the oven at 350°F (175°C) for about 10-15 minutes. To prevent drying out, cover them loosely with aluminum foil as they heat. This will help retain the moisture and ensure that each roll remains as delightful as the first bite.
Nutritional Information
Serving Size and Calories
Each cinnamon roll has approximately 250 calories, making it a rich treat to indulge in. Understanding the breakdown of calories helps one appreciate the ingredients and the effort that goes into creating these rolls. While they are undoubtedly a dessert, keeping an eye on portion sizes can help maintain a balanced approach to enjoying such treats.
Portion Control Tips
Enjoying these delightful cinnamon rolls doesn’t mean you have to overindulge. Opting for a single roll alongside a cup of your favorite beverage can be an excellent way to satiate your sweet tooth while keeping servings manageable. Consider cutting the rolls in half and sharing, or pairing one roll with some fruit for a satisfying snack without going overboard. This careful approach allows you to savor the flavor without the guilt.
Warm glazed cinnamon rolls offer a delightful balance of sweetness and comfort. With a preparation and baking time that’s nearly two hours, each roll boasts a soft, fluffy texture complemented by the luscious glaze. Perfectly suited for dessert or a special breakfast, these cinnamon rolls are sure to please any crowd.
Warm Glazed Cinnamon Rolls Recipe for Cozy Gatherings
Ingredients
- 2 cups all-purpose flour
- ¼ cup granulated sugar
- 1 packet active dry yeast
- ½ cup warm milk
- ¼ cup unsalted butter
- ¼ tsp salt
- 1 large egg
- 1 tbsp ground cinnamon
- ¼ cup packed brown sugar
- 1 cup powdered sugar
- 2 tbsp cream cheese
- 1-2 tbsp milk
Instructions
- Combine warm milk, active dry yeast, and granulated sugar in a bowl and let sit for 5 minutes until frothy.
- Add melted butter, salt, and egg to the yeast mixture and stir until combined.
- Gradually add flour, stirring until a soft dough forms, then knead on a floured surface for 5 minutes.
- Place dough in a greased bowl, cover, and let rise in a warm area for 1 hour until doubled.
- Preheat oven to 350°F (175°C). Roll out dough into a rectangle about ¼ inch thick.
- Spread softened butter over dough, then sprinkle with brown sugar and cinnamon.
- Roll dough tightly from one edge and slice into 12 pieces, placing them cut side up in a greased dish.
- Bake for 25-30 minutes until golden brown, then cool slightly in the pan.
- Mix powdered sugar, cream cheese, and milk to make the glaze until smooth.
- Drizzle glaze over warm rolls before serving.